Haier AB092FCBHA User Manual - Page 22
V. Installing decorative sheets
 |
View all Haier AB092FCBHA manuals
Add to My Manuals
Save this manual to your list of manuals |
Page 22 highlights
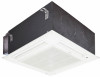
Installation of indoor unit V. Installing decorative sheets 1. Verify with water level or water filled Polyethylene pipe that the indoor unit is horizontally installed and specifications of the holes on the ceilings are correct. Remove the water level before installing the decorative sheets. 2. Tighten the screws of the indoor unit ensuring that the height difference between the two sides of the indoor unit is less than 5mm. 3. Apply two screws for preliminary fixing. 4. Apply the other and then tighten the four screws. 5. Connect the cable of the synchronous motor. 6. Connect the signal cables. 7. Verify that cable is correctly connected if the unit does not respond to remote controller signals. Allow a 10-second lapse after disconnection of the power supply, and then restart the remote controller. Water drainpipe Pipe Faucet Displaying signals Restrictions for top panel installation 1. Top panel is installed as shown in the figure. 2. Incorrect installation of the top panel may result in air leaks and fluctuation, as well as failure of signal transmission and display. Synchronous motor Liquid intake pipe Water drainpipe Backflow pipe 21
-
 1
1 -
2
-
3
-
4
-
5
-
6
-
7
-
8
-
9
-
10
-
11
-
12
-
13
-
14
-
15
-
16
-
 17
17 -
 18
18 -
 19
19 -
 20
20 -
 21
21 -
 22
22 -
 23
23 -
 24
24 -
 25
25 -
 26
26 -
 27
27 -
28
 |
 |
