Hamilton Beach 40132H Use & Care - Page 7
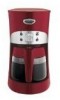
How to Make Coffee
 |
UPC - 040094401321
View all Hamilton Beach 40132H manuals
Add to My Manuals
Save this manual to your list of manuals |
Page 7 highlights
840141700 ENv00.qxd 10/25/05 9:55 AM Page 7 How to Make Coffee 1. To ensure best possible taste, wash the carafe then clean the inside of unit. See "Cleaning Instructions." 2. Plug in Coffeemaker. The numbers on Clock will flash until time is set. 3. Press H to set current hour with AM or PM. Press M to set current minutes. The clock is now set. 4. Fill carafe with the desired amount of cold tap water. Flip open top cover and pour water into reservoir. 5. Return the carafe with carafe lid attached to the Keep-Hot Plate. Make sure that the carafe is firmly in place. 6. Place a disposable No. 4 coneshaped paper filter in filter basket. A permanent filter may also be used. 7. For each cup of coffee being made, place one level scoop or tablespoon of medium-ground automatic drip coffee into filter. Lower top cover to close. 8. Press ON/OFF button once to brew coffee now and the light will glow red. To brew later, see "To Program Automatic Brew." NOTE: To serve coffee during the brewing cycle, remove carafe and pour a cup. By removing the carafe, the flow of coffee from the bottom of the filter basket will stop. CAUTION Burn Hazard Return Carafe to Keep-Hot Plate and ensure Auto Pause 'n Serve is engaged within 20 seconds. Hot water continues to flow into the Filter Basket when the Auto Pause 'n Serve feature is used. Overflowing coffee and hot water are a burn hazard. To Program Automatic Brew NOTES: • The Automatic Brew feature must be programmed each time it is used. • Make sure you have placed the desired amount of water and coffee in the unit before using the Automatic Brew feature. 1. Plug in Coffeemaker. The numbers on the Clock will flash until the time is set. 2. Press the H button until the current hour is displayed. AM or PM will appear on display. Press the M button until the current minute is displayed. The Clock is now set. 3. To program Coffeemaker to automatically begin brewing, press and hold the Prog/Auto button for two seconds to enter the setting mode. While still pressing Prog/Auto, press the H button to set hours and then press the M button to set minutes until the desired brew time is displayed. 4. To have Coffeemaker automatically begin brewing at the preset time, press Prog/Auto button momentarily. The Prog/Auto button will glow green to indicate Automatic Brew is set and coffeemaker is ready to begin brewing at the specified time. "Auto" will appear in the display. 5. The Coffeemaker will shut off two hours after brewing begins. 9. The unit will shut off automatically after two hours. When finished, unplug from outlet. 7
-
 1
1 -
 2
2 -
 3
3 -
 4
4 -
 5
5 -
 6
6 -
 7
7 -
 8
8 -
 9
9 -
 10
10 -
 11
11 -
 12
12 -
13
-
14
-
15
-
16
-
17
-
18
-
19
-
20
-
21
-
22
-
23
-
24
-
25
-
26
-
27
-
28
-
29
-
30
-
31
-
32
-
33
-
34
-
35
-
36
-
37
-
38
-
39
-
40
-
41
-
42
-
43
-
44
-
45
-
46
 |
 |
