Hannspree HT09 User Manual
Hannspree HT09 Manual
 |
View all Hannspree HT09 manuals
Add to My Manuals
Save this manual to your list of manuals |
Hannspree HT09 manual content summary:
- Hannspree HT09 | User Manual - Page 1
Safety Instructions 6 Preface 9 Warranty and Service 9 1. Getting Started 11 1.1 Package Contents 11 1.2 Introducing the TV 12 1.2.1 Features 12 1.3 Control Panel 13 1.4 Input and Output Jacks 14 1.5 Remote Control 15 1.6 Inserting the Remote Control Batteries 18 2. Setting up your TV 20 - Hannspree HT09 | User Manual - Page 2
Troubleshooting 34 5. Specifications 35 6. Appendix: Remote Control Guide 37 6.1 Operation Modes 37 6.1.1 Switching Electronic Equipment Types 37 6.1.2 Setting Program Codes 37 6.1.3 Searching Codes Protection Capability 42 6.3 Component Program Codes 43 7. Setting the TV on the Wall 51 8. - Hannspree HT09 | User Manual - Page 3
installation. This equipment generates, uses and can radiate radio frequency energy and, if not installed and used in accordance with the instructions, may cause harmful interference to radio communications. However, there is no guarantee that interference will not occur in a particular installation - Hannspree HT09 | User Manual - Page 4
CAUTION This symbol is used to alert users to pay attention to important descriptions regarding usage, maintenance (repair), and additional important information related to this TV. This symbol is used to alert users to the risk of electric shocks due to dangerous and uninsulated components. 4 - Hannspree HT09 | User Manual - Page 5
personnel only. To reduce the risk of electric shock, do not perform any servicing other than that contained in the operating instructions unless you are qualified to do so. Notes: • The LCD TV is for entertainment use only and visual display tasks are excluded. • This device uses a VGA connector - Hannspree HT09 | User Manual - Page 6
not block any ventilation openings. Install in accordance with manufacturer's instructions. 8. Do not install near any heat sources such as radiators for replacement of the obsolete outlet. NOTE: Applies to US only. 10. Protect the power cord from being walked on or pinched, particularly at - Hannspree HT09 | User Manual - Page 7
unused for long periods of time. 14. Refer all servicing to qualified service personnel. Servicing is required when the apparatus has been damaged in or electric shock, do not expose this apparatus to rain or moisture. 16. The apparatus shall be connected to a MAINS socket outlet with a protective - Hannspree HT09 | User Manual - Page 8
down, or is otherwise damaged, unplug the power cord immediately and contact an authorized service technician. 5. If any fluid is sprayed or dropped into the TV, contact an authorized service technician. 6. The screen of the TV is made of glass. Avoid hitting or scraping it. If the screen is broken - Hannspree HT09 | User Manual - Page 9
defect or omission in this manual, even if advised of the possibility of such damages in advance. Warranty and Service For complete warranty service information, please refer to the "Warranty card" enclosed with your TV. As an ENERGY STAR® Partner, Hannspree has determined that this product meets - Hannspree HT09 | User Manual - Page 10
be reproduced in any form by any means without the prior written authorization of Hannspree. The TV described in this manual may include copyrighted software of Hannspree (or other third parties). Hannspree (or other third parties) preserves the exclusive rights for copyrighted software, such as the - Hannspree HT09 | User Manual - Page 11
sure the following components are included in the box. Please contact Hannspree Customer Service immediately if anything is missing or damaged. • TV • Power cord • Remote control and batteries • User's manual • Quick start guide • Warranty card • Product registration card • Attention notice card 11 - Hannspree HT09 | User Manual - Page 12
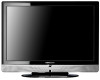
the VGA or DVI port. Convenient control buttons located on the TV and a handy remote control let you change channels, adjust the volume, and change display settings through an easyto-use on-screen display menu system. The built-in stereo speakers provide full rich sound and a convenient audio output - Hannspree HT09 | User Manual - Page 13
number or move downward to the next item on the OSD menu. Press to increase the volume or move to the right on the OSD menu. Press to decrease the volume or move to the left on the OSD menu. Receive incoming remote control commands. Indicate power or standby status. Deliver high-quality sounds. 13 - Hannspree HT09 | User Manual - Page 14
Input and Output Jacks Description Connector Power connector AC IN Function Connect to the included power cord. Service SERVICE For factory use only. Not available for users. HDMI 1 input HDMI 1 Connect to an speakers with built-in amplifiers. Connect to an antenna or cable TV. 14 - Hannspree HT09 | User Manual - Page 15
Control Description Icon Power Input source INPUT Keypad Function Press to turn the TV on or off. Press to open the input source list. Use to select a channel directly. Press 09 to enter the program numbers (press 1 and 0 for channel 10). Program entry Last Information Menu Arrows LAST - Hannspree HT09 | User Manual - Page 16
GUIDE RETURN CH VOL SLEEP MUTE MTS DVD AUDIO Function Press to confirm the TV source selection. Press to view the EPG screen. Press to return to the previous menu Mono/ Stereo/ SAP) in ATV or the audio services in DTV. Press to select a programmed DVD player. Press to select a programmed Audio Receiver - Hannspree HT09 | User Manual - Page 17
to adjust the width-to-height ratio of the image with aspect ratio Full, Normal, Zoom, and Subtitle. Press to open or close the closed caption. Note: • For best results, use the remote control within a proper distance from the front of the TV. Do not exceed an angle of 30 degrees when pointing at - Hannspree HT09 | User Manual - Page 18
English 28US_LCDTV.book Page 18 Thursday, July 3, 2008 5:33 PM 1.6 Inserting the Remote Control Batteries 1 Open the battery compartment cover at the back of the remote control (A). A 2 Insert the batteries paying attention to the polarity markings inside the battery compartment (B). B 3 Replace - Hannspree HT09 | User Manual - Page 19
by the equipment manufacturer. Discard used batteries according to manufacturer's instructions. • Refer to your local recycling or waste disposal rules and contact a local waste disposal vendor to dispose of used batteries. • The remote control cover may have a magnet in it, so do not place - Hannspree HT09 | User Manual - Page 20
the other end of the power cord into a power outlet. 2.1.2 Connecting an Antenna or Cable TV Connect one end of the VHF/UHF (Antenna) or CATV cable to VHF/UHF jack on the rear of the TV. Antenna VHF / UHF CABLE/ANTENNA Ground Clamp Coaxial Cable Ground Note: If you cannot receive - Hannspree HT09 | User Manual - Page 21
Connecting External Earphones Headphones EAR PHONE Speakers (Built-in Amplifiers) Note: • External speakers or headphones are not included with the TV. • The internal TV speakers will not output sound when headphones are plugged in. • Use external speakers with built-in amplifiers only. • Only - Hannspree HT09 | User Manual - Page 22
28US_LCDTV.book Page 22 Thursday, July 3, 2008 5:33 PM English 2.2.2 Connecting to AV Devices A HDMI 1 HDMI 2 B R AUDIO LY PB PR C R L VIDEO AUDIO AUDIO R L VIDEO S-V 2 S-V 1 Audio Cable (Optional) HDMI Cable (Optional) Video Cable (Optional) Audio/ Video Cable (Optional) HDMI Game - Hannspree HT09 | User Manual - Page 23
R AUDIO LY PB PR VCR STB DVD Audio Cable (Optional) Video Cable (Optional) 2.2.4 Connecting a VCR/ STB/ DVD Player Using Composite Video Connect the TV to a VCR/ STB/ DVD player using the composite video input. VCR STB DVD AV2 RL AUDIO AV1 AUDIO RL Audio Cable (Optional) VIDEO VIDEO - Hannspree HT09 | User Manual - Page 24
28US_LCDTV.book Page 24 Thursday, July 3, 2008 5:33 PM English 2.2.5 Connecting a PC using VGA Connect the TV to your PC to use it as the monitor using the VGA port as shown. 1 Connect the VGA port of the TV to the VGA output of the PC. 2 Connect the PC LINE IN port of your - Hannspree HT09 | User Manual - Page 25
HDMI (High Definition Multimedia Interface) assures that the best video signal is always sent from source to the TV. Refer to the following illustration to connect an HDMI device to the TV. HDMI 1 HDMI 2 HDMI Cable (Optional) DVD Player Note: When the HDMI cable is connected, connecting the audio - Hannspree HT09 | User Manual - Page 26
. Press OK to confirm. 2.3.3 Performing an Automatic Channel Search Before using the TV to view programs, you need to activate the channel search first. 1 Press MENU on the control panel or remote control, then select to enter the Channel menu. 2 Select Antenna to set the signal source (Air or Cable - Hannspree HT09 | User Manual - Page 27
or press the volume buttons to restore the original volume. 2.3.6 Editing Channel Table or Favorite Channel 1 Press MENU on the control panel or remote control, then select to enter the Channel menu. 2 Select Channel List. 3 If you want to add or remove channel from channel table, please select - Hannspree HT09 | User Manual - Page 28
book Page 28 Thursday, July 3, 2008 5:33 PM English 3 Adjusting On-Screen Display (OSD) Settings The On-Screen Display (OSD) menu system provides a quick and simple method to adjust the TV settings. The OSD menu can be accessed through the buttons either on the control panel or the remote control - Hannspree HT09 | User Manual - Page 29
instructions indicated on the bottom of the OSD Function Menu. Press CH / CH on the control panel or / arrow keys on the remote control to scroll through the menus. Press INPUT on the control panel or OK key on the remote control can be set to Full, Normal, Zoom, and Subtitle. Note: The items available - Hannspree HT09 | User Manual - Page 30
the item. 6 Press / on the remote control or VOL+/ VOL- on the control panel to change the scales or press OK on the remote control or INPUT on the control panel to mark an item. 7 Press RETURN to return to the Audio menu. 8 Press MENU to exit the Audio menu. 9 The Audio menu can be used to adjust - Hannspree HT09 | User Manual - Page 31
or CHS / CHT on the control panel to select Channel menu. 3 Press / OK on the remote control or Channel V-CHIP Setup INPUT on the control panel to enter the Channel menu. Move OK Enter Return Return Menu Exit 4 Press / on the remote control or CHS / CHT on the control panel to select an item - Hannspree HT09 | User Manual - Page 32
enter the item. 7 Press OK on the remote control or INPUT on the control panel to mark an item. 8 Press RETURN to return to the V-CHIP menu. 9 Press MENU to exit the V-CHIP menu. 10 The V-CHIP menu can set New Password, Change Password, Lock, MPAA, TV Rating, Can. English, and Can. French settings - Hannspree HT09 | User Manual - Page 33
CC Mode Analog CC INPUT on the control panel to enter the Setup menu. Move OK Enter Return Return Menu Exit 4 Press / an item. on the remote control or CHS / CHT on the control panel to select 5 Press / OK on the remote control or INPUT on the control panel to enter the item. 6 Press / on - Hannspree HT09 | User Manual - Page 34
34 Thursday, July 3, 2008 5:33 PM English 4 Troubleshooting Situation Solution • Connect the power cord properly. • control panel or remote control. Adjust the balance in the OSD Audio menu. Try the Auto Scan function in the OSD Channel menu. Use the Setup Wizard function in the OSD Setup menu - Hannspree HT09 | User Manual - Page 35
5 Specifications LCD Panel Size Screen Format Panel Resolution TV System Video System Audio System Built-in Stereo Amplifier Output Power Consumption Power Supply Dimension W x H x D Weight 28 inch TFT 16:10 1920 (H) x 1200 (V) ATV: NTSC DTV: ATSC AV (CVBS) S-Video HDMI HDTV (YPBPR) PC - Hannspree HT09 | User Manual - Page 36
Page 36 Thursday, July 3, 2008 5:33 PM English PC Mode Support Timing Mode Resolution (active dot) Horizontal Vertical Frequency (KHz) 106.5 146.25 154 V V V V V V V V V V V V V Video Mode Support Timing Resolution 480i 480p 720p 1080i 1080p HDMI V V V V YPbPr V V V V V 36 - Hannspree HT09 | User Manual - Page 37
Control Guide 6.1 Operation Modes 6.1.1 Switching Electronic Equipment Types The electronic equipment type switch buttons are used for switching the current electronic equipment type on the remote control. The remote control includes 4 electronic equipment types: DVD, AUDIO, CABLE and TV. The remote - Hannspree HT09 | User Manual - Page 38
every 5s. 4. During search, the indicator light will flash when the POWER signal of each electronic equipment is transmitted. When one cycle of code-searching is complete, the indicator light will come on for 600ms before going off, exiting search mode automatically. 5. Pressing CH+/CH- during - Hannspree HT09 | User Manual - Page 39
button, press VOL- twice consecutively to cancel volume lock under current mode (for example, if volume lock was set under TV mode and you wish to transmit code values under current DVD mode, just perform this unlock operation, while those electronic equipment modes not operated still have volume - Hannspree HT09 | User Manual - Page 40
electronic equipment buttons to enter factory setting operation mode. 5. The default current electronic equipment is TV upon first power-on. Electronic equipment Code Note TV 1001 Provided by manufacturer CABLE -- Transmit TV code AUDIO -- Transmit TV code DVD -- Transmit TV code 40 - Hannspree HT09 | User Manual - Page 41
VOL- and Mute TV Transmit TV code CABLE Transmit CABLE code AUDIO Transmit AUDIO code DVD Transmit DVD code 7. Default channel lock setting: Electronic equipment CH+ and CH- TV Transmit TV code CABLE AUDIO DVD Transmit CABLE code Transmit AUDIO code Transmit DVD code Note Provided by - Hannspree HT09 | User Manual - Page 42
time, only when a single button is pressed, the corresponding code is just output. Two or more buttons simultaneously pressed do not output any code. 6.2.2 Buttons Information Except TV equipment, all the buttons on remote controls corresponding to other electronic equipments (AUDIO, CABLE, and DVD - Hannspree HT09 | User Manual - Page 43
Mathes Cybernex 2015 2005, 2011, 2024, 2015 2913, 2004, 2020 2024 CyberPower 2102 Daewoo Dell 2010, 2017, 2025 2102 Denon 2008 Direc TV 2059 Setup Code for VCR's Durabrand 2007, 2006 Electrohome 2005 Emerex 2002 Emerson 2004, 2005, 2021, 2024, 2010, 2018, 2009, 2022, 2001, 2025, 2027 - Hannspree HT09 | User Manual - Page 44
KLH 2015 Kenwood 2014, 2006 KLH 2015 Kodak 2004, 2005 Kolin 2009 2005, LG 2010, 2008, 2022, 2006 Logik 2015 LXI 2005 Setup Code for VCR's Magnavox 2004, 2007, 2016 Magnin 2024 Marantz 2004, 2016 Marta 2005 Matsushita 2004, 2020 Media Center PC 2102 MEI 2004 Memorex - Hannspree HT09 | User Manual - Page 45
2004, 2024, 2008, 2077 Realistic 2004, 2005, 2012, 2011, 2017 Replay TV 2043 Runco 2007 Sampo 2005, 2012 Samsung 2024, 2010, 2026 Sanky 2012, 2006 Teknika 2004, 2005 2048, Tivo 2044, 2098, 2059 TMK 2024 Setup Code for VCR's Toshiba 2010, 2008, 2014, 2009, 2098, 2079, 2102 - Hannspree HT09 | User Manual - Page 46
2057 JVC 2038, 2045, 2075 Kenwood 2028, 2035 KLH 2058, 2080, 2095 Koss 2058, 2080, 2095 Lasonic 2068 LG 2042, 2076, 2069 Setup Code for VCR's Lite-ON 2096, 2085 Loewe 2030 Magnavox 2029, 2036, 2054 Marantz 2036 Memorex 2055 Microsoft 2032 Mintek 2058 Mitsubishi 2099, 2031 - Hannspree HT09 | User Manual - Page 47
SVA 2058 Sylvania 2054 Symphonic 2054 Teac 2058 Technics 2028 Theta Digital 2039 Toshiba 2029, 2055 V,Inc. 2019 Urban Concepts 2029 Setup Code for VCR's Xbox 2032 Yamaha 2028, 2036, 2037 Zenith 2029, 2042, 2076 ABC 0002, 0003, 0006 Americast 0039 Bell & Howell 0006 Bell - Hannspree HT09 | User Manual - Page 48
0001 Trans PX 0015 Tristar 0038 TS 0002 V2 0038 Viewmaster 0038 Vision 0038 Vortex View 0038 Zenith 0001, 0021, 0039 Setup Code for Satellite's AlphaStar 0030 Chaparral 0011 Crossdigital 0043 DirecTV 0018, 0023, 0025, 0044, 0013, 0029, 0057, 0028, 0034, 0058, 0060, 0043, 0007 - Hannspree HT09 | User Manual - Page 49
Sony 0025, 0056 Star Choice 0036 Tivo 0044, 0053 Toshiba 0029, 0057, 0032, 0048 Ultimate TV 0056, 0051 Uniden 0028, 0027 US Digital 0055 USDTV 0055 Voom 0036 Zenith 0058 Setup Code for CD's Aiwa 3019 Burmester 3027 Califormia Audio Labs 3004 Carver 3019, 3022 Dkk 3001 - Hannspree HT09 | User Manual - Page 50
3059 NEC 3024 Optimus 3026 Realistic 3026 Shure 3024 Sony 3034 Soundesign 3011 Victor 3059 Wards 3011 Yamaha 3025, 3016 50 Setup Code for Audio AMP/ Tuners's ADC 3029 Aiwa 3052, 3015 Anam 3057, 3039 Audiotronic 3042 Bose 3043 Capetronic 3027 Carver 3042 Denon 3051 - Hannspree HT09 | User Manual - Page 51
. • The 28" TV stand base can be screwed on a table or a hard surface using the hole on the back of the stand base. *Installing the LCD TV requires special skill that should only be performed by qualified service personnel. Customers should not attempt to do the work themselves. Hannspree bears no - Hannspree HT09 | User Manual - Page 52
English 28US_LCDTV.book Page 52 Thursday, July 3, 2008 5:33 PM 8 Using the Cable Organizer 1 Insert the cable clamp into the square hold on the rear of the TV. 2 Route the cables through the cable clamp. 52
-
 1
1 -
 2
2 -
 3
3 -
 4
4 -
 5
5 -
 6
6 -
 7
7 -
8
-
9
-
10
-
11
-
12
-
13
-
14
-
15
-
16
-
17
-
18
-
19
-
20
-
21
-
22
-
23
-
24
-
25
-
26
-
27
-
28
-
29
-
30
-
31
-
32
-
33
-
34
-
35
-
36
-
37
-
38
-
39
-
40
-
41
-
42
-
43
-
44
-
45
-
46
-
47
-
48
-
49
-
50
-
51
-
52
 |
 |
Table of Contents
1
English
Regulatory Information
................................................................
3
Description of Warning Symbols
..................................................
4
Safety Notices
.............................................................................
5
Important Safety Instructions
........................................................
6
Preface
.......................................................................................
9
Warranty and Service
..................................................................
9
1.
Getting Started
......................................................................
11
1.1 Package Contents
...........................................................
11
1.2 Introducing the TV
...........................................................
12
1.2.1 Features
................................................................
12
1.3 Control Panel
..................................................................
13
1.4 Input and Output Jacks
....................................................
14
1.5 Remote Control
...............................................................
15
1.6 Inserting the Remote Control Batteries
.............................
18
2.
Setting up your TV
.................................................................
20
2.1 Basic Connections
...........................................................
20
2.1.1 Power Connection
..................................................
20
2.1.2 Connecting an Antenna or Cable TV
........................
20
2.2 Connecting External Devices
...........................................
21
2.2.1 Connecting External Earphones
..............................
21
2.2.2 Connecting to AV Devices
.......................................
22
2.2.3 Connecting a VCR/ STB/ DVD Player Using
Component Video
...................................................
23
2.2.4 Connecting a VCR/ STB/ DVD Player Using
Composite Video
....................................................
23
2.2.5 Connecting a PC using VGA
...................................
24
2.2.6 Connecting a PC using DVI
.....................................
24
2.2.7 Connecting HDMI
...................................................
25
2.3 Using the TV
...................................................................
26
2.3.1 Turning the TV On and Off
......................................
26
2.3.2 Switching Source Signals
........................................
26
2.3.3 Performing an Automatic Channel Search
................
26
2.3.4 Selecting Channels
.................................................
26
2.3.5 Adjusting the Volume
..............................................
26
28US_LCDTV.book
Page 1
Thursday, July 3, 2008
5:33 PM