Harman Kardon AVP-2 Owners Manual - Page 3
Table, Contents, Installation
 |
View all Harman Kardon AVP-2 manuals
Add to My Manuals
Save this manual to your list of manuals |
Page 3 highlights
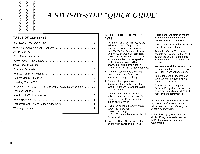
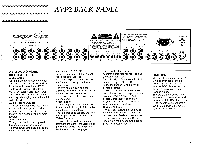
A STEP-BY-STEP "QUICK GUIDE" TABLE OF CONTENTS Step-by-Step "QUICK GUIDE" Becoming Acquainted with Your AVP2 INSTALLATION OF YOUR A test signal will start on the left AVP2 front channel and sequence clockwise around the room. 2 1. As a minimum, you will require the following items: left/right front If any channels are mis-connected, 3 speakers, two surround speakers, correct the connections. AVP2 Features 3 four channels of audio amplification, and an AV source plus necessary Adjust the Output Trim Level controls on the back of the AVP2 Front Panel Illustration 4 cables. Additional system options so that the volume is the same Audio Video Inputs/Outputs 4 include a center channel speaker, and subwoofer plus additional from each speaker at the listening position. Back Panel Illustration Surround Parameters Remote Control Functions Remote Control Illustration 5 6 channels of audio amplification and/or additional audio-video sources. We recommend the use of a sound pressure level meter, if available. 2. Place the speakers and connect Set it for "C" weighting, "slow". 7 7 them to your amplifiers. Be sure you observe proper polarity. Adjust the output trim levels so each speaker produces 75 dB Installing Your AVP2 Adjusting The DolbyTM Time Link Digital Audio Delay System Troubleshooting 8 8 9 3. Connect the appropriate interconnect cables between the outputs of the AVP2 and the audio amplifier inputs. sound pressure level. 7. Turn off the Noise sequencer. Select a Dolby Surround encoded movie on laser disc or hifi VCR to About Radio-TV Interference 4. Connect the output of an audio 10 video source such as a laser disc verify system performance. AVP2 Specifications Trademark and Patent Acknowledgements Warranty Information 11 11 player or hifi VCR to one of the inputs on the AVP2. Please read the rest of this manual. It provides additional information 5. Using the handheld remote control, which will help you optimize your 12 select the following: system performance. DolbyTM Pro Logic. CTR OFF if a center speaker is not Dolby, Pro Logic, Time Link and the being used. double-D logo are trademarks of 6. Push the Noise Sequencer button on the front panel of the AVP2. Dolby Laboratories Licensing Corporation. 2
-
 1
1 -
 2
2 -
 3
3 -
 4
4 -
 5
5 -
 6
6 -
 7
7 -
 8
8 -
 9
9 -
10
-
11
-
12
-
13
 |
 |
