Harman Kardon AVR 144 Owners Manual
Harman Kardon AVR 144 Manual
 |
View all Harman Kardon AVR 144 manuals
Add to My Manuals
Save this manual to your list of manuals |
Harman Kardon AVR 144 manual content summary:
- Harman Kardon AVR 144 | Owners Manual - Page 1
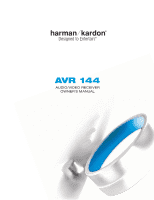
® Designed to Entertain.TM AVR 144 AUDIO/VIDEO RECEIVER OWNER'S MANUAL - Harman Kardon AVR 144 | Owners Manual - Page 2
polarized plug. 13. Power-Cord Protection. Power-supply cords should be the mast and supporting structure, grounding instructions. Adjust only those controls that are covered by the operating instructions, as an improper adjustment of other controls service or repairs to this product, ask the service - Harman Kardon AVR 144 | Owners Manual - Page 3
service center with a cord meeting factory specifications can support the AVR 144 and the heat generated by the amplifiers, there is the remote Harman Kardon's control instructions user's authority to operate the equipment. Unpacking The carton and shipping materials used to protect your new receiver - Harman Kardon AVR 144 | Owners Manual - Page 4
4 - Harman Kardon AVR 144 | Owners Manual - Page 5
42 System Settings 42 Dim Function 42 Advanced Remote Control Functions 43 Punch-Through Programming 43 Macros 43 Resetting the Remote 43 Processor Reset 43 Memory 44 TROUBLESHOOTING GUIDE 45 TECHNICAL SPECIFICATIONS 45 Trademark Acknowledgements 46 APPENDIX WARNING To prevent - Harman Kardon AVR 144 | Owners Manual - Page 6
and ease-of-use features that enhance the home entertainment experience. In the years since our first single-channel component was introduced, Harman Kardon has offered a number of receiver models, each an improvement upon its predecessors, leading to the AVR 144, a 5.1-channel digital audio/video - Harman Kardon AVR 144 | Owners Manual - Page 7
video inputs Digital Audio Inputs • Coaxial: Two rear-panel/one front-panel • Optical: Two rear-panel/one front-panel Outputs • Subwoofer output • Tape (analog AVR 144. If any of these items are missing, please contact Harman Kardon customer service at www.harmankardon.com. • System remote control - Harman Kardon AVR 144 | Owners Manual - Page 8
remote control. Standby/On Switch: This is an electrical switch that turns the receiver Mode: This button toggles between manual (one frequency step at , press this button to select a specific variant of that type of mode. Surround surround modes. The Message Display also indicates the surround mode - Harman Kardon AVR 144 | Owners Manual - Page 9
Surround Mode Indicators Message Display Source Indicators Speaker/Channel Input Indicators Volume Power it easier to follow the instructions throughout the manual that refer to this illustration, a copy of this page may be downloaded from the Product Support section at www.harmankardon.com. 9 - Harman Kardon AVR 144 | Owners Manual - Page 10
, DVD player, cable TV box) to the receiver. Remember to use only one type of video connection to the corresponding inputs on your television or video display in order to view the sources. CD and Tape CDR or another audio-only recorder. Coaxial and Optical Digital Audio Inputs: If your source has a - Harman Kardon AVR 144 | Owners Manual - Page 11
Surround Speaker Outputs Center Speaker Outputs Optical Digital Audio Inputs (1 & 2) NOTE: To make it easier to follow the instructions throughout the manual that refer to this illustration, a copy of this page may be downloaded from the Product Support section at www.harmankardon.com. 11 - Harman Kardon AVR 144 | Owners Manual - Page 12
off the AVR 144 or another device. AVR Selector: Press this button to switch the remote to the codes that operate the receiver. Input receiver will use the video input and remote control codes for the last-selected video source. Dim: Press this button to partially or fully dim the front-panel display - Harman Kardon AVR 144 | Owners Manual - Page 13
Numeric Keys Memory Clear Preset Stations Selectors Disc Skip Macros Surround Mode Selectors NOTE: To make it easier to follow the instructions throughout the manual that refer to this illustration, a copy of this page may be downloaded from the Product Support section at www.harmankardon.com. 13 - Harman Kardon AVR 144 | Owners Manual - Page 14
station. Depending on whether the tuning mode has been set to manual or automatic, each press will either change one frequency step at controls (bass and treble). Use the Navigation Buttons to make your selections. Disc Skip: This button has no effect on the receiver, but is used with some optical - Harman Kardon AVR 144 | Owners Manual - Page 15
Typical Home Theater System A home theater typically includes your audio/video receiver, which controls the system; a DVD player; a source component for television broadcasts, which may be a cable box, a satellite dish receiver, an HDTV tuner or simply an antenna connected to the TV; a video display - Harman Kardon AVR 144 | Owners Manual - Page 16
red, to the positive terminal on the receiver, which is colored as shown in the Connection Color Guide (Table 1). Similarly, always connect the black negative terminal on the speaker to the black negative terminal on the receiver. The AVR 144 uses binding-post speaker terminals that can accept - Harman Kardon AVR 144 | Owners Manual - Page 17
optical digital audio connections should be the same, although it is important to limit the length of the cable. Whichever type of connection you choose, Harman Kardon guide pin. Be careful to line up the plug correctly when you insert it into the jack on the receiver, source or video display. - Harman Kardon AVR 144 | Owners Manual - Page 18
Component video cable Figure 10 - Component Video If it's available on your video display, component video is recommended as the best quality connection, followed by S-video and then composite video. Antennas The AVR 144 uses separate terminals for the included FM and AM antennas that provide proper - Harman Kardon AVR 144 | Owners Manual - Page 19
top of, below or mounted on the wall above or below the video display screen. The front left and right speakers are placed along the circle, low frequencies sound best. Place the subwoofer in that spot. NOTE: Your receiver will sound its best when the same model loudspeaker is used for all positions - Harman Kardon AVR 144 | Owners Manual - Page 20
receiver. Use the Connection Color Guide on page 16 as a reference. See Figure 14. AVR 144 remote control. Decide which audio connections you will use. If your source device has them, use either the coaxial digital or the optical your source device and your video display must have this type of video - Harman Kardon AVR 144 | Owners Manual - Page 21
receiver and remote control. However, you may connect any device to any source input. Device Type VCR, DVR, PVR, TiVo or other audio/video recorder AVR 144 Source Input Video 1 Audio Connections • Video 1 Analog (inputs and outputs) and • Any one available coaxial or optical or Optical digital - Harman Kardon AVR 144 | Owners Manual - Page 22
for playback, never recording. The AVR 144 remote control is programmed to operate many Audio and Component Video Inputs NOTE: If you receive your television programming using your TV with an CD Analog Audio inputs and to the Coaxial 2 or Optical 2 Digital Audio input. See Figure 22. Figure 22 - Harman Kardon AVR 144 | Owners Manual - Page 23
the lens toward the front panel of the AVR 144. Make sure no objects, such as furniture, are blocking the remote's path to the receiver. Bright lights, fluorescent lights and plasma video displays may interfere with the remote's functioning. The remote has a range of about 20 feet, depending on - Harman Kardon AVR 144 | Owners Manual - Page 24
the Remote The AVR 144 remote is capable of controlling not only the receiver, but it may also be programmed to control many instructions on these advanced programming functions. NOTE: The AVR 144 remote is preprogrammed to operate the transport controls of Harman Kardon DVD players when the AVR - Harman Kardon AVR 144 | Owners Manual - Page 25
the codes programmed to operate that device. In order to control the receiver, you will need to press the AVR Button to return the remote to AVR mode. You are now ready for Initial Setup, in which you will make a few adjustments to ensure that your new AVR 144 receiver performs at its best. 25 - Harman Kardon AVR 144 | Owners Manual - Page 26
most users follow the instructions in this INITIAL SETUP section to configure a basic home theater system. You may return to these menus at any time to make additional adjustments. This section requires that you complete all of the steps in the Installation section that apply to your receiver. You - Harman Kardon AVR 144 | Owners Manual - Page 27
them at all. With proper bass management, the AVR 144 divides the source signal at a crossover point. receiver and video display turned on, press the OSD Button on the remote. Use the ¤ Button on the remote to move the cursor to the MANUAL SETUP line, and press the Set Button to display the Manual - Harman Kardon AVR 144 | Owners Manual - Page 28
outputs. NOTE: If you are using a Harman Kardon HKTS speaker system, select the SMALL setting for AVR. Move the cursor to the BACK TO MANUAL SETUP line and press the Set Button to return to the Manual Setup Menu. NOTE: The Speaker/Channel Indicators on the front panel of the receiver will display - Harman Kardon AVR 144 | Owners Manual - Page 29
to get out of sync. This is known as a "lip sync" problem. You may delay the audio for all channels by up to 80 milliseconds display. You should have turned on the receiver and used the Manual Setup menus to configure each of your speakers. Sit in the listening position with the remote control - Harman Kardon AVR 144 | Owners Manual - Page 30
SETUP line. Press the Set Button to display the Manual Setup menu, and then navigate to the CHANNEL ADJUST line. Press the Set Button to display the Channel Adjust menu. See Figure 38. If you would like to set your levels using the AVR 144's internal test tone, you will need to adjust the TEST - Harman Kardon AVR 144 | Owners Manual - Page 31
signal is available, the AVR 144 will switch to the Controls section on page 33 for more information. You are now ready to begin enjoying your new receiver have finished spelling out the new display name for the source. COMPONENT IN which default to Coax 1 and Optical 1, respectively. If you used - Harman Kardon AVR 144 | Owners Manual - Page 32
OPERATION Now that you have installed your system components and completed at least a basic configuration of your receiver, you are ready to begin enjoying your home theater system. Turning On the AVR 144 Gently press the Master Power Switch until the word OFF is no longer visible. The Power - Harman Kardon AVR 144 | Owners Manual - Page 33
display, or move the cursor to the BACK TO MASTER MENU line if you wish to make other changes using the menu system. NOTE: The AVR 144 does not have any conventional balance control control. Headphones Plug the 1/4" plug on a pair of headphones into the headphone jack on the front of the receiver - Harman Kardon AVR 144 | Owners Manual - Page 34
. If your video display doesn't have component video inputs, then connect the player's composite or S-video output to the DVD's corresponding video input. c) Connect the player's 6-channel analog audio outputs to the AVR's 6-Channel Inputs. d) Program the player's remote control codes into the DVD - Harman Kardon AVR 144 | Owners Manual - Page 35
directly to the volume control, without digitizing or processing Manual Setup menu. Consult the owner's guide for your multichannel player for more information. Using the Tuner The AVR 144 the desired station. 2. Press the Memory Button on the remote. 3. Use the Numeric Keys to enter the desired - Harman Kardon AVR 144 | Owners Manual - Page 36
in home theater entertainment, using your AVR 144. As you become more familiar with the receiver, you may wish to explore some of its advanced functions, which are described in the following section. Figure 57 - Select a Surround Mode (Front Panel) To select a surround mode using the remote control - Harman Kardon AVR 144 | Owners Manual - Page 37
on the remote and use the ⁄/¤ Buttons to make the selection. b) The tone controls must be remote repeatedly to select this mode. 3. Analog Surround Modes: One of the main benefits of a surround receiver such as the AVR 144 Logic 7 modes, the Hall and Theater modes and the Stereo modes. Digital - Harman Kardon AVR 144 | Owners Manual - Page 38
receiver to decode the surround back channel. For Dolby Digital EX materials, the incoming bitstream will be displayed as 3/2/.1 EX-ON. For older discs, the display may show EX-OFF. In either case, since the AVR 144 2. Using the remote, press the button Introduction to Home Theater section, surround - Harman Kardon AVR 144 | Owners Manual - Page 39
. Default Modes During initial use or after a processor reset, the AVR 144 will default to the Logic 7 Music mode for all analog and PCM audio inputs. Subsequently, when a source input is selected and an analog or PCM signal is received, the AVR will switch to the last surround mode used for that - Harman Kardon AVR 144 | Owners Manual - Page 40
ADVANCED FUNCTIONS Surround Mode Dolby Pro Logic II Dolby Pro Logic II Movie Description Analog decoder that derives five full-range, discrete main audio channels from matrix surround-encoded or 2-channel analog sources. Four variants are available. Variant of Dolby Pro Logic II that is optimized - Harman Kardon AVR 144 | Owners Manual - Page 41
PCM (44.1kHz or 48kHz) Exclusive to Harman Kardon, Logic 7 enhances 2-channel recordings by deriving PCM (44.1kHz, 48kHz, 96kHz) The AVR 144 is programmed at the factory to default to • PCM (44.1kHz or 48kHz) Simulates a live-performance theater. • Analog (2-channel) • Tuner • PCM (44.1kHz - Harman Kardon AVR 144 | Owners Manual - Page 42
Display goes completely dark except for Power Indicator to remind you that the receiver is turned on Advanced Remote Control Functions The AVR 144 remote control not only operates the AVR 144, but it also serves as a universal remote that may be programmed to operate many of your other home theater - Harman Kardon AVR 144 | Owners Manual - Page 43
appears in the display. If the receiver still does not function correctly after a processor reset, contact an authorized Harman Kardon service center for assistance. Authorized service centers may be located by visiting our Web site at www.harmankardon.com. Memory If the AVR 144 is unplugged or - Harman Kardon AVR 144 | Owners Manual - Page 44
In addition to the items shown above, additional information on troubleshooting possible problems with your AVR 144, or installation-related issues, may be found in the list of "Frequently Asked Questions" which is located in the Product Support section of our Web site at www.harmankardon.com. 44 - Harman Kardon AVR 144 | Owners Manual - Page 45
AVR 144 TECHNICAL SPECIFICATIONS Audio specifications are subject to change without notice. Harman Kardon, Harman International and Logic 7 are trademarks of Harman TiVo Inc. Please register your product on our Web site at www.harmankardon.com. Note: You'll need the product's serial number. At the - Harman Kardon AVR 144 | Owners Manual - Page 46
Appendix - Default Settings, Worksheets, Remote Product Codes Table A1 - Source Input Setting Defaults Source DVD Video 1 Video 2 Video 3 CD Title Component Comp V 1 Video Input Comp V 2 Comp V 2 Comp V 2 Comp V 1 Audio Input Coax 1 Analog Optical 1 Analog Analog Auto Poll On - Harman Kardon AVR 144 | Owners Manual - Page 47
Surround Channel Level*** Subwoofer Channel Level*** **The 6-Channel Inputs are "direct" inputs, meaning their signals are passed directly to the volume control without any bass management processing. Thus, the speaker sizes are always full range, and it isn't possible to adjust speaker size or - Harman Kardon AVR 144 | Owners Manual - Page 48
Codes Source Input Product Type (circle one) Video 1 VCR, PVR Video 2 Cable, Satellite Video 3 TV DVD DVD CD CD, CDR Tape Cassette Remote Control Code Table A7 - System Settings Feature Default Setting VFD Fade Time-Out Off Volume Default Off Default Vol Set -25dB Semi-OSD - Harman Kardon AVR 144 | Owners Manual - Page 49
59 60 61 62 63 64 65 66 67 68 Refer to the numbered buttons in Figure 63 when using the Function List. Figure 63 - Remote Control Function List Reference 49 - Harman Kardon AVR 144 | Owners Manual - Page 50
Remote Control Function List No. Button Name AVR Function DVD CD/CD-R 1 Power On Power On Power On Power On 2 Power Off Power Off Power Off Power Off 3 Mute Mute Mute Mute 4 AVR AVR Select AVR Select AVR Down Volume Down Volume Down 22 CH./Guide Channel Trim Title or Disc Menu - Harman Kardon AVR 144 | Owners Manual - Page 51
APPENDIX No. Button Name AVR Function 44 Direct Direct Tuner Entry 45 Clear Clear 46 Preset Up Preset Tune Up 47 Tuning Down Tuning Down 48 Tone Tone mode 49 D. - Harman Kardon AVR 144 | Owners Manual - Page 52
codes for your components into the remote. Table A9 - Remote Control Product Codes - TV Manufacturer/Brand EMERSON FUNAI FUTURETECH GE GOLDSTAR/LG GRUNDIG HALL MARK HARMAN KARDON HITACHI INFINITY INKEL JBL JC PENNEY JENSEN JVC 029 087 121 123 128 133 144 159 163 110 122 128 132 193 128 201 123 - Harman Kardon AVR 144 | Owners Manual - Page 53
SSS SYLVANIA SYMPHONIC TANDY TATUNG TECHNICS TECHWOOD Setup Code Number 069 128 077 144 148 030 123 128 132 144 148 115 123 148 148 069 128 084 115 123 128 084 077 087 148 180 045 115 123 128 132 148 033 035 036 123 128 132 144 148 024 123 128 128 132 133 059 122 128 132 165 032 087 045 123 - Harman Kardon AVR 144 | Owners Manual - Page 54
APPENDIX Manufacturer/Brand TEKNIKA TELERENT TERA THOMSON TMK TOSHIBA TOTEVISION VIDEO CONCEPTS VIDTECH WARDS YAMAHA YORK YUPITERU ZENITH ZONDA Setup Code Number 045 069 115 123 128 132 069 156 190 191 128 063 129 202 132 160 128 069 128 132 148 123 128 128 045 069 090 122 54 - Harman Kardon AVR 144 | Owners Manual - Page 55
Table A10 - Remote Control Product Codes - VCR Manufacturer/Brand Setup Code Number AIWA AKAI AMPRO ASA AUDIO DYNAMICS BROKSONIC CANDLE CANON CAPEHART CITIZEN CRAIG DAEWOO DAYTRON DBX DYNATECH EMERSON FISHER FUNAI GE GO VIDEO GOLDSTAR/LG HARMAN KARDON HITACHI JC PENNEY JENSEN JVC KENWOOD LLOYD LXI - Harman Kardon AVR 144 | Owners Manual - Page 56
APPENDIX Manufacturer/Brand REALISTIC SALORA SAMSUNG SANSUI SANYO SCOTT SEARS SHARP SONY SOUNDESIGN SYLVANIA SYMPHONIC TANDY TASHICO TATUNG TEAC TEKNIKA THOMAS TiVo TMK TOSHIBA TOTEVISION UNITECH VECTOR RESEARCH VIDEO CONCEPTS VIDEOSONIC WARDS YAMAHA ZENITH Setup Code Number 017 020 040 045 159 - Harman Kardon AVR 144 | Owners Manual - Page 57
Remote Control Product Codes - CD Manufacturer/Brand ADCOM AIWA AKAI AUDIO TECHNICA AUDIOACCESS AUDIOFILE BSR CALIFORNIA AUDIO CAPETRONIC CARRERA CARVER CASIO CLARINETTE DENON EMERSON FISHER FRABA FUNAI GE GENEXXA GOLDSTAR/LG HAITAI HARMAN KARDON 070 087 136 140 141 143 144 144 185 186 117 166 166 - Harman Kardon AVR 144 | Owners Manual - Page 58
011 058 085 086 106 107 110 121 137 146 154 039 013 074 097 151 155 173 087 120 130 095 019 031 053 061 135 169 166 Table A12 - Remote Control Product Codes - DVD Manufacturer/Brand APEX DIGITAL DENON GE GOLDSTAR/LG HARMAN KARDON JVC MAGNAVOX MARANTZ MITSUBISHI NAD ONKYO PANASONIC PHILIPS PIONEER - Harman Kardon AVR 144 | Owners Manual - Page 59
Remote Control Product Codes - SAT Manufacturer/Brand Setup Code Number ALPHASTAR ALPHASTAR DBS ALPHASTAR DSR BIRDVIEW CHANNEL MASTER CHAPARRAL CITOH DRAKE DX ANTENNA ECHOSTAR ELECTRO HOME SAMSUNG SATELLITE SERVICE CO SCIENTIFIC ATLANTA SONY STAR CHOICE DBS STARCAST SUPER GUIDE TELECOM TOSHIBA - Harman Kardon AVR 144 | Owners Manual - Page 60
APPENDIX Table A14 - Remote Control Product Codes - TAPE Manufacturer/Brand HARMAN KARDON Setup Code Number 001 Table A15 - Remote Control Product Codes - CBL Manufacturer/Brand Setup Code Number ABC ALLEGRO AMERICAST ARCHER BELCOR CABLE STAR CITIZEN COLOUR VOICE DIGI EAGLE EASTERN ELECTRICORD - Harman Kardon AVR 144 | Owners Manual - Page 61
Manufacturer/Brand REMBRANT SAMSUNG SCIENTIFIC ATLANTA SEAM SIGNATURE SPRUCER STARCOM STARGATE TANDY TELECAPATION TEXSCAN TFC TIMELESS TOCOM UNITED CABLE UNIVERSAL VIDEOWAY VIEWSTAR ZENITH ZENTEK Setup Code Number 032 003 072 186 183 203 221 222 121 001 188 053 177 189 002 011 163 120 024 028 036 - Harman Kardon AVR 144 | Owners Manual - Page 62
NOTES 62 - Harman Kardon AVR 144 | Owners Manual - Page 63
NOTES - Harman Kardon AVR 144 | Owners Manual - Page 64
® 250 Crossways Park Drive, Woodbury, New York 11797 www.harmankardon.com © 2006 Harman International Industries, Incorporated. All rights reserved. Part No. CQX1A1153Z
-
 1
1 -
 2
2 -
 3
3 -
 4
4 -
 5
5 -
 6
6 -
 7
7 -
8
-
9
-
10
-
11
-
12
-
13
-
14
-
15
-
16
-
17
-
18
-
19
-
20
-
21
-
22
-
23
-
24
-
25
-
26
-
27
-
28
-
29
-
30
-
31
-
32
-
33
-
34
-
35
-
36
-
37
-
38
-
39
-
40
-
41
-
42
-
43
-
44
-
45
-
46
-
47
-
48
-
49
-
50
-
51
-
52
-
53
-
54
-
55
-
56
-
57
-
58
-
59
-
60
-
61
-
62
-
63
-
64
 |
 |

®
Designed to Entertain.
TM
AVR 144
AUDIO/VIDEO RECEIVER
OWNER’S MANUAL