Harman Kardon AVR 144 Owners Manual - Page 18
Antennas - avr 144
 |
View all Harman Kardon AVR 144 manuals
Add to My Manuals
Save this manual to your list of manuals |
Page 18 highlights
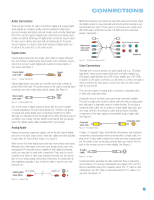
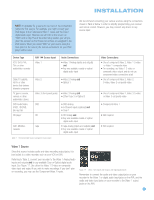
CONNECTIONS Component video cable Figure 10 - Component Video If it's available on your video display, component video is recommended as the best quality connection, followed by S-video and then composite video. Antennas The AVR 144 uses separate terminals for the included FM and AM antennas that provide proper reception for the tuner. The FM antenna uses a 75-ohm F-connector. See Figure 11. Figure 11 - FM Antenna The AM loop antenna needs to be assembled. Then connect the two leads to the screw terminals on the receiver. See Figure 12. Figure 12 - AM Antenna 18 18
-
 1
1 -
2
-
3
-
4
-
5
-
6
-
7
-
8
-
9
-
10
-
11
-
12
-
 13
13 -
 14
14 -
 15
15 -
 16
16 -
 17
17 -
 18
18 -
 19
19 -
 20
20 -
 21
21 -
 22
22 -
 23
23 -
24
-
25
-
26
-
27
-
28
-
29
-
30
-
31
-
32
-
33
-
34
-
35
-
36
-
37
-
38
-
39
-
40
-
41
-
42
-
43
-
44
-
45
-
46
-
47
-
48
-
49
-
50
-
51
-
52
-
53
-
54
-
55
-
56
-
57
-
58
-
59
-
60
-
61
-
62
-
63
-
64
 |
 |

18
18
CONNECTIONS
Figure 10 – Component Video
If it’s available on your video display, component video is recom-
mended as the best quality connection, followed by S-video and then
composite video.
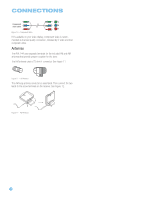
Antennas
The AVR 144 uses separate terminals for the included FM and AM
antennas that provide proper reception for the tuner.
The FM antenna uses a 75-ohm F-connector. See Figure 11.
Figure 11 – FM Antenna
The AM loop antenna needs to be assembled. Then connect the two
leads to the screw terminals on the receiver. See Figure 12.
Figure 12 – AM Antenna
Component
video cable