HealthRider H600 Treadmill English Manual
HealthRider H600 Treadmill Manual
 |
View all HealthRider H600 Treadmill manuals
Add to My Manuals
Save this manual to your list of manuals |
HealthRider H600 Treadmill manual content summary:
- HealthRider H600 Treadmill | English Manual - Page 1
, or if there are missing or damaged parts, we will guarantee complete satisfaction through direct assistance MANUAL CAUTION Read all precautions and instructions in this manual before using this equipment. Save this manual for future reference. Newlife is an authorized dealer of this treadmill - HealthRider H600 Treadmill | English Manual - Page 2
9 OPERATION AND ADJUSTMENT 10 HOW TO FOLD AND MOVE THE TREADMILL 25 TROUBLESHOOTING 27 CONDITIONING GUIDELINES 30 PART LIST 31 ORDERING REPLACEMENT PARTS Back Cover Note: An EXPLODED DRAWING is attached in the centre of this manual. HealthRider is a registered trademark of ICON IP, Inc. 2 - HealthRider H600 Treadmill | English Manual - Page 3
from heated surfaces. 13. Never move the walking belt whilst the power is turned off. Do not operate the treadmill if the power cord or plug is damaged, or if the treadmill is not working properly. (See TROUBLESHOOTING on page 27 if the treadmill is not working properly.) 14. Read, understand, and - HealthRider H600 Treadmill | English Manual - Page 4
procedures described in this manual. Never remove the motor hood un- less instructed to do so by an authorized ser- vice representative. Servicing other than the procedures in this manual should be performed by an authorized service representative only. 27. This treadmill is intended for in - HealthRider H600 Treadmill | English Manual - Page 5
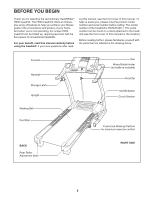
be found on a decal attached to the treadmill (see the front cover of this manual for the location). Before reading further, please familiarise yourself with the parts that are labelled in the drawing below. Console Handrail Storage Latch Upright Walking Belt Foot Rail Fan Water Bottle Holder (no - HealthRider H600 Treadmill | English Manual - Page 6
belt or the shipping carton. This is a normal condition and does not affect treadmill perfor- mance. If there is lubricant on top of the walking belt, assembly. Note: If a part is not in the parts bag, check to see if it has been preattached to one of the parts to be assembled. Extension Leg - HealthRider H600 Treadmill | English Manual - Page 7
onto the pin. Plug in the power cord as described on page 10, and turn on the power as described on page 12. Note: The treadmill may automatically rise to the maximum incline level and then return to the minimum level. 4 84 Knob 73 Spring 3 Large Collar Hole Pin 7 - HealthRider H600 Treadmill | English Manual - Page 8
level. Then, unplug the power cord. 6 58 Bracket 103 108 6a Holes 108 103 7. Make sure that all parts are properly tightened before you use the treadmill. If there are sheets of clear plastic on the treadmill decals, remove the plastic. To protect the floor or carpet, place a mat under the - HealthRider H600 Treadmill | English Manual - Page 9
CHEST PULSE SENSOR TROUBLESHOOTING Sensor Unit Sensor Unit Buckle The instructions on the following on the treadmill, position yourself near the centre of the walking belt. For the console to display heart rate readings, problem, try relocating the treadmill. • The CR2032 battery may need to be - HealthRider H600 Treadmill | English Manual - Page 10
THE PRE-LUBRICATED WALKING BELT Your treadmill features a walking belt coated with high-performance lubricant. IMPORTANT: Never apply silicone spray or other substances to the walking belt or the walking platform. Such substances will deteriorate the walking belt and cause excessive wear - HealthRider H600 Treadmill | English Manual - Page 11
the speed and incline of the treadmill as it guides you through an effective workout. The console also offers four pulse programs that control the speed and incline of the treadmill to keep your heart rate near target heart rate settings during your workouts. In addition, a fitness test program - HealthRider H600 Treadmill | English Manual - Page 12
treadmill the walking belt to slow treadmill is used, observe the alignment of the walking belt, and centre the walking belt if necessary (see page 28). 4 Change the incline of the treadmill as desired. To change the incline of the treadmill treadmill to the manual mode, the treadmill, treadmill. - HealthRider H600 Treadmill | English Manual - Page 13
of the walking belt. Note: When rate if desired. To use the chest pulse sen- sor, see page 9. To use the handgrip pulse sensor, see the instructions treadmill to the lowest setting. The incline must be at the lowest setting when the treadmill is folded to the storage position or the treadmill - HealthRider H600 Treadmill | English Manual - Page 14
setting for the second segment will then be shown in the flashing Current Segment column and the treadmill will automatically adjust to the speed and incline settings for the second segment. Note: If all seven Segment column and the last segment ends. The walking belt will then slow to a stop. 14 - HealthRider H600 Treadmill | English Manual - Page 15
walking belt will begin to move at 2 km/h. When the next segment of the program begins, the treadmill will automatically adjust to the speed and incline settings for the next segment. 5 Follow your progress with the matrix and the display. See step 5 on page 12. 6 Measure your heart rate - HealthRider H600 Treadmill | English Manual - Page 16
start the program. A moment after the button is pressed, the treadmill will automatically adjust to the first speed and incline settings of the -minute segments. The same target heart rate setting is programmed for all segments. Note: For a shorter workout, simply stop the program before it - HealthRider H600 Treadmill | English Manual - Page 17
change to bring your heart rate closer to the target heart rate setting. If your pulse is not detected during the program, the letters "PLS" will flash in the display and the speed of the treadmill may automatically decrease. If this occurs, see CHEST PULSE SENSOR TROUBLESHOOTING on page 9. To stop - HealthRider H600 Treadmill | English Manual - Page 18
program, the speed and incline of the treadmill will periodically change. The speed setting or minutes. When the program ends, the walking belt will slow to a stop and your VO2 display), or if your heart rate exceeds 85% of your age-predicted maximum heart rate for several seconds during the program - HealthRider H600 Treadmill | English Manual - Page 19
, or computer. See pages 19 and 20 for connecting instructions. To use iFIT.com programs directly from our Web site, the treadmill must be connected to your computer. See page 20 for connecting instructions. To use iFIT.com video programs, the treadmill must be connected to your VCR. See page 21 for - HealthRider H600 Treadmill | English Manual - Page 20
CONNECT YOUR HOME STEREO HOW TO CONNECT YOUR COMPUTER Note: If your stereo has an unused LINE OUT jack, see instruction A below. If the LINE OUT jack is being used, see instruction B. A. Plug one end of a long 3.5 mm to RCA stereo audio cable (available at electronics stores) into the input jack - HealthRider H600 Treadmill | English Manual - Page 21
Play button is pressed, your personal trainer will begin guiding you through your workout. Simply follow your personal trainer's instructions. Note: If the time is flashing in the display, press the Start button or the Speed + button on the console. The treadmill will not respond to an MP3, CD, or - HealthRider H600 Treadmill | English Manual - Page 22
or too low, you can manually override the settings at any time of the program. To stop the walking belt at any time, press the Stop button If the speed and/or incline of the treadmill does not change when a "chirp" is step 5 on page 12. 5 Measure your heart rate if desired. See step 6 on page 13. 6 - HealthRider H600 Treadmill | English Manual - Page 23
an internet connection and an internet service provider. A list of specific system -line instructions for using a program. 6 Follow the on-line instructions to belt, and begin walking. During the program, an electronic "chirping" sound will alert you when the speed and/or incline of the treadmill - HealthRider H600 Treadmill | English Manual - Page 24
MODE/DEMO MODE The console features an information mode that keeps track of the total number of hours that the treadmill has been operated and the total distance that the walking belt has moved. The information mode also allows you to select kilometres or miles as the unit of measurement and to - HealthRider H600 Treadmill | English Manual - Page 25
able to safely lift 45 pounds (20 kg) to raise, lower, or move the treadmill. 1. Hold the metal frame firmly in the location shown by the arrow at the position. 2. Move your right hand to the position shown and hold the treadmill firmly. Using your left hand, pull the latch knob to the left and - HealthRider H600 Treadmill | English Manual - Page 26
USE 1. Hold the upper end of the treadmill with your right hand. Pull the latch knob to the left and hold it. Pivot the frame down until the catch is past the latch - HealthRider H600 Treadmill | English Manual - Page 27
TROUBLESHOOTING Most treadmill problems can be solved by following the steps below. Find the symptom that applies, and follow the steps listed. If further assistance is needed, please call the telephone number on the front cover of this manual. PROBLEM: The power does not turn on SOLUTION: a. - HealthRider H600 Treadmill | English Manual - Page 28
cord, insert the key, and walk on the treadmill for a few minutes. Repeat until the walking belt is properly tightened. b 5-7 cm Rear Roller Bolts c. If the walking belt still slows when walked on, see the front cover of this manual. PROBLEM: The walking belt is off-centre or slips when walked on - HealthRider H600 Treadmill | English Manual - Page 29
key, and walk on the treadmill for a few min- utes. Repeat until the walking belt is properly tight- ened. PROBLEM: The chest pulse sensor does not function properly SOLUTION: a. If the chest pulse sensor does not function properly, see CHEST PULSE SENSOR TROUBLESHOOTING on page 9. b. If the - HealthRider H600 Treadmill | English Manual - Page 30
found by using your heart rate as a guide. The chart below shows recommended heart rates for fat burning and aerobic treadmill until your heart rate is near the highest number in your training zone. WORKOUT GUIDELINES Each workout should include the following three parts: A Warm-up-Start each workout - HealthRider H600 Treadmill | English Manual - Page 31
Guide Screw Belt Guide Left Handrail Right Handrail Frame Pivot Bolt Left Foot Rail Right Foot Rail Controller/Incline Motor Wire Isolator Washer Console Frame Support Latch Pin Assembly Motor Bushing Transformer Motor Bolt Static Decal Motor Belt Drive Motor Frame Washer U-nut Outlet Assembly Lift - HealthRider H600 Treadmill | English Manual - Page 32
on this EXPLODED DRAWING, see the PART LIST on page 31 of the user's manual. 5 16 5 4 69 3 9 2 70 1 5 5 93 91 19 94 49 3 6 12 11 5 48 17 5 26 96 97 102 101 99 98 95 100 28 15 32 42 - HealthRider H600 Treadmill | English Manual - Page 33
29 8 8 20 64 64 79 107 105 106 3 73 21 29 77 8 13 84 64 3 3 8 3 64 44 3 65 68 32 31 3 113 8 3 81 80 89 56 67 82 86 83 32 82 88 83 72 82 87 108 83 89 77 33 65 8 32 3 31 3 44 82 83 68 71 109 75 76 3 3 3 3 33 87 103 32 67 74 82 80 83 81 82 83 - HealthRider H600 Treadmill | English Manual - Page 34
HealthRider H600 treadmill) • the SERIAL NUMBER of the product (see the front cover of this manual) • the KEY NUMBER AND DESCRIPTION OF THE PART(S) (see the EXPLODED DRAWING attached in the centre of this manual and the PART usage or repairs not provided by an Newlife authorized service center;
-
 1
1 -
 2
2 -
 3
3 -
 4
4 -
 5
5 -
 6
6 -
 7
7 -
8
-
9
-
10
-
11
-
12
-
13
-
14
-
15
-
16
-
17
-
18
-
19
-
20
-
21
-
22
-
23
-
24
-
25
-
26
-
27
-
28
-
29
-
30
-
31
-
32
-
33
-
34
 |
 |
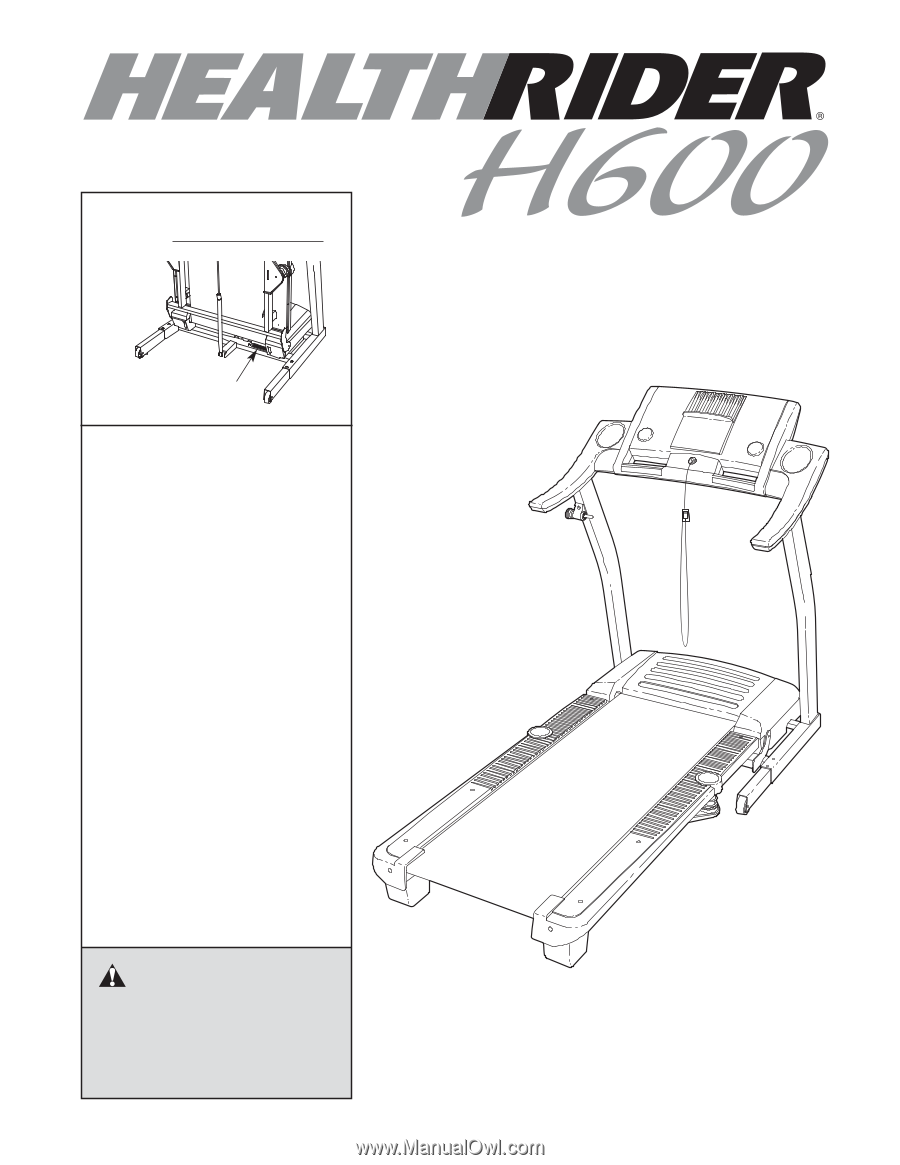
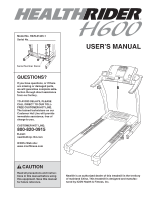
Serial Number Decal
Model No. HATL61205.1
Serial No.
CAUTION
Read all precautions and instruc-
tions in this manual before using
this equipment. Save this manual
for future reference.
USER’S MANUAL
QUESTIONS?
If you have questions, or if there
are missing or damaged parts,
we will guarantee complete satis-
faction through direct assistance
from our factory.
TO AVOID DELAYS, PLEASE
CALL DIRECT TO OUR TOLL-
FREE CUSTOMER HOT LINE.
The trained technicians on our
Customer Hot Line will provide
immediate assistance, free of
charge to you.
CUSTOMER HOT LINE:
800-820-0915
E-mail:
ICON’s Web site:
www.iconfitness.com
Newlife is an authorized dealer of this treadmill in the territory
of mainland China. This treadmill is designed and manufac-
tured by ICON Health & Fitness, Inc.