HP 8/20q HP StorageWorks 8Gb Simple SAN Connection Kit quick start instruction - Page 5
Linux installation
 |
View all HP 8/20q manuals
Add to My Manuals
Save this manual to your list of manuals |
Page 5 highlights
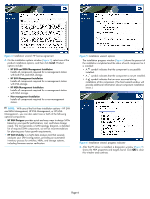
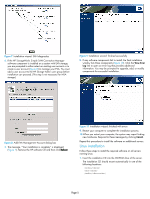
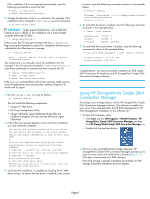
Figure 7 Installation wizard: SAN diagnostics 6. If the HP StorageWorks Simple SAN Connection Manager software component is installed on a system with EVA storage, you are prompted to either select an existing user account or to create a user account (Figure 8) to manage your EVA. You must add a user account to the HP Storage Admin user group before installation can proceed. (This step is not necessary for MSA storage.) Figure 9 Installation wizard: finished successfully 8. If any software components fail to install, the final installation window lists those components (Figure 10). Click the View Error Log link to open an error log that provides additional information. You may be prompted to upgrade, add, or modify components for successful installation. Figure 8 Add EVA Management Account dialog box 7. The message, "Your installation is complete," is displayed (Figure 9). Remove the HP software CD and then click Reboot. Figure 10 Installation wizard: finished with errors 9. Restart your computer to complete the installation process. 10.When you restart your computer, the system may report finding new hardware. Respond to these messages by clicking Cancel. Repeat this procedure to install the software on additional servers. Linux installation Follow these steps to install the required software on all servers running Linux. 1. Insert the installation CD into the CD-ROM drive of the server. The installation CD should mount automatically in one of the following locations: /media/cdrom/ /mnt/cdrom/ /media/cdrecorder/ Page 5
-
 1
1 -
 2
2 -
 3
3 -
 4
4 -
 5
5 -
 6
6 -
 7
7
 |
 |
