HP All-in-One 200-5280qd Upgrading and Servicing Guide - Page 6
the wall mounting device to the computer., Follow the wall-mounting hardware manufacturer's
 |
View all HP All-in-One 200-5280qd manuals
Add to My Manuals
Save this manual to your list of manuals |
Page 6 highlights
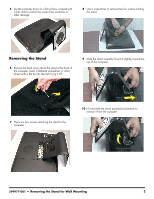
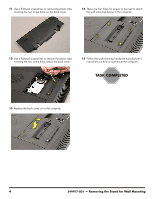
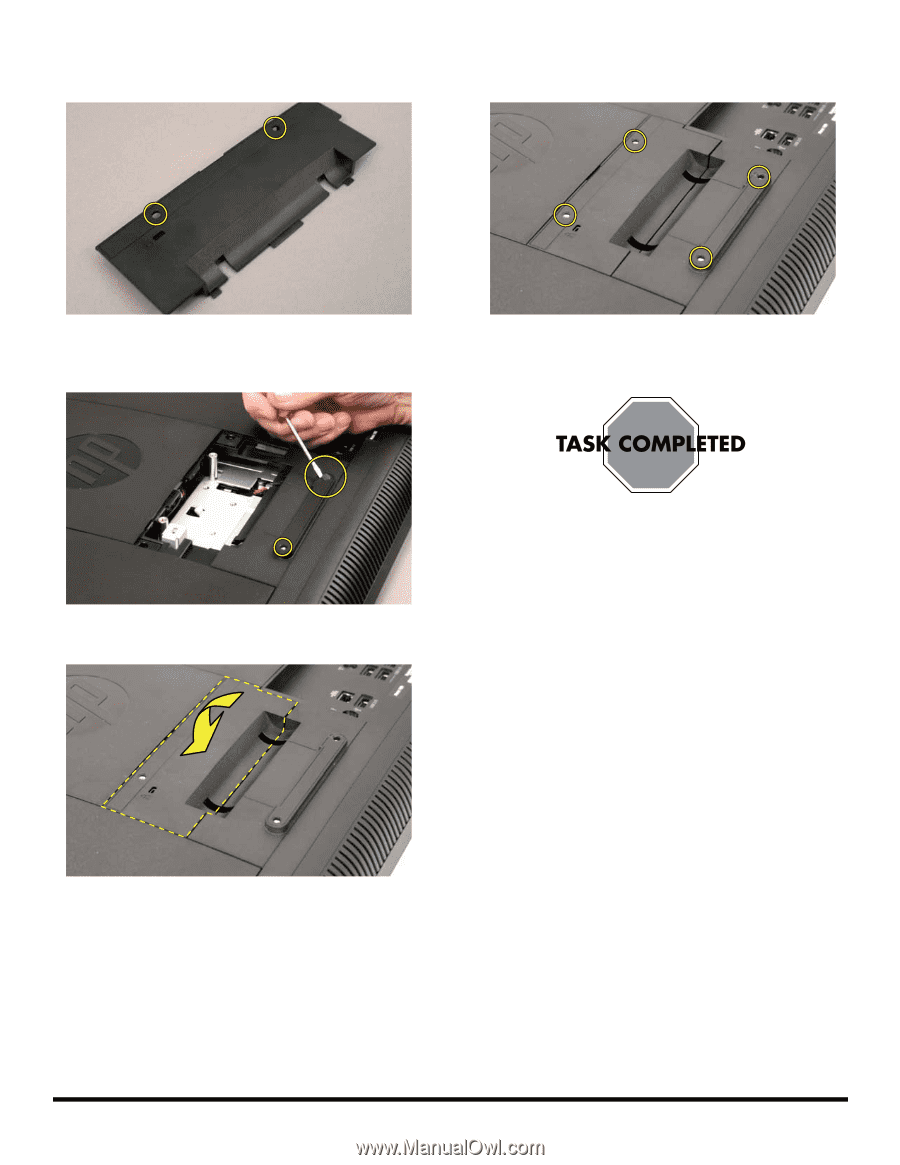
11 Use a flathead screwdriver to remove the plastic tabs covering the two screw holes on the back cover. 14 There are four holes for screws to be used to attach the wall mounting device to the computer. 12 Use a flathead screwdriver to remove the plastic tabs covering the two screw holes below the back cover. 15 Follow the wall-mounting hardware manufacturer's instructions on how to wall-mount the computer. 13 Replace the back cover on to the computer. 4 599977-001 - Removing the Stand for Wall Mounting
-
 1
1 -
 2
2 -
 3
3 -
 4
4 -
 5
5 -
 6
6 -
 7
7 -
 8
8 -
 9
9 -
 10
10 -
 11
11 -
 12
12 -
13
-
14
-
15
-
16
-
17
-
18
-
19
-
20
-
21
-
22
-
23
-
24
-
25
-
26
-
27
-
28
 |
 |
4
599977-001
— Removing the Stand for Wall Mounting
11
Use a flathead screwdriver to remove the plastic tabs
covering the two screw holes on the back cover.
12
Use a flathead screwdriver to remove the plastic tabs
covering the two screw holes below the back cover.
13
Replace the back cover on to the computer.
14
There are four holes for screws to be used to attach
the wall mounting device to the computer.
15
Follow the wall-mounting hardware manufacturer’s
instructions on how to wall-mount the computer.