HP Classmate Notebook PC User Guide
HP Classmate Notebook PC Manual
 |
View all HP Classmate Notebook PC manuals
Add to My Manuals
Save this manual to your list of manuals |
HP Classmate Notebook PC manual content summary:
- HP Classmate Notebook PC | User Guide - Page 1
User Guide - HP Classmate Notebook PC | User Guide - Page 2
for HP products and services are set forth in the express warranty statements accompanying such products and services. Nothing herein should latest user guide, go to http://www.hp.com/support, and select your country. Select Drivers & Downloads, and then follow the on-screen instructions. Software - HP Classmate Notebook PC | User Guide - Page 3
Safety warning notice WARNING! To reduce the possibility of heat-related injuries or of overheating the computer, do not place the computer directly on your lap or obstruct the computer air vents. Use the computer only on a hard, flat surface. Do not allow another hard surface, such as an adjoining - HP Classmate Notebook PC | User Guide - Page 4
iv Safety warning notice - HP Classmate Notebook PC | User Guide - Page 5
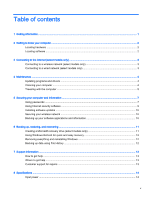
models only 11 Using Windows Refresh for quick and easy recovery 12 Removing everything and reinstalling Windows 12 Backing up data using File History ...12 7 Support information ...13 How to get help ...13 Where to get help ...13 Customer - HP Classmate Notebook PC | User Guide - Page 6
Operating environment ...14 9 Troubleshooting ...15 Troubleshooting resources ...15 Resolving issues ...15 10 Electrostatic discharge ...18 Index ...19 vi - HP Classmate Notebook PC | User Guide - Page 7
computer hardware and software issues See Troubleshooting on page 15. ● Find electronic user guides and Go to http://www.hp.com/support, and select your country. Select Drivers & Downloads, specifications for your computer model and then follow the on-screen instructions. ● Order parts and find - HP Classmate Notebook PC | User Guide - Page 8
recovery. 5. Select Recovery, and then under Advanced startup, select Restart now. 6. From the Choose an option screen, select Troubleshoot. 7. From the Troubleshoot screen, click Advanced options. 8. From the Advanced options screen, click UEFI Firmware Settings. 9. From the UEFI Firmware Settings - HP Classmate Notebook PC | User Guide - Page 9
Set up a new connection or network. A list of options is displayed, allowing you to manually search for and connect to a network or to create a new network connection. 6. Follow the on-screen instructions to complete the connection. After the connection is made, place the mouse pointer over the - HP Classmate Notebook PC | User Guide - Page 10
and drivers HP recommends that you update your programs and drivers on a regular basis to the latest versions. Go to http://www.hp.com/support to download the latest versions. You can also register to receive automatic update notifications when they become available. Cleaning your computer Use the - HP Classmate Notebook PC | User Guide - Page 11
Cleaning the sides or cover To clean the sides or cover, use a soft microfiber cloth or chamois moistened with one of the cleaning solutions listed previously or use an acceptable disposable wipe. NOTE: When cleaning the cover of the computer, use a circular motion to aid in removing dirt and debris - HP Classmate Notebook PC | User Guide - Page 12
Broadband Module installed, such as an 802.11b/g/n (2.4GHz) device, Global System for Mobile Communications (GSM) device, or a General Packet Radio Service (GPRS) device, the use of these devices may be restricted in some environments. Such restrictions may apply aboard aircraft, in hospitals, near - HP Classmate Notebook PC | User Guide - Page 13
5 Securing your computer and information Computer security is essential for protecting the confidentiality, integrity, and availability of your information. Security solutions provided by the Windows operating system, HP applications, the nonWindows Computer Setup (BIOS), and other third-party - HP Classmate Notebook PC | User Guide - Page 14
● If HP SpareKey has been set up previously, and if you forget the BIOS administrator password set in Computer Setup, you can use HP SpareKey to access the utility. ● If you forget both the DriveLock user password and the DriveLock master password set in Computer Setup, the hard drive that is - HP Classmate Notebook PC | User Guide - Page 15
Setting passwords in Computer Setup Password Function BIOS administrator password* Protects access to Computer Setup. NOTE: If features have been enabled to prevent removing the BIOS administrator password, you may not be able to remove it until those features have been disabled. DriveLock - HP Classmate Notebook PC | User Guide - Page 16
software updates HP, Microsoft Windows, and third-party software installed on your computer should be regularly updated to correct security problems and improve software performance. For more information, see Updating programs and drivers on page 4. Installing critical security updates HP recommends - HP Classmate Notebook PC | User Guide - Page 17
provided, see Help and Support. From the Start screen, type help, and then select Help and Support. Creating a Microsoft recovery drive recovery drive is selected. 2. Select Next, and then follow the on-screen instructions. 3. After you have created the recovery drive, a prompt is displayed asking - HP Classmate Notebook PC | User Guide - Page 18
you have a quick way to see what you might need to reinstall. See Help and Support for instructions on reinstalling traditional applications. From the Start screen, type help, and then select Help and Support. NOTE: You may be prompted for your permission or password when using Refresh. See Help - HP Classmate Notebook PC | User Guide - Page 19
to repair your computer. These cost of these services is covered during the warranty period. There are some limitations and exclusions to the warranty (as well as some important details), which are described in the HP Worldwide Limited Warranty and Technical Support guide. How to get help 13 - HP Classmate Notebook PC | User Guide - Page 20
8 Specifications Input power The power information in this section may be helpful if you plan to travel internationally with the computer. The computer operates on DC power, which can be supplied by an AC or a DC power source. The AC power source must be rated at 100-240 V, 50-60 Hz. Although the - HP Classmate Notebook PC | User Guide - Page 21
HP technician. NOTE: When chat is not available in a particular language, it is available in English. ◦ Find HP support worldwide telephone numbers. ◦ Locate an HP service center. Resolving issues The following sections describe several common issues and solutions. The computer is unable to start up - HP Classmate Notebook PC | User Guide - Page 22
external device is not working Follow these suggestions if an external device does not function as expected: ● Turn on the device according to the manufacturer's instructions. ● Be sure that all device connections are secure. ● Be sure that the device is receiving electrical power. 16 Chapter - HP Classmate Notebook PC | User Guide - Page 23
● Be sure that the device, especially if it is older, is compatible with the operating system. ● Be sure that the correct drivers are installed and updated. The wireless network connection is not working If a wireless network connection is not working as expected, follow these suggestions: ● To - HP Classmate Notebook PC | User Guide - Page 24
drive, or loss of information, observe these precautions: ● If removal or installation instructions direct you to unplug the computer, unplug it after being properly grounded and before removing with component removal or installation, contact HP support. 18 Chapter 10 Electrostatic discharge - HP Classmate Notebook PC | User Guide - Page 25
12 wired network, connecting 3 wireless network connecting 3 functional range 3 securing 10 S software updates, installing 10 software, locating 2 support 13 T traveling with the computer 5 troubleshooting computer on but not responding 16 computer screen is blank 15 computer unable to start up 15
-
 1
1 -
 2
2 -
 3
3 -
 4
4 -
 5
5 -
 6
6 -
 7
7 -
8
-
9
-
10
-
11
-
12
-
13
-
14
-
15
-
16
-
17
-
18
-
19
-
20
-
21
-
22
-
23
-
24
-
25
 |
 |

User Guide