HP Color LaserJet Enterprise Flow MFP X677zs User Guide - Page 118
Introduction, Scan to SharePoint, Quick Sets, Select, File Name, File Type and Resolution, Sides
 |
View all HP Color LaserJet Enterprise Flow MFP X677zs manuals
Add to My Manuals
Save this manual to your list of manuals |
Page 118 highlights
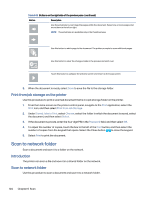
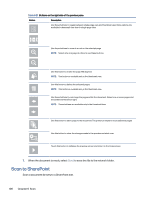
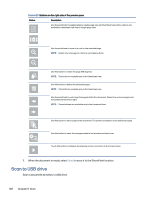
Introduction If you have a workflow-equipped printer, you can scan a document and send it to a SharePoint site. This feature eliminates the need to scan the documents to a network folder, USB flash drive, or email message, and then manually upload the files to the SharePoint site. Scan to SharePoint supports all scanning options, including the ability to scan documents as images or use the OCR features to create text files or searchable PDFs. NOTE: Before you can scan to SharePoint, your printer administrator or IT department must use the HP Embedded Web Server to enable the feature and set it up. Scan to SharePoint Use the following steps to scan a document directly to a SharePoint site. 1. Place the document face-down on the scanner glass, or place it face-up in the document feeder and adjust the paper guides to fit the size of the document. 2. From the Home screen on the printer control panel, navigate to the Scan application, select the Scan icon, and then select Scan to SharePoint®. NOTE: It might be necessary to sign in to the printer to use this feature. 3. Under Quick Sets, touch Select, select a Quick Set, and then select Load. 4. Select the File Name: text field to open a keyboard. Type the name for the file, and then select the enter button . 5. To configure settings, such as File Type and Resolution, Sides, and Content Orientation, select Options in the lower left corner, and then select the settings from the Options menus. Select Done if prompted. 6. Optional Preview: Touch the right pane of the screen to preview the document. You can use the Expand and Collapse buttons on the left side of the preview pane to expand and collapse the preview screen. Table 6-22 Buttons on the left side of the preview pane Button Description Expand the preview screen. Collapse the preview screen. Use the buttons on the right of the screen to adjust the preview options and to rearrange, rotate, insert, or remove pages. Introduction 107
-
 1
1 -
2
-
3
-
4
-
5
-
6
-
7
-
8
-
9
-
10
-
11
-
12
-
13
-
14
-
15
-
16
-
17
-
18
-
19
-
20
-
21
-
22
-
23
-
24
-
25
-
26
-
27
-
28
-
29
-
30
-
31
-
32
-
33
-
34
-
35
-
36
-
37
-
38
-
39
-
40
-
41
-
42
-
43
-
44
-
45
-
46
-
47
-
48
-
49
-
50
-
51
-
52
-
53
-
54
-
55
-
56
-
57
-
58
-
59
-
60
-
61
-
62
-
63
-
64
-
65
-
66
-
67
-
68
-
69
-
70
-
71
-
72
-
73
-
74
-
75
-
76
-
77
-
78
-
79
-
80
-
81
-
82
-
83
-
84
-
85
-
86
-
87
-
88
-
89
-
90
-
91
-
92
-
93
-
94
-
95
-
96
-
97
-
98
-
99
-
100
-
101
-
102
-
103
-
104
-
105
-
106
-
107
-
108
-
109
-
110
-
111
-
112
-
 113
113 -
 114
114 -
 115
115 -
 116
116 -
 117
117 -
 118
118 -
 119
119 -
 120
120 -
 121
121 -
 122
122 -
 123
123 -
124
-
125
-
126
-
127
-
128
-
129
-
130
-
131
-
132
-
133
-
134
-
135
-
136
-
137
-
138
-
139
-
140
-
141
-
142
-
143
-
144
-
145
-
146
-
147
-
148
-
149
-
150
-
151
-
152
-
153
-
154
-
155
-
156
-
157
-
158
-
159
-
160
-
161
-
162
-
163
-
164
-
165
-
166
-
167
-
168
-
169
-
170
-
171
-
172
-
173
-
174
-
175
-
176
-
177
-
178
-
179
-
180
-
181
-
182
-
183
-
184
-
185
-
186
-
187
-
188
-
189
-
190
-
191
-
192
-
193
-
194
-
195
-
196
-
197
-
198
-
199
-
200
-
201
-
202
-
203
-
204
-
205
-
206
-
207
-
208
-
209
-
210
-
211
-
212
-
213
-
214
-
215
-
216
-
217
-
218
-
219
-
220
-
221
-
222
-
223
-
224
-
225
-
226
-
227
-
228
-
229
-
230
-
231
-
232
-
233
-
234
-
235
-
236
-
237
-
238
-
239
-
240
-
241
-
242
-
243
-
244
-
245
-
246
-
247
-
248
-
249
-
250
-
251
-
252
-
253
-
254
-
255
-
256
-
257
-
258
-
259
-
260
-
261
-
262
-
263
-
264
-
265
-
266
-
267
-
268
-
269
-
270
-
271
-
272
-
273
 |
 |
