HP Deskjet 630c (English) DJ 630C Printer - Reference Manual - Page 21
To insert or replace an optional print, cartridge, Printer Services, Align the Print Cartridges - ink cartridges
 |
View all HP Deskjet 630c manuals
Add to My Manuals
Save this manual to your list of manuals |
Page 21 highlights
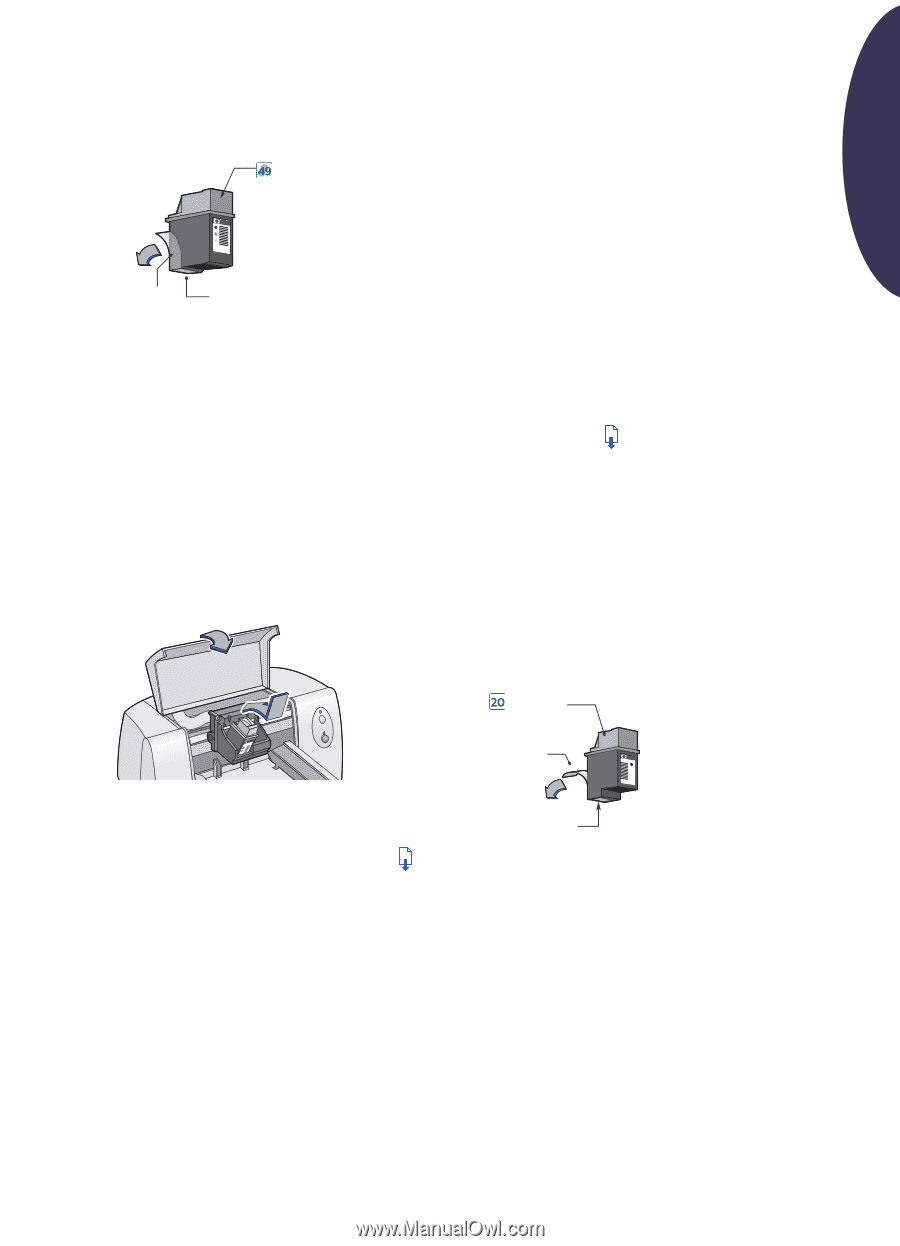
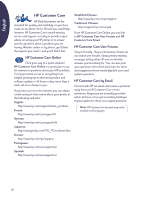
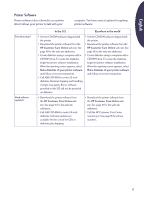
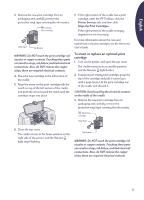
English 3. Remove the new print cartridge from its packaging and carefully remove the protective vinyl tape covering the ink nozzles. Tri-Color Print Cartridge Vinyl Tape Ink Nozzles WARNING: Do NOT touch the print cartridge ink nozzles or copper contacts. Touching these parts can result in clogs, ink failure, and bad electrical connections. Also, do NOT remove the copper strips; these are required electrical contacts. 4. Place the new cartridge in the left section of the cradle. 5. Align the arrow on the print cartridge with the notch on top of the left section of the cradle, and push the arrow toward the notch until the cartridge snaps into place. 7. If the right section of the cradle has a print cartridge, open the HP Toolbox, click the Printer Services tab, and then click Align the Print Cartridges. If the right section of the cradle is empty, alignment is not necessary. For more information about the care and maintenance of print cartridges, see the electronic User's Guide. To insert or replace an optional print cartridge 1. Turn on the printer, and open the top cover. The cradle moves to an accessible position, and the Resume light flashes. 2. If replacing an empty print cartridge, grasp the top of the cartridge and pull it toward you until it pops loose. Lift the print cartridge out of the cradle and discard it. CAUTION: Avoid touching the electrical contacts on the inside of the cradle. 3. Remove the new print cartridge from its packaging and carefully remove the protective vinyl tape covering the ink nozzles. Black Print Cartridge Vinyl Tape 6. Close the top cover. The cradle returns to the home position on the right side of the printer, and the Resume light stops flashing. Ink Nozzles WARNING: Do NOT touch the print cartridge ink nozzles or copper contacts. Touching these parts can result in clogs, ink failure, and bad electrical connections. Also, do NOT remove the copper strips; these are required electrical contacts. 21
-
 1
1 -
2
-
3
-
4
-
5
-
6
-
7
-
8
-
9
-
10
-
11
-
12
-
13
-
14
-
15
-
 16
16 -
 17
17 -
 18
18 -
 19
19 -
 20
20 -
 21
21 -
 22
22 -
 23
23 -
 24
24
 |
 |