HP Deskjet 630c (English) DJ 630C Printer - Reference Manual - Page 3
English, While You're Printing, If something goes wrong - black cartridge
 |
View all HP Deskjet 630c manuals
Add to My Manuals
Save this manual to your list of manuals |
Page 3 highlights
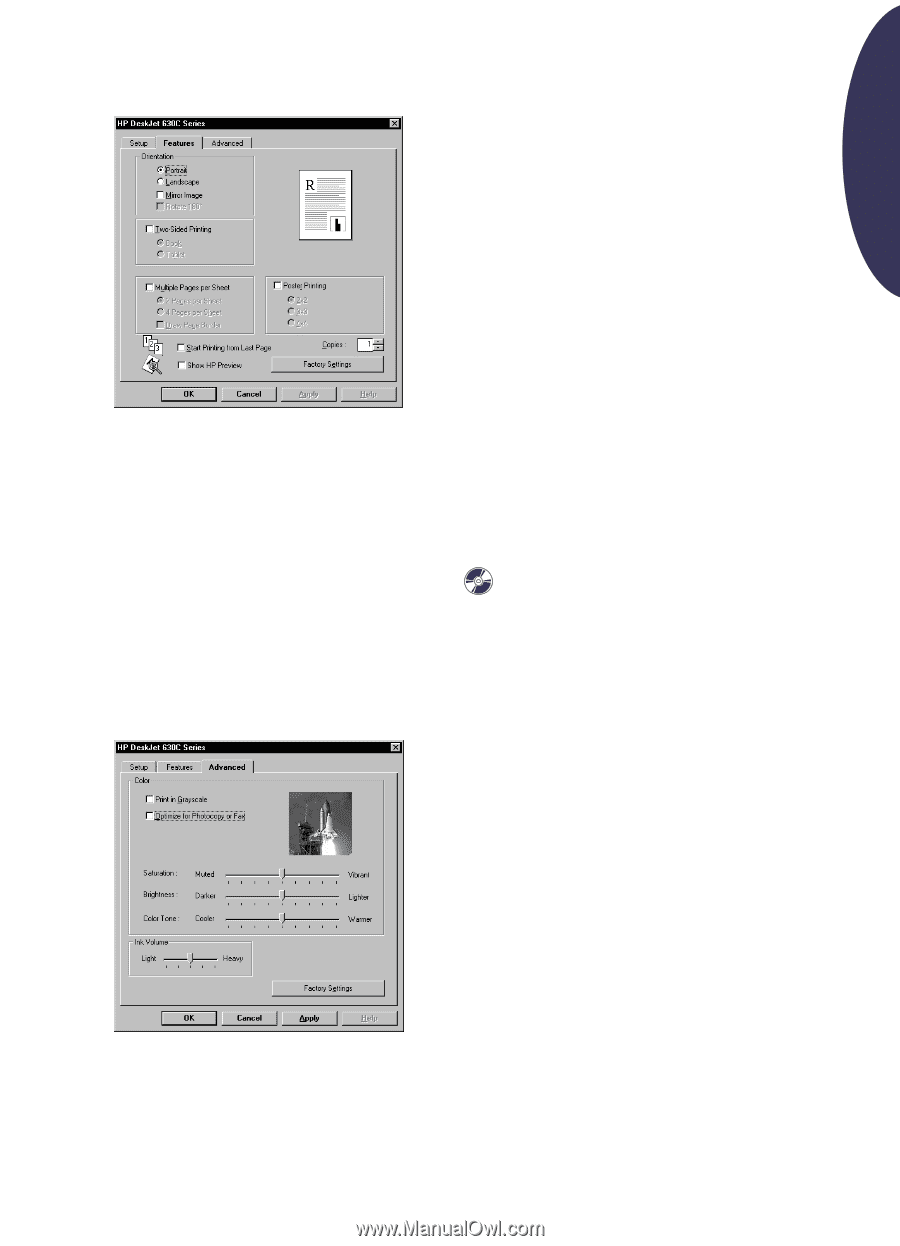
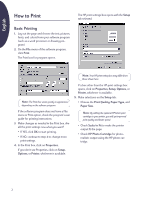
English 6. Click the Features tab for more print settings. 7. Make selections on the Features tab: • Choose paper orientation-Portrait, Landscape, or Mirror Image. • Check Two-Sided Printing, Multiple Pages per Sheet, and Poster Printing, as desired. • Check Start Printing from Last Page to reverse the order of printing. • Check Show HP Preview to display an on screen preview of the printed copy. • Set the number of Copies. 8. Click the Advanced tab for more settings. 9. Make selections on the Advanced tab: • Check Print in Grayscale to print in black and white. • Check Optimize for Photocopy or Fax to make your photocopied and faxed images sharper. • Use the sliders to change the Saturation, Brightness, and Color Tone of color prints. • Use the slider for Ink Volume to change the amount of ink applied. 10. Click OK in the HP print setting box to save your settings. Then click OK in the Print dialog box to start printing. If a box other than the Print dialog box opens, click on OK or Print, whichever is available. It takes a few moments for the printing to start, because the printer is receiving information from the computer. For more information about the HP Print Settings box, see the electronic User's Guide, which you can access from the HP Toolbox (see page 10). While You're Printing Your printer will print at different speeds, depending on the complexity of the job, the print quality you have chosen, and the number of print cartridges in the printer. If you have lots of graphics and color in your document, it will take longer to print. If something goes wrong Sometimes, in spite of your best efforts, something goes wrong during printing. Maybe a sheet of paper jams in the printer or nothing happens at all. See "Solving Common Problems" on page 11 for solutions. 3
-
 1
1 -
 2
2 -
 3
3 -
 4
4 -
 5
5 -
 6
6 -
 7
7 -
 8
8 -
 9
9 -
10
-
11
-
12
-
13
-
14
-
15
-
16
-
17
-
18
-
19
-
20
-
21
-
22
-
23
-
24
 |
 |