HP Deskjet F4500 User Guide - Page 8
Test wireless setup and print network configuration - series
 |
View all HP Deskjet F4500 manuals
Add to My Manuals
Save this manual to your list of manuals |
Page 8 highlights
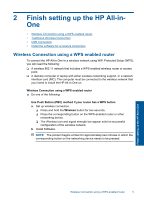
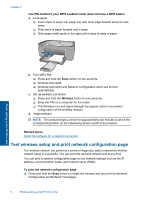
Chapter 2 Use PIN method if your WPS enabled router does not have a WPS button a. Load paper. ❑ Insert stack of paper into paper tray with short edge forward and print side down. ❑ Slide stack of paper forward until it stops. ❑ Slide paper-width guide to the right until it stops at edge of paper. Finish setting up the HP All-in-One b. Print WPS PIN. ❑ Press and hold the Scan button for two seconds. ❑ Wireless test starts. ❑ Wireless test report and Network Configuration report are printed automatically. c. Set up wireless connection. ❑ Press and hold the Wireless button for two seconds. ❑ Enter the PIN on a computer for the router. ❑ The Wireless icon and signal strength bar appear solid on successful configuration of the wireless network. d. Install software NOTE: The product begins a timer for approximately two minutes in which the corresponding button on the networking device needs to be pressed. Related topics Install the software for a network connection Test wireless setup and print network configuration page The wireless network test performs a series of diagnostic tests to determine whether network setup is successful. You can print the wireless network test at any time. You can print a network configuration page to see network settings such as the IP address, communication mode, and network name (SSID). To print the network configuration page ▲ Press and hold the Scan button to initiate the wireless test and print the Network Configuration and Network Test pages. 6 Finish setting up the HP All-in-One
-
 1
1 -
2
-
 3
3 -
 4
4 -
 5
5 -
 6
6 -
 7
7 -
 8
8 -
 9
9 -
 10
10 -
 11
11 -
 12
12 -
 13
13 -
14
-
15
-
16
-
17
-
18
-
19
-
20
-
21
-
22
-
23
-
24
-
25
-
26
-
27
-
28
-
29
-
30
-
31
-
32
-
33
-
34
-
35
-
36
-
37
-
38
-
39
-
40
-
41
-
42
-
43
-
44
-
45
-
46
-
47
-
48
-
49
-
50
-
51
-
52
-
53
-
54
-
55
-
56
-
57
-
58
-
59
-
60
-
61
-
62
-
63
-
64
-
65
-
66
-
67
-
68
-
69
-
70
-
71
-
72
-
73
-
74
-
75
-
76
-
77
-
78
-
79
-
80
 |
 |
