HP Dx2250 Hardware Reference Guide - dx2250 MT - Page 12
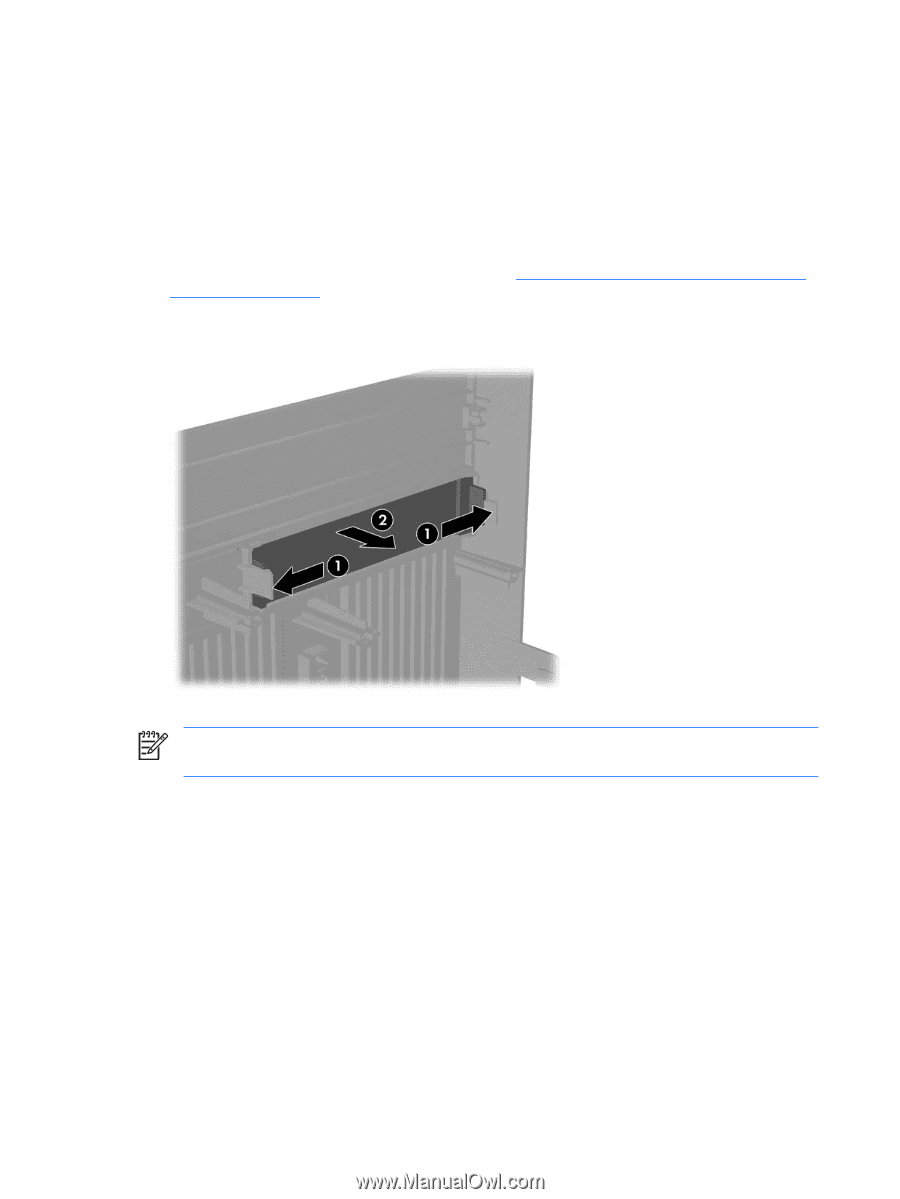
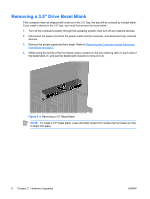
Removing a 3.5
 |
UPC - 883585243983
View all HP Dx2250 manuals
Add to My Manuals
Save this manual to your list of manuals |
Page 12 highlights
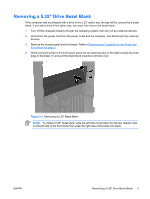
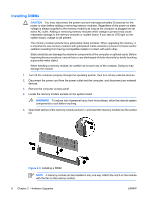
Removing a 3.5" Drive Bezel Blank If the computer was not shipped with a device in the 3.5" bay, the bay will be covered by a bezel blank. If you install a device in the 3.5" bay, you must first remove the bezel blank. 1. Turn off the computer properly through the operating system, then turn off any external devices. 2. Disconnect the power cord from the power outlet and the computer, and disconnect any external devices. 3. Remove the access panel and front bezel. Refer to Removing the Computer Access Panel and Front Bezel on page 3. 4. While facing the inside of the front bezel, press outward on the two retaining tabs on each side of the bezel blank (1) and pull the bezel blank inwards to remove it (2). Figure 2-4 Removing a 3.5" Bezel Blank NOTE To install a 3.5" bezel blank, press the blank inward from inside the front bezel so that it snaps into place. 6 Chapter 2 Hardware Upgrades ENWW
-
 1
1 -
2
-
3
-
4
-
5
-
6
-
 7
7 -
 8
8 -
 9
9 -
 10
10 -
 11
11 -
 12
12 -
 13
13 -
 14
14 -
 15
15 -
 16
16 -
 17
17 -
18
-
19
-
20
-
21
-
22
-
23
-
24
-
25
-
26
-
27
-
28
-
29
 |
 |