HP E344c User Guide - Page 14
Connecting the cables, IMPORTANT - manual
 |
View all HP E344c manuals
Add to My Manuals
Save this manual to your list of manuals |
Page 14 highlights
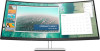
3. Attach the monitor to the wall or swing arm of your choice by inserting the four VESA screws provided with the VESA mounting bracket. IMPORTANT: Use the four new VESA screws that are attached to the new mounting bracket. Do not reuse the four VESA screws that you removed from the back of the monitor head. These screws are not long enough to provide a secure connection. Connecting the cables NOTE: The monitor ships with select cables. Not all cables shown in this section are included with the monitor. 1. Place the monitor in a convenient, well-ventilated location near the computer. 2. Before connecting the cables, route the cables through the cable routing hole in the center of the stand. 3. Connect a video cable. NOTE: The monitor automatically determines which inputs have valid video signals. To select any input manually, open the OSD and select Input. ● Connect one end of a DisplayPort cable to the DisplayPort connector on the rear of the monitor and the other end to the DisplayPort connector on the source device. 8 Chapter 1 Getting Started
-
 1
1 -
2
-
3
-
4
-
5
-
6
-
7
-
8
-
 9
9 -
 10
10 -
 11
11 -
 12
12 -
 13
13 -
 14
14 -
 15
15 -
 16
16 -
 17
17 -
 18
18 -
 19
19 -
20
-
21
-
22
-
23
-
24
-
25
-
26
-
27
-
28
-
29
-
30
-
31
-
32
-
33
-
34
-
35
-
36
 |
 |
