HP EliteBook 735 Maintenance and Service Guide
HP EliteBook 735 Manual
 |
View all HP EliteBook 735 manuals
Add to My Manuals
Save this manual to your list of manuals |
HP EliteBook 735 manual content summary:
- HP EliteBook 735 | Maintenance and Service Guide - Page 1
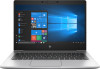
Maintenance and Service Guide HP EliteBook 735 G6 Notebook PC - HP EliteBook 735 | Maintenance and Service Guide - Page 2
updates. Go to http://www.microsoft.com for details. To access the latest user guides, go to http://www.hp.com/support, and follow the instructions to find your product. Then select User Guides. Software terms By installing, copying, downloading, or otherwise using any software product preinstalled - HP EliteBook 735 | Maintenance and Service Guide - Page 3
-Repair Parts IMPORTANT: Your computer includes Customer Self-Repair parts and parts that should be accessed only by an authorized service provider. See Chapter 5, "Removal and replacement procedures for Customer SelfRepair parts," for details. Accessing parts described in Chapter 6, "Removal and - HP EliteBook 735 | Maintenance and Service Guide - Page 4
iv Important Notice about Customer Self-Repair Parts - HP EliteBook 735 | Maintenance and Service Guide - Page 5
Safety warning notice WARNING! To reduce the possibility of heat-related injuries or of overheating the device, do not place the device directly on your lap or obstruct the device air vents. Use the device only on a hard, flat surface. Do not allow another hard surface, such as an adjoining optional - HP EliteBook 735 | Maintenance and Service Guide - Page 6
vi Safety warning notice - HP EliteBook 735 | Maintenance and Service Guide - Page 7
area ...11 Touchpad ...11 Lights ...12 Buttons, speakers, and fingerprint reader 13 Hot keys (select products only) ...14 Special keys ...15 Bottom ...16 Front replacement procedures preliminary requirements 27 Tools required ...27 Service considerations ...27 Plastic parts ...27 Cables and - HP EliteBook 735 | Maintenance and Service Guide - Page 8
module ...39 Keyboard ...41 6 Removal and replacement procedures for authorized service provider parts 44 Component replacement procedures ...44 Battery ...45 RJ-45 and audible codes 76 8 Computer Setup (BIOS), TPM, and HP Sure Start 78 Using Computer Setup ...78 Starting Computer Setup ...78 - HP EliteBook 735 | Maintenance and Service Guide - Page 9
Recovery media 88 Changing the computer boot order 88 Using HP Sure Recover (select products only 89 11 Specifications ...90 Computer specifications ...90 33.8 cm (13.3 in) display specifications ...91 M.2 SATA solid-state drive specifications ...91 M.2 PCIe solid-state drive specifications ...92 - HP EliteBook 735 | Maintenance and Service Guide - Page 10
13 Statement of memory volatility ...96 Nonvolatile memory usage ...98 Questions and answers ...100 Using HP Sure Start (select models only) ...101 14 Recycling ...102 Index ...103 x - HP EliteBook 735 | Maintenance and Service Guide - Page 11
Name HP EliteBook 735 G6 Supports HD decode, DX12, HDMI 2.0, HDCP 2.2 via HMDI/DisplayPort™ up to 4K @ 60 Hz Supports four independent displays through docking stations as follows: ● HP UltraSlim Docking Station HD + IR camera, with WWAN 33.8 cm (13.3 in), FHD (1920 × 1080), UWVA, touch screen - HP EliteBook 735 | Maintenance and Service Guide - Page 12
wake on (via out of band): HP USB-C Dock G4, HP Thunderbolt Dock 120 W G2, HP USB-C Mini Dock The following support S0/S3/S4/S5 MAPT (via out of band): HP USB-C Dock G4, HP Thunderbolt Dock 120 W G2, HP USB-C Mini Dock, HP USB-C Dock G5, HP USB-C/A Universal Dock G2 Wireless networking Bluetooth - HP EliteBook 735 | Maintenance and Service Guide - Page 13
Supports HP Connection Optimizer with data analytics Support S3/S4 wake on Wireless LAN Supports HP LAN-Wireless Protection (WLAN/LAN/WWAN switching) Support Static BIOS SAR for Intel and Realtek modules Support connector RJ-45 (network) connector Docking connector Audio-out (headphone)/audio- - HP EliteBook 735 | Maintenance and Service Guide - Page 14
Microsoft® precison touchpad default gestures Firmware PTP (Point to Point) with Filter Driver Support for No Hybrid Mode Power requirements Battery HP Long Life Lithium Polymer Soft Pack Battery, 3 cell, 50 Wh HP Fast Charge Technology AC adapter 65 W Smart right angle, 4.5 mm 65 W Smart - HP EliteBook 735 | Maintenance and Service Guide - Page 15
FreeDOS 3.0 Restore media Windows 10 Driver DVD Windows 10 Driver USB Windows 10 Professional 64-bit OS DVD Windows 10 Professional 64-bit OS USB Certified Microsoft WHQL Web-only support Windows 10 Enterprise 64 Windows 10 Pro 64 CBB 1803 Serviceability End user replaceable parts AC - HP EliteBook 735 | Maintenance and Service Guide - Page 16
Table 1-1 Product components and their descriptions (continued) Category Description WWAN module Keyboard 6 Chapter 1 Product description - HP EliteBook 735 | Maintenance and Service Guide - Page 17
Also connects an optional headset microphone. This jack does not support optional standalone microphones. WARNING! To reduce the risk of personal Environmental Notices. To access this guide: ▲ Type HP Documentation in the taskbar search box, and then select HP Documentation. NOTE: When a - HP EliteBook 735 | Maintenance and Service Guide - Page 18
Table 2-1 Right-side components and their descriptions (continued) Component Description (6) Docking connector Connects an optional docking device. (7) USB Type-C SuperSpeed port and DisplayPort When the computer is on, connects and charges most USB connector devices that have a Type-C - HP EliteBook 735 | Maintenance and Service Guide - Page 19
internal components and prevent overheating. It is normal for the internal fan to cycle on and off during routine operation. (3) USB SuperSpeed port with HP Sleep and Charge Connects a USB device, provides high-speed data transfer, and even when the computer is off, charges most products such as - HP EliteBook 735 | Maintenance and Service Guide - Page 20
Display Table 2-3 Display components and their descriptions Component Description (1) WWAN antennas* (select products only) Send and receive wireless signals to communicate with wireless wide area networks (WWANs). (2) Ambient light sensor (select products only) Adjusts the brightness of - HP EliteBook 735 | Maintenance and Service Guide - Page 21
Table 2-3 Display components and their descriptions (continued) Component Description To access this guide: ▲ Type HP Documentation in the taskbar search box, and then select HP Documentation. Keyboard area Touchpad Table 2-4 Touchpad components and their descriptions Component Description - HP EliteBook 735 | Maintenance and Service Guide - Page 22
Lights Table 2-5 Lights and their descriptions Component (1) Power light (2) Caps lock light (3) Fn lock light (4) Mute light (5) Microphone mute light (6) Num lk light (7) Wireless light (8) Sharing or presenting light Description ● On: The computer is on. ● Blinking: The - HP EliteBook 735 | Maintenance and Service Guide - Page 23
the power button for at least 5 seconds to turn off the computer. To learn more about your power settings, see your power options. Keyboard area 13 - HP EliteBook 735 | Maintenance and Service Guide - Page 24
reader and not an insert, press the Windows key on your keyboard, select Settings, select Accounts, select Sign-in options and then follow the onscreen instructions. Hot keys (select products only) A hot key is the combination of the fn key and another key. To use a hot key: ▲ Press the fn key - HP EliteBook 735 | Maintenance and Service Guide - Page 25
Special keys Table 2-8 Special keys and their descriptions Component Description (1) esc key Displays system information when pressed in combination with the fn key. (2) fn key Executes frequently used system functions when pressed in combination with another key. Such key combinations are - HP EliteBook 735 | Maintenance and Service Guide - Page 26
Bottom Table 2-9 Bottom components and their descriptions Component Description Vent Enables airflow to cool internal components. NOTE: The computer fan starts up automatically to cool internal components and prevent overheating. It is normal for the internal fan to cycle on and off during - HP EliteBook 735 | Maintenance and Service Guide - Page 27
on. NOTE: On some models, the wireless light is amber when all wireless devices are off. ● Blinking white: The hard drive is being accessed. ● Amber: HP 3D DriveGuard has temporarily parked the hard drive. Record sound. Front 17 - HP EliteBook 735 | Maintenance and Service Guide - Page 28
you may need when you troubleshoot system problems or travel internationally with the computer support. Table 2-11 Service label components Component (1) HP product name (2) Model number (3) Product ID (4) Serial number (5) Warranty period Table 2-12 Service label components Component (1) HP - HP EliteBook 735 | Maintenance and Service Guide - Page 29
Table 2-12 Service label components (continued) Component (3) Serial number (4) Warranty period ● Regulatory label(s)-Provide(s) regulatory information about the computer. ● Wireless certification label(s)-Provide(s) information about optional wireless devices - HP EliteBook 735 | Maintenance and Service Guide - Page 30
improves and changes product parts. For complete and current information about supported parts for your computer, go to http://partsurfer.hp.com, select your country or region, and then follow the on-screen instructions. NOTE: Details about your computer, including model, serial number, product key - HP EliteBook 735 | Maintenance and Service Guide - Page 31
Smart card reader board L60626-001 (11) NFC module (includes antenna cable and foam) L64720-001 (12) Speakers (includes cable) L13684-001 (13) System board (includes processor and replacement thermal material, see System board on page 59): All system boards use the following part numbers - HP EliteBook 735 | Maintenance and Service Guide - Page 32
Computer major components and their descriptions (continued) Item Component Intel Intel Wireless-AC 9260 802.11ac 2 × 2 Wi-Fi + Bluetooth 5.0 (non-vPro, supporting Gigabit Wi-Fi speeds) Intel Wi-Fi 6 AX200 802.11ax 2 × 2 + Bluetooth 5.0 (non-vPro) (16) Solid-state drive (SSD): 1 TB, PCIe, TLC - HP EliteBook 735 | Maintenance and Service Guide - Page 33
Display assembly subcomponents Item Component Spare part number (1) Bezel: For use in models with microphone modules L60617-001 For use in models with an HD camera (includes camera privacy cover) L60618-001 For use in models with an IR camera (includes camera privacy cover) L60619-001 - HP EliteBook 735 | Maintenance and Service Guide - Page 34
Item (3) (4) (5) (6) (7) (8) (9) (10) (11) (12) Component FHD, non-touch, 250 nits FHD, non-touch, for use in models with an IR camera and ambient light sensor, 400 nits FHD, touch-on panel (TOP), 250 nits FHD, non-touch, privacy, 1000 nits Camera module (includes microphone): IR camera HD camera - HP EliteBook 735 | Maintenance and Service Guide - Page 35
parts Component AC adapter, non-PFC, 4.5 mm: 65 W HP Smart AC adapter, 3 prong 65 W HP Smart AC Adapter for use in Argentina 65 W HP Smart AC adapter, EM 65 W, wall mount, 3 pin, USB-C, 1.8 m 45 W HP Smart AC adapter, 2 prong 45 W HP Smart AC Adapter 45 W HP Smart AC Adapter for use in Argentina 45 - HP EliteBook 735 | Maintenance and Service Guide - Page 36
Kit (includes system board and heat sink shield absorber and solid-state drive shield absorber) L68814-001 Bracket Kit (includes USB support bracket and fingerprint reader bracket) L65688-001 Screw Kit L13696-001 Pointing stick covers L15396-001 26 Chapter 3 Illustrated parts catalog - HP EliteBook 735 | Maintenance and Service Guide - Page 37
damage. Plastic parts IMPORTANT: Using excessive force during disassembly and reassembly can damage plastic parts. Cables and connectors IMPORTANT: When servicing the computer, be sure that cables are placed in their proper locations during the reassembly process. Improper cable placement can damage - HP EliteBook 735 | Maintenance and Service Guide - Page 38
a wrist strap connected to a properly grounded work surface and use properly grounded tools and equipment. ● Use conductive field service tools, such as cutters, screw drivers, and vacuums. ● When fixtures must directly contact dissipative surfaces, use fixtures made only of static-safe materials - HP EliteBook 735 | Maintenance and Service Guide - Page 39
with conductive or approved containers or packaging. ● Keep electrostatic-sensitive parts in their containers until they arrive at static-free stations. ● Place items on a grounded surface before removing them from their container. ● Always be properly grounded when touching a sensitive component or - HP EliteBook 735 | Maintenance and Service Guide - Page 40
materials such as ordinary plastic assembly aids and polystyrene foam. ● Use field service tools, such as cutters, screwdrivers, and vacuums, that are conductive. Recommended materials and equipment HP recommends the following materials and equipment to prevent static electricity: ● Antistatic tape - HP EliteBook 735 | Maintenance and Service Guide - Page 41
● Static-dissipative table or floor mats with hard tie to ground ● Field service kits ● Static awareness labels ● Wrist straps and footwear straps providing 1 MΩ ±10% resistance ● Material handling packages ● Conductive plastic bags ● Conductive plastic tubes ● Conductive tote boxes ● Opaque - HP EliteBook 735 | Maintenance and Service Guide - Page 42
and current information about supported parts for your computer, go to http://partsurfer.hp.com, select your country or region, and then follow the on-screen instructions. There are as many as 16 screws that must be removed, replaced, and/or loosened when servicing Customer Self-Repair parts - HP EliteBook 735 | Maintenance and Service Guide - Page 43
2. Loosen the six captive screws (1) and the two inset captive screws (2) that secure the bottom cover. 3. Starting under the display (1), pry and lift the bottom cover off the computer (2). Reverse the removal procedures to install the bottom cover. Component replacement procedures 33 - HP EliteBook 735 | Maintenance and Service Guide - Page 44
Solid-state drive (SSD) Table 5-2 Solid-state drive descriptions and part numbers Description 1 TB, PCIe, TLC 512 GB, PCIe, TLC 512 GB, PCIe, self-encrypting drive (SED), Opal 2, TLC 512 GB, PCIe, value 256 GB, PCIe, NVMe, TLC 256 GB, PCIe, NVMe, value 256 GB, SATA-3, self-encrypting drive (SED), - HP EliteBook 735 | Maintenance and Service Guide - Page 45
850 937236-850 937438-850 IMPORTANT: Before adding new memory, make sure you update the computer to the latest BIOS, available at www.hp.com. Before removing the memory module, follow these steps: 1. Prepare the computer for disassembly (Preparation for disassembly on page 32). 2. Remove the bottom - HP EliteBook 735 | Maintenance and Service Guide - Page 46
2. Remove the memory module (2) by pulling the module away from the slot at an angle. IMPORTANT: Do not remove memory shielding from the system board when replacing memory. NOTE: The computer uses two memory sockets. The socket labeled 2 houses the expansion memory module and the socket labeled 1 - HP EliteBook 735 | Maintenance and Service Guide - Page 47
Realtek RTL8822BE 802.11ac 2 × 2 Wi-Fi + Bluetooth 4.2 Combo Adapter Intel Intel Wireless-AC 9260 802.11ac 2 × 2 Wi-Fi + Bluetooth 5.0 (non-vPro, supporting Gigabit Wi-Fi speeds) Intel Wi-Fi 6 AX200 802.11ax 2 × 2 + Bluetooth 5.0 (non-vPro) Spare part number 915623-001 920687-001 L35282-002 Before - HP EliteBook 735 | Maintenance and Service Guide - Page 48
3. Remove the WLAN module by pulling the module away from the slot at an angle (3). NOTE: WLAN modules are designed with a notch to prevent incorrect insertion. NOTE: If the WLAN antennas are not connected to the terminals on the WLAN module, the protective sleeves must be installed on the antenna - HP EliteBook 735 | Maintenance and Service Guide - Page 49
WWAN module The WLAN module and WWAN module are not interchangeable. The WWAN module is available on select models only. Table 5-5 WWAN module descriptions and part numbers Description Intel XMM 7360 LTE-Advanced (CAT 9) Spare part number L15398-001 Before removing the WWAN module, follow these - HP EliteBook 735 | Maintenance and Service Guide - Page 50
4. Remove the WWAN module (3) by pulling the module away from the slot at an angle. NOTE: WWAN modules are designed with a notch to prevent incorrect insertion. NOTE: If the WWAN antennas are not connected to the terminals on the WWAN module, the protective sleeves must be installed on the antenna - HP EliteBook 735 | Maintenance and Service Guide - Page 51
Keyboard In this section, the first table provides the main spare part number for the keyboards. The second table provides the country codes. Table 5-6 Keyboard descriptions and part numbers Description Spare part number Keyboard, no backlight L13698-xx1 Keyboard, backlit L13697-xx1 - HP EliteBook 735 | Maintenance and Service Guide - Page 52
2. Insert a screwdriver or similar thin tool into the hole near the fan, and then press on the back of the keyboard until it disengages from the computer (2). NOTE: Cables connect the bottom of the keyboard to the system board. Make sure not to prematurely pull the keyboard cables out of the system - HP EliteBook 735 | Maintenance and Service Guide - Page 53
4. Pry and lift to disengage the top of the keyboard (1), and then lift the rear of the keyboard (2). 5. Rotate the keyboard onto the palm rest (1). 6. Disconnect the keyboard cable from the system board ZIF connector (2). 7. Disconnect the pointing stick cable from the system board ZIF connector - HP EliteBook 735 | Maintenance and Service Guide - Page 54
current information about supported parts for your computer, go to http://partsurfer.hp.com, select your country or region, and then follow the on-screen instructions. There are as many as 77 screws that must be removed, replaced, and/or loosened when servicing Authorized Service Provider only parts - HP EliteBook 735 | Maintenance and Service Guide - Page 55
Battery Table 6-1 Battery description and part number Description Battery, 3 cell, 50 Wh, 4.33 Ah Spare part number 933321-855 NOTE: HP recommends that the battery power cable be disconnected from the system board before removing any part. You can disconnect the cable without removing the battery. - HP EliteBook 735 | Maintenance and Service Guide - Page 56
the computer (3), and then rotate the battery into place. Reverse the removal procedures to install the battery. 46 Chapter 6 Removal and replacement procedures for authorized service provider parts - HP EliteBook 735 | Maintenance and Service Guide - Page 57
RJ-45 board with bracket Table 6-2 RJ-45 board with bracket description and part number Description RJ-45 board with bracket Spare part number L19425-001 Before removing the RJ-45 board and bracket, follow these steps: 1. Prepare the computer for disassembly (Preparation for disassembly on page 32 - HP EliteBook 735 | Maintenance and Service Guide - Page 58
damaged and bent during removal. Do not remove the shielding from the thermal module or heat pipe. 48 Chapter 6 Removal and replacement procedures for authorized service provider parts - HP EliteBook 735 | Maintenance and Service Guide - Page 59
2. Thoroughly clean the thermal material from the surfaces of the system board components (1) and the heat sink (2) each time the heat sink is removed. Replacement thermal material is included with the heat sink and system board spare part kits. Reverse this procedure to install the heat sink. - HP EliteBook 735 | Maintenance and Service Guide - Page 60
a flat tool (2), pry the battery out of the computer (3). Reverse this procedure to install the RTC battery. 50 Chapter 6 Removal and replacement procedures for authorized service provider parts - HP EliteBook 735 | Maintenance and Service Guide - Page 61
Power button board Table 6-5 Power button board description and part number Description Power button board assembly Power button board cable Spare part number L60628-001 L60602-001 (Cable Kit) Before removing the power button board, follow these steps: 1. Prepare the computer for disassembly ( - HP EliteBook 735 | Maintenance and Service Guide - Page 62
speaker to the computer. 3. Remove the speaker from the computer (4). Reverse this procedure to install the speaker. 52 Chapter 6 Removal and replacement procedures for authorized service provider parts - HP EliteBook 735 | Maintenance and Service Guide - Page 63
Touchpad Table 6-7 Touchpad and cable descriptions and part numbers Description Touchpad without NFC antenna Touchpad with NFC antenna Touchpad cable Spare part number L60597-001 L60598-001 L60602-001 (Cable Kit) Before removing the touchpad, follow these steps: 1. Prepare the computer for - HP EliteBook 735 | Maintenance and Service Guide - Page 64
remove the touchpad button board from the computer (3). Reverse this procedure to install the touchpad button board. 54 Chapter 6 Removal and replacement procedures for authorized service provider parts - HP EliteBook 735 | Maintenance and Service Guide - Page 65
NFC module Table 6-9 NFC module and cable descriptions and part numbers Description NFC module (includes antenna cable and foam) Spare part number L64720-001 Before removing the NFC module, follow these steps: 1. Prepare the computer for disassembly (Preparation for disassembly on page 32). 2. - HP EliteBook 735 | Maintenance and Service Guide - Page 66
. 4. Remove the smart card reader from the computer (4). Reverse this procedure to install the smart card reader. 56 Chapter 6 Removal and replacement procedures for authorized service provider parts - HP EliteBook 735 | Maintenance and Service Guide - Page 67
Fan Table 6-11 Fan description and part number Description Fan Spare part number L60624-001 Before removing the fan, follow these steps: 1. Prepare the computer for disassembly (Preparation for disassembly on page 32). 2. Remove the bottom cover (see Bottom cover on page 32). 3. Remove the - HP EliteBook 735 | Maintenance and Service Guide - Page 68
6. Remove the fan from the computer (3). Reverse this procedure to install the fan. 58 Chapter 6 Removal and replacement procedures for authorized service provider parts - HP EliteBook 735 | Maintenance and Service Guide - Page 69
System board NOTE: All system board spare part kits include replacement thermal material. All system boards use the following part numbers: xxxxxx-001: Non-Windows operating systems xxxxxx-601: Windows operating system Table 6-12 System board descriptions and part numbers Description AMD Ryzen 7 PRO - HP EliteBook 735 | Maintenance and Service Guide - Page 70
2. Remove the two Phillips M2.5 × 3.0 screws that secure the system board to the computer. 3. Close the computer and position it upside down. 60 Chapter 6 Removal and replacement procedures for authorized service provider parts - HP EliteBook 735 | Maintenance and Service Guide - Page 71
4. Disconnect the following cables from the system board: (1) Speaker cable (2) Display cable (3) Camera cable (4) Power button board cable (ZIF) (5) Smart card reader cable (ZIF) (6) NFC module cable (ZIF) (7) Fingerprint reader cable (reverse ZIF) (8) RTC battery cable Component replacement - HP EliteBook 735 | Maintenance and Service Guide - Page 72
to disengage the connectors from the left side of the computer, and then remove the system board (2). 62 Chapter 6 Removal and replacement procedures for authorized service provider parts - HP EliteBook 735 | Maintenance and Service Guide - Page 73
8. If you need to remove the USB connector bracket, lift the bracket off the system board. IMPORTANT: Be sure to install the USB connector bracket onto the system board before installing the system board into the computer. The bracket cannot be installed after installing the system board. Reverse - HP EliteBook 735 | Maintenance and Service Guide - Page 74
Fingerprint reader assembly Table 6-13 Fingerprint reader assembly, bracket, gasket and cable descriptions and part numbers Description Spare part number from on top of the fingerprint reader assembly (2). 64 Chapter 6 Removal and replacement procedures for authorized service provider parts - HP EliteBook 735 | Maintenance and Service Guide - Page 75
3. Use a tool to release the fingerprint reader board from the computer (1), and then remove the assembly from the computer (2). Reverse this procedure to install the fingerprint reader assembly. Component replacement procedures 65 - HP EliteBook 735 | Maintenance and Service Guide - Page 76
positioned off the edge of the table (1). 5. Remove the five Phillips M2.5 × 4.0 screws (2) from the display hinges. 66 Chapter 6 Removal and replacement procedures for authorized service provider parts - HP EliteBook 735 | Maintenance and Service Guide - Page 77
6. Lift the display assembly straight up and remove it (3). IMPORTANT: When installing the display assembly, be sure that the wireless antenna cables are routed and arranged properly. Failure to properly route the antennas can result in degradation of the computer's wireless performance. 7. If you - HP EliteBook 735 | Maintenance and Service Guide - Page 78
the display enclosure (1), disconnect the cable from the module (2), and then remove the module from the display (3). 68 Chapter 6 Removal and replacement procedures for authorized service provider parts - HP EliteBook 735 | Maintenance and Service Guide - Page 79
The HD camera module is available as spare part number L60622-001. The microphone module is available as spare part number L60630-001. b. IR camera Remove the tape from on top of the module (1), lift upward to disengage the module from the adhesive on the display enclosure (2), disconnect the cables - HP EliteBook 735 | Maintenance and Service Guide - Page 80
that secure the panel to the display enclosure. 12. Rotate the display panel over onto the keyboard (1). 70 Chapter 6 Removal and replacement procedures for authorized service provider parts - HP EliteBook 735 | Maintenance and Service Guide - Page 81
13. On the back of the display panel, lift the tape from on top of the connector (2), and then disconnect the display cable from the rear - HP EliteBook 735 | Maintenance and Service Guide - Page 82
the camera cable: Camera cables are available in the Cable Kit as spare part number L60602-001. 72 Chapter 6 Removal and replacement procedures for authorized service provider parts - HP EliteBook 735 | Maintenance and Service Guide - Page 83
a. HD camera models Disconnect the cable from the camera (1), and then remove the cable from the display enclosure (2). b. IR camera models Disconnect the cable from the ambient light sensor board (1), from the left (2) and right (3) sides of the IR camera, and then remove the cable from the display - HP EliteBook 735 | Maintenance and Service Guide - Page 84
available as spare part number L60615-001. Reverse this procedure to reassemble and install the display assembly. 74 Chapter 6 Removal and replacement procedures for authorized service provider parts - HP EliteBook 735 | Maintenance and Service Guide - Page 85
Top cover Table 6-14 Top cover description and part number Description Top cover (includes power button) The top cover remains after removing all other spare parts from the computer. Spare part number L62281-001 Component replacement procedures 75 - HP EliteBook 735 | Maintenance and Service Guide - Page 86
7 Interpreting system validation diagnostic front panel LEDs and audible codes During the system validation phase that occurs at system startup, the BIOS validates the functionality of the following subsystems and conditions: ● AC adapter ● System board power ● Processor failure ● BIOS corruption ● - HP EliteBook 735 | Maintenance and Service Guide - Page 87
2.2 - Power Follow the Crisis Recovery instructions at become corrupted and there is Blink = 2 LED http://support.hp.com/us-en/document/ no recovery (red.white) board most likely needs to be replaced. initialization ( 4/13- Graphics adaptor not found) 3.4 The system board displays a CAP/NUM - HP EliteBook 735 | Maintenance and Service Guide - Page 88
Starting Computer Setup ▲ Turn on or restart the computer, and when the HP logo appears, press f10 to enter Computer Setup. Navigating and selecting in main Computer Setup screen, press esc, and then follow the on-screen instructions. To exit Computer Setup, choose one of the following methods: ● To - HP EliteBook 735 | Maintenance and Service Guide - Page 89
in the taskbar search box, and then select the HP Support Assistant app. - or - Select the question mark icon in the taskbar. 2. Select Updates, and then select Check for updates and messages. 3. Follow the on-screen instructions. 4. At the download area, follow these steps: Using Computer Setup - HP EliteBook 735 | Maintenance and Service Guide - Page 90
Device Options menu: ● Turn on or restart the computer, and when the HP logo appears, press f9 to enter the Boot Device Options menu. 2. Select a boot device, press enter, and then follow the on-screen instructions. TPM BIOS settings (select products only) IMPORTANT: Before enabling Trusted Platform - HP EliteBook 735 | Maintenance and Service Guide - Page 91
Sure Start default configuration. The default configuration can be customized by advanced users. To access the latest documentation on HP Sure Start, go to http://www.hp.com/support. Select Find your product, and then follow the on-screen instructions. Using HP Sure Start (select products only) 81 - HP EliteBook 735 | Maintenance and Service Guide - Page 92
device, scan the code and then follow the onscreen instructions. ● Instructions for calling support are displayed. Follow those instructions. Downloading HP PC Hardware Diagnostics Windows ● The HP PC Hardware Diagnostics Windows download instructions are provided in English only. ● You must use - HP EliteBook 735 | Maintenance and Service Guide - Page 93
the problem: ▲ Select Get Support, and then use a mobile device to scan the QR code that displays on the next screen. The HP Customer Support - Service Center page appears with your Failure ID and product number automatically filled in. Follow the on-screen instructions. - or - Contact support, and - HP EliteBook 735 | Maintenance and Service Guide - Page 94
Diagnostics UEFI is not included in the HP Tool partition. ● The hard drive is damaged. NOTE: The HP PC Hardware Diagnostics UEFI download instructions are provided in English only, and you must use a Windows computer to download and create the HP UEFI support environment because only .exe files are - HP EliteBook 735 | Maintenance and Service Guide - Page 95
, follow these steps: 1. Go to http://www.hp.com/support. 2. Select Get software and drivers, select your type of product, enter the product instructions to select and download the Remote UEFI version for the product. Customizing Remote HP PC Hardware Diagnostics UEFI settings Using the Remote HP - HP EliteBook 735 | Maintenance and Service Guide - Page 96
PC Hardware Diagnostics UEFI settings, follow these steps: 1. Turn on or restart the computer, and when the HP logo appears, press f10 to enter Computer Setup. 2. Select Advanced, and then select Settings. 3. Make your customization selections. 4. Select Main, and then Save Changes and - HP EliteBook 735 | Maintenance and Service Guide - Page 97
USB flash drive. To download the tool: ▲ Go to the Microsoft Store and search for HP Cloud Recovery. For details, go to http://www.hp.com/support, search for HP Cloud Recovery, and then select "HP PCs - Using the Cloud Recovery Tool (Windows 10, 7)." Backing up information and creating recovery - HP EliteBook 735 | Maintenance and Service Guide - Page 98
: If you cannot create recovery media yourself, contact support to obtain recovery discs. Go to http://www.hp.com/support, select your country or region, and then follow the on-screen instructions. To recover your system: ▲ Insert the HP Recovery media, and then restart the computer. Changing the - HP EliteBook 735 | Maintenance and Service Guide - Page 99
of the operating system ● Platform-specific device drivers ● Software applications, in the case of a custom image To access the latest documentation for HP Sure Recover, go to http://www.hp.com/support. Select Find your product, and then follow the on-screen instructions. Restoring and recovery 89 - HP EliteBook 735 | Maintenance and Service Guide - Page 100
11 Specifications Computer specifications Metric U.S. Dimensions Length 229.3 mm 9.03 in Width 310.4 mm 12.22 in Height (non-touch) 17.7 mm 0.70 in Height (touch) 17.85 mm 0.70 in Weight Non-touch display 1.33 kg 2.94 lbs Touch display 1.44 kg 3.18 lbs Input power Operating - HP EliteBook 735 | Maintenance and Service Guide - Page 101
Surface treatment Brightness Viewing angle Backlight Aspect ratio Display panel interface Metric U.S. 33.8 cm 13.3 in FHD: 1920 × 1080 Antiglare (except touch screen) FHD (45% CG and exclusions apply. Contact technical support for details. 33.8 cm (13.3 in) display specifications 91 - HP EliteBook 735 | Maintenance and Service Guide - Page 102
to 176°F) *1 GB = 1 billion bytes when referring to hard drive storage capacity. Actual accessible capacity is less. NOTE: Certain restrictions and exclusions apply. Contact technical support for details. 512 GB* 1 mm 50.8 mm 28.9 mm < 10 g ATA-7 Up to 2150 MB/s Up to 300,000 IOPs Up to 1550 MB - HP EliteBook 735 | Maintenance and Service Guide - Page 103
12 Power cord set requirements The wide-range input feature of the computer permits it to operate from any line voltage from 100 to 120 V ac, or from 220 to 240 V ac. The 3-conductor power cord set included with the computer meets the requirements for use in the country or region where the equipment - HP EliteBook 735 | Maintenance and Service Guide - Page 104
Requirements for specific countries and regions Table 12-1 Power cord requirements for specific countries and regions Country/region Accredited agency Applicable note number Argentina IRAM 1 Australia SAA 1 Austria OVE 1 Belgium CEBEC 1 Brazil ABNT 1 Canada CSA 2 Chile IMQ 1 - HP EliteBook 735 | Maintenance and Service Guide - Page 105
Table 12-1 Power cord requirements for specific countries and regions (continued) Country/region Accredited agency Applicable note number 2. The flexible cord must be Type SVT/SJT or equivalent, No. 18 AWG, 3-conductor. The wall plug must be a two-pole grounding type with a NEMA 5-15P (15 A, 125 - HP EliteBook 735 | Maintenance and Service Guide - Page 106
13 Statement of memory volatility The purpose of this chapter is to provide general information regarding nonvolatile memory in HP Business computers. This chapter also provides general instructions for restoring nonvolatile memory that can contain personal data after the system has been powered off - HP EliteBook 735 | Maintenance and Service Guide - Page 107
Utilities. d. Under Utilities, select Secure Erase, select the hard drive storing the data you want to clear, and then follow the on-screen instructions to continue. - or - ● Clear the contents of the drive using the following Disk Sanitizer commands steps: IMPORTANT: If you clear data using Disk - HP EliteBook 735 | Maintenance and Service Guide - Page 108
and then follow the on-screen instructions to continue. Nonvolatile memory usage Table 13-1 Troubleshooting steps for nonvolatile memory usage Nonvolatile configuration data for select platforms that support HP Sure Start. For more information, see Using HP Sure Start (select models only) - HP EliteBook 735 | Maintenance and Service Guide - Page 109
13-1 Troubleshooting on the HP website; go to http://www.hp.com/ support. Select Find your product, and then follow the on-screen instructions. Intel Management through newer available but can be obtained versions of the driver from the silicon vendor. whenever the flash requires an upgrade. - HP EliteBook 735 | Maintenance and Service Guide - Page 110
13-1 Troubleshooting programmed by user enrollment in HP ProtectTools Security Manager. Only a on-screen instructions. d. Select Main, select Save Changes and Exit, and then follow the on-screen instructions. 2. What for the older BIOS architecture, but supports much of the legacy BIOS functionality. - HP EliteBook 735 | Maintenance and Service Guide - Page 111
can use the HP Sure Start default configuration. The default configuration can be customized by advanced users. To access the latest documentation on HP Sure Start, go to http://www.hp.com/support. Select Find your product, and then follow the on-screen instructions. Using HP Sure Start (select - HP EliteBook 735 | Maintenance and Service Guide - Page 112
dispose of the battery in general household waste. Follow the local laws and regulations in your area for battery disposal. HP encourages customers to recycle used electronic hardware, HP original print cartridges, and rechargeable batteries. For more information about recycling programs, see the - HP EliteBook 735 | Maintenance and Service Guide - Page 113
number 22, 32 buttons left touchpad 11 power 13 right touchpad 11 C call answer light 13 call end light 13 camera 10 identifying 10 camera cable spare part 1 display specifications 91 DisplayPort, identifying USB Type- C8 docking connector, identifying 8 drive light, identifying 17 E electrostatic - HP EliteBook 735 | Maintenance and Service Guide - Page 114
serial number 18 service 18 wireless certification 19 WLAN 19 left side components 9 lights AC adapter and battery 8 battery 8 call answer 13 call end 13 camera 10 caps 7 product description 3 USB SuperSpeed 7 USB SuperSpeed port with HP Sleep and Charge 9 USB Type-C SuperSpeed 8 power button board - HP EliteBook 735 | Maintenance and Service Guide - Page 115
primary storage 2 processors 1 product name 1 security 4 sensors 3 serviceability 5 video 2 wireless networking 2 product name 1 product name and number, computer 18 R raw panel spare part number 23 recovery 87 discs 88 HP Recovery partition 88 media 88 USB flash drive 88 recovery media creating - HP EliteBook 735 | Maintenance and Service Guide - Page 116
WWAN antenna spare part number 24 WWAN antennas, identifying 10 WWAN module removal 39 spare part number 22, 39 106 Index
-
 1
1 -
 2
2 -
 3
3 -
 4
4 -
 5
5 -
 6
6 -
 7
7 -
8
-
9
-
10
-
11
-
12
-
13
-
14
-
15
-
16
-
17
-
18
-
19
-
20
-
21
-
22
-
23
-
24
-
25
-
26
-
27
-
28
-
29
-
30
-
31
-
32
-
33
-
34
-
35
-
36
-
37
-
38
-
39
-
40
-
41
-
42
-
43
-
44
-
45
-
46
-
47
-
48
-
49
-
50
-
51
-
52
-
53
-
54
-
55
-
56
-
57
-
58
-
59
-
60
-
61
-
62
-
63
-
64
-
65
-
66
-
67
-
68
-
69
-
70
-
71
-
72
-
73
-
74
-
75
-
76
-
77
-
78
-
79
-
80
-
81
-
82
-
83
-
84
-
85
-
86
-
87
-
88
-
89
-
90
-
91
-
92
-
93
-
94
-
95
-
96
-
97
-
98
-
99
-
100
-
101
-
102
-
103
-
104
-
105
-
106
-
107
-
108
-
109
-
110
-
111
-
112
-
113
-
114
-
115
-
116
 |
 |

Maintenance and Service Guide
HP EliteBook 735 G6 Notebook PC