HP HP-380467-003 Upgrading and Servicing Guide - Page 12
Removing a Hard Disk Drive, The hard disk drive is preloaded with the system
 |
UPC - 846084030171
View all HP HP-380467-003 manuals
Add to My Manuals
Save this manual to your list of manuals |
Page 12 highlights
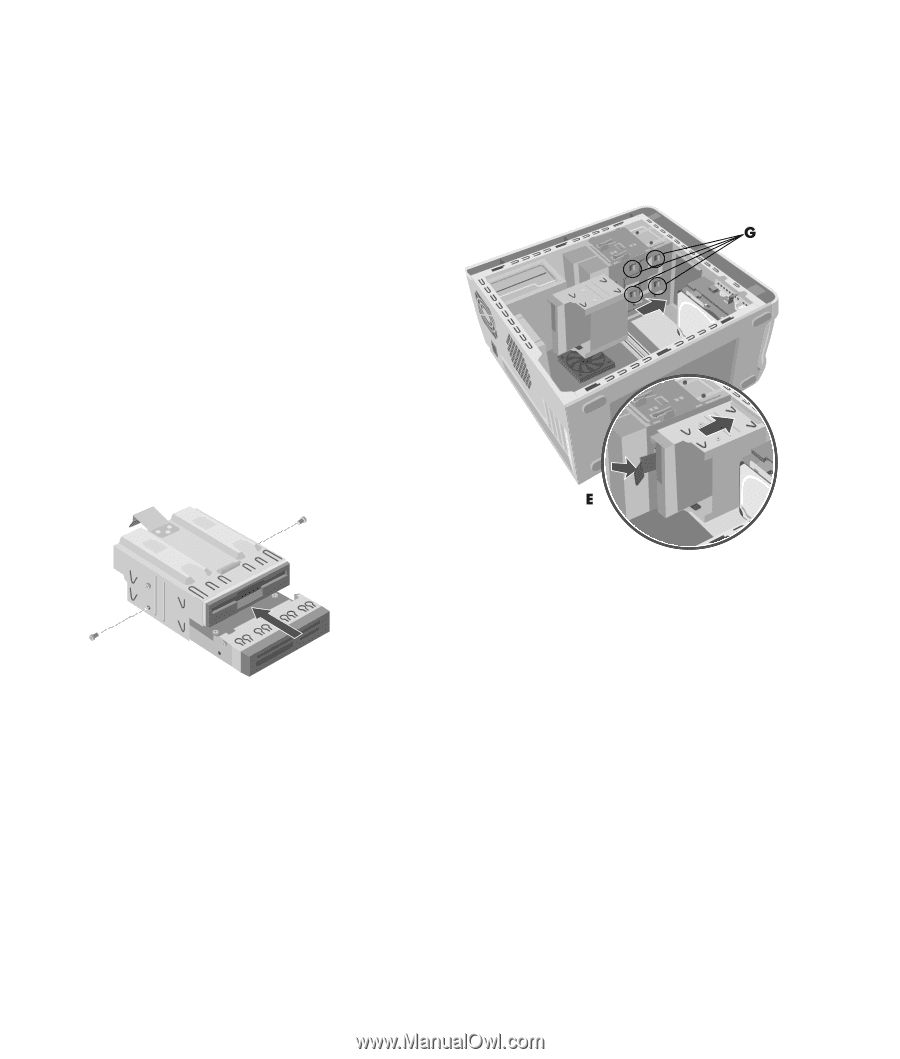
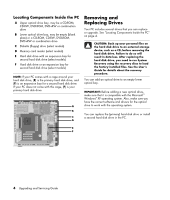
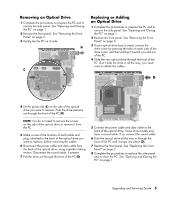
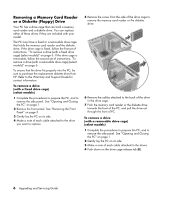
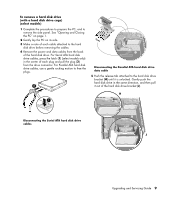
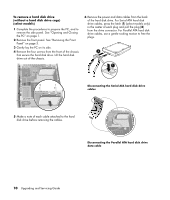
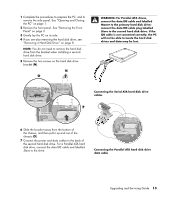
3 Attach the cables to the drive you are installing. 4 Insert the screw to secure the drive you are installing to the drive cage. 5 Replace the front panel. See "Replacing the Front Panel" on page 3. 6 Complete the procedures to replace the side panel, and to close the PC. See "Opening and Closing the PC" on page 1. To install a drive (with a removable drive cage) (select models) 1 To remove the drive or the drive cage when you are adding a drive, see "To remove a drive (with a removable drive cage) (select models)" on page 6. 2 If you are adding a drive, remove the faceplate of the drive bay. 3 Slide the replacement drive into the drive cage until the two screw holes on each side are aligned. 4 Insert the screws on each side of the drive cage. 5 Pull the drive cage release tab (E) back. Align the four holes on the top of the drive cage with the four hooks (G) on the bottom of the optical drive bracket. Slide the drive cage so that the hooks go into the holes on the drive cage, and then push the drive cage forward until it snaps into place. 8 Upgrading and Servicing Guide 6 Connect the cable to the back of the drives. 7 Complete the procedures to replace the side panel, and to close the PC. See "Opening and Closing the PC" on page 1. Removing a Hard Disk Drive The hard disk drive is preloaded with the system recovery partition of your PC. One of two types of hard disk drive is installed in your PC: a Serial ATA (advanced technology attachment) drive that uses a narrow data cable, or a Parallel ATA drive that uses a wide data cable. The hard disk drive of your PC may be located inside a cage. If it is, follow the first set of instructions, "To remove a hard disk drive (with a hard disk drive cage)" on page 9. If your hard disk drive is not located inside a cage, follow the second set of instructions, "To remove a hard disk drive (without a hard disk drive cage)" on page 10.
-
 1
1 -
2
-
3
-
4
-
5
-
6
-
 7
7 -
 8
8 -
 9
9 -
 10
10 -
 11
11 -
 12
12 -
 13
13 -
 14
14 -
 15
15 -
 16
16 -
 17
17 -
18
-
19
-
20
-
21
-
22
-
23
-
24
 |
 |