HP L1940T HP L1940T 19" LCD Monitor User Guide (Accessibility Enhanced)
HP L1940T - 19" LCD Monitor Manual
 |
UPC - 882780252936
View all HP L1940T manuals
Add to My Manuals
Save this manual to your list of manuals |
HP L1940T manual content summary:
- HP L1940T | HP L1940T 19" LCD Monitor User Guide (Accessibility Enhanced) - Page 1
User Guide HP L1940T 19" LCD Monitor Document Part Number: 407540-001 January 2006 This guide provides information on setting up the monitor, installing drivers, using the on-screen display menu, troubleshooting and technical specifications. Enhanced for Accessibility - HP L1940T | HP L1940T 19" LCD Monitor User Guide (Accessibility Enhanced) - Page 2
2006 Hewlett-Packard Development Company, L.P. The information contained herein is subject to change without notice. Microsoft, MS-DOS, Windows, and Windows NT equipment or loss of information. User Guide HP L1940T 19" LCD Monitor First Edition (January 2006) Document Part Number: 407540-001 - HP L1940T | HP L1940T 19" LCD Monitor User Guide (Accessibility Enhanced) - Page 3
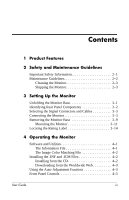
the Monitor Software and Utilities 4-1 The Information File 4-1 The Image Color Matching File 4-2 Installing the .INF and .ICM Files 4-2 Installing from the CD 4-2 Downloading from the Worldwide Web 4-3 Using the Auto-Adjustment Function 4-3 Front Panel Controls 4-5 User Guide iii - HP L1940T | HP L1940T 19" LCD Monitor User Guide (Accessibility Enhanced) - Page 4
sRGB ICM File for Microsoft Windows 2000 and Windows XP 4-16 A Troubleshooting Solving Common Problems A-1 Using the Worldwide Web A-3 Preparing to call Technical Support A-3 B Technical Specifications L1940T 19" LCD Monitor B-1 Recognizing Preset Display Resolutions B-2 Entering User Modes - HP L1940T | HP L1940T 19" LCD Monitor User Guide (Accessibility Enhanced) - Page 5
Contents Disposal of Waste Equipment by Users in Private Household in the European Union C-4 Japanese Notice C-5 Korean Notice C-5 ENERGY STAR Compliance C-5 Power Cord Set Requirements C-5 Japanese Power Cord Requirements C-6 D LCD Monitor Quality and Pixel Policy User Guide v - HP L1940T | HP L1940T 19" LCD Monitor User Guide (Accessibility Enhanced) - Page 6
Contents vi User Guide - HP L1940T | HP L1940T 19" LCD Monitor User Guide (Accessibility Enhanced) - Page 7
Features The flat panel display has an active matrix, thin-film transistor (TFT), liquid crystal display (LCD). The monitor features include: ■ 19-inch/48.3 cm viewable area display, with narrow bezels. ■ 1280 × 1024 native resolution, plus full-screen support for lower resolutions. ■ Wide viewing - HP L1940T | HP L1940T 19" LCD Monitor User Guide (Accessibility Enhanced) - Page 8
play capability if supported by your system. ■ On-Screen Display (OSD) adjustments in English, Dutch, French, Italian, Simplified Chinese, German, and Spanish for ease of set-up and screen optimization. ■ Software and documentation CD that includes monitor driver software and product documentation - HP L1940T | HP L1940T 19" LCD Monitor User Guide (Accessibility Enhanced) - Page 9
Guidelines Important Safety Information A power cord is included with your monitor. If another cord is used, use only a power source and connection appropriate for this monitor. For information on the correct power cord set to use with your monitor, refer to the "Power Cord Set Requirements" section - HP L1940T | HP L1940T 19" LCD Monitor User Guide (Accessibility Enhanced) - Page 10
controls that are covered in the operating instructions. If your monitor is not operating properly or has been dropped or damaged, contact your HP authorized dealer, reseller, or service provider. ■ Use only a power source and connection appropriate for this monitor, as indicated on the label/back - HP L1940T | HP L1940T 19" LCD Monitor User Guide (Accessibility Enhanced) - Page 11
your monitor or place it on an unstable surface. ■ Do not allow anything to rest on the power cord. Do not walk on the cord. ■ Keep your monitor in to clean your monitor or the screen. These chemicals may damage the cabinet finish as well as the screen. Shipping the Monitor Keep the original packing - HP L1940T | HP L1940T 19" LCD Monitor User Guide (Accessibility Enhanced) - Page 12
Safety and Maintenance Guidelines 2-4 User Guide - HP L1940T | HP L1940T 19" LCD Monitor User Guide (Accessibility Enhanced) - Page 13
To set up the monitor, ensure that the power is turned off to the monitor, computer system, and other attached devices, then follow the instructions below. Unfolding the Monitor Base The monitor is shipped with the base attached in a folded flat position. To begin using the monitor, you must unfold - HP L1940T | HP L1940T 19" LCD Monitor User Guide (Accessibility Enhanced) - Page 14
Rear Panel Components No. Component Function 1 AC power connector Connects the AC power cord to the monitor. 2 USB downstream Connects optional USB devices to the monitor. connectors 3 USB upstream connector Connects the USB cable to the host (computer or another USB hub). 4 DVI connector - HP L1940T | HP L1940T 19" LCD Monitor User Guide (Accessibility Enhanced) - Page 15
have valid video signals. The inputs can be selected through the On-Screen Display (OSD) feature by pressing the Menu button on the monitor front bezel or by pressing the + button to enable VGA signal input or the - button to enable DVI signal input. Connecting the Monitor Å WARNING: To reduce the - HP L1940T | HP L1940T 19" LCD Monitor User Guide (Accessibility Enhanced) - Page 16
Setting Up the Monitor 1. Place the monitor in a convenient, well-ventilated location near your computer. 2. Pivot the monitor to the portrait position to access the connectors. Connect one end of the power cable to the power connector on the monitor 1, and the other end to an electrical wall outlet - HP L1940T | HP L1940T 19" LCD Monitor User Guide (Accessibility Enhanced) - Page 17
the VGA connector on the monitor 1, and the other end to the VGA connector on the computer 2. Connecting the VGA Signal Cable ✎ For digital operation, use a DVI-D signal cable (not provided with the monitor). Connect the DVI-D signal cable to the DVI-D connector on the monitor and the other end to - HP L1940T | HP L1940T 19" LCD Monitor User Guide (Accessibility Enhanced) - Page 18
Setting Up the Monitor 4. Connect the USB cable to the USB upstream connector on the monitor 1 and to a convenient USB connector on the computer 2. Connecting the USB Cable 3-6 User Guide - HP L1940T | HP L1940T 19" LCD Monitor User Guide (Accessibility Enhanced) - Page 19
Setting Up the Monitor 5. Adjust the monitor as needed for your comfort using the monitor's tilt, swivel, and height adjustment capabilities. Adjusting the Tilt Adjusting the Swivel User Guide 3-7 - HP L1940T | HP L1940T 19" LCD Monitor User Guide (Accessibility Enhanced) - Page 20
To view information on your screen in portrait mode, you will need to install the Pivot software available on www.hp.com/support or from the Portrait Display Web site, www.portrait.com. On the HP Web site, follow the links for your monitor to the software and drivers download page. 3-8 User Guide - HP L1940T | HP L1940T 19" LCD Monitor User Guide (Accessibility Enhanced) - Page 21
-in image damage on your monitor screen, you should always activate a screen saver application or turn off the monitor when it is not in use for a prolonged period of time. Removing the Monitor Base The monitor base can be removed from the panel to mount the monitor panel on a wall, a swing arm or - HP L1940T | HP L1940T 19" LCD Monitor User Guide (Accessibility Enhanced) - Page 22
in the minimum base extension may result in injury to the user. 1. Disconnect and remove the signal and power cables from the back of the monitor. Ä CAUTION: Ensure that the bottom of the monitor base is positioned over a table or desktop before removing the base from the monitor. 3-10 User Guide - HP L1940T | HP L1940T 19" LCD Monitor User Guide (Accessibility Enhanced) - Page 23
Setting Up the Monitor 2. Remove the four screws 1 from the monitor base. 3. Remove the monitor base 2 from the monitor. Removing the Monitor Base Mounting the Monitor 1. Remove the monitor base. Refer to "Removing the Monitor Base" steps in the previous section. User Guide 3-11 - HP L1940T | HP L1940T 19" LCD Monitor User Guide (Accessibility Enhanced) - Page 24
to a swing arm, wall or other mounting fixture using the HP Compaq Quick Release, follow the instructions provided in the documentation that comes with Quick Release. Mounting the Monitor to a Swing Arm Using Quick Release Mounting the Monitor to the Wall Using Quick Release 3. If mounting the - HP L1940T | HP L1940T 19" LCD Monitor User Guide (Accessibility Enhanced) - Page 25
important to verify that the manufacturer's mounting solution is compliant with the VESA standard and is rated to support the weight of the monitor display panel. For best performance, it is important to use the power and video cables provided with the monitor. Mounting the Monitor User Guide 3-13 - HP L1940T | HP L1940T 19" LCD Monitor User Guide (Accessibility Enhanced) - Page 26
Locating the Rating Label The rating label 1 is located along the bottom of the rear panel of the monitor. It provides the monitor's spare part number, product number and serial number. You may need these numbers when contacting HP about your monitor model. Locating the Rating Label 3-14 User - HP L1940T | HP L1940T 19" LCD Monitor User Guide (Accessibility Enhanced) - Page 27
(Image Color Matching) file ■ Auto-adjustment pattern utility Adobe Reader is supplied on this CD and can be installed from the menu. ✎ If the monitor does not include a CD, the .INF and .ICM files can be downloaded from the HP monitors support Web site. See "Downloading from the Worldwide Web" in - HP L1940T | HP L1940T 19" LCD Monitor User Guide (Accessibility Enhanced) - Page 28
. 2. View the "INF and ICM Readme" file. 3. Select "Install INF and ICM Files." 4. Follow the on-screen instructions. 5. After the INF software has been installed, restart Windows. 6. Ensure that the proper resolution and refresh rates appear in the Windows Display control panel. 4-2 User Guide - HP L1940T | HP L1940T 19" LCD Monitor User Guide (Accessibility Enhanced) - Page 29
the support page and download page. 3. Ensure your system meets the requirements. 4. Download the software by following the instructions. Using the Auto-Adjustment Function You can optimize the screen performance for the VGA (analog) input by using the Auto Adjust button on the monitor and the auto - HP L1940T | HP L1940T 19" LCD Monitor User Guide (Accessibility Enhanced) - Page 30
to warm up for 20 minutes before adjusting. 2. Press the Auto Adjust button on the monitor front panel. ❏ You can also press the Menu button, then select Image Control from the OSD Main Menu. Next, select Auto Adjustment. Refer to "Adjusting Monitor Settings" in this chapter. ❏ If the result - HP L1940T | HP L1940T 19" LCD Monitor User Guide (Accessibility Enhanced) - Page 31
Monitor Front Panel Controls No. Control 1 Auto Adjust 2 Menu 3 - (Minus) 4 + (Plus) 5 Power Function Activates the auto adjustment feature for optimum image. Opens the On-Screen Display (OSD) menu. • If OSD is on, press to navigate backward through the OSD menu features and decrease adjustment - HP L1940T | HP L1940T 19" LCD Monitor User Guide (Accessibility Enhanced) - Page 32
Use the On-Screen Display (OSD) to adjust the screen image based on your viewing preferences. To access the OSD, do the following: 1. If the monitor is not already on, press the Power switch to turn on the monitor. 2. Press the Menu button on the monitor's front panel to launch the OSD Main Menu - HP L1940T | HP L1940T 19" LCD Monitor User Guide (Accessibility Enhanced) - Page 33
Screen Display menus available; one for basic adjustments, and one for advanced adjustments. To access the Basic OSD Menu, press the menu button on the monitor's front panel. Basic OSD Menu Levels Menu Level 1 Menu Level 2 Brightness Adjustment Scale Contrast Adjustment Scale Auto Adjustment - HP L1940T | HP L1940T 19" LCD Monitor User Guide (Accessibility Enhanced) - Page 34
Management Advanced OSD Menu Levels Level 2 Level 3 Adjustment Scale Adjustment Scale Auto Adjustment Horizontal Position Vertical and Return Power Saver Power On Recall "Adjusting" Message Adjustment Scale Adjustment Scale Adjustment Scale Adjustment Scale Custom Color Adjustment On / - HP L1940T | HP L1940T 19" LCD Monitor User Guide (Accessibility Enhanced) - Page 35
N Power-On Status On / Off Selection N Display Sleep Timer Timer Set Menu N Default Video Input Analog - VGA N Digital Serial Number Display monitor s/n Basic Menu N Cancel Save and Return OSD Control Horizontal OSD Adjustment Scale N Position Vertical OSD Adjustment Scale - HP L1940T | HP L1940T 19" LCD Monitor User Guide (Accessibility Enhanced) - Page 36
contains advanced circuitry that allows the flat panel screen to function like a standard monitor. Two controls in the on-screen display can be adjusted to improve image performance: Clock and Clock Phase. Use these controls only when the auto-adjust function does not provide a satisfactory image - HP L1940T | HP L1940T 19" LCD Monitor User Guide (Accessibility Enhanced) - Page 37
monitor is entering a reduced power state but the power saving feature is set to off. ■ Auto Adjustment in Progress- Displays when auto adjustment feature is active. ■ OSD Lock-The OSD can be enabled or disabled by pressing and holding the Menu button on the front panel for 10 seconds. If the OSD - HP L1940T | HP L1940T 19" LCD Monitor User Guide (Accessibility Enhanced) - Page 38
for minutes. 8. Press the - (Minus) or + (Plus) buttons to adjust the minutes. 9. Press the Menu button to lock in the time chosen. 10. After setting the current time, the highlight automatically skips to Set Sleep Time hours. Repeat steps 6 through 9 to set Sleep Time. 11. If you do not want to set - HP L1940T | HP L1940T 19" LCD Monitor User Guide (Accessibility Enhanced) - Page 39
HP Display LiteSaver is a software application, available on the CD, that increases monitor life and saves energy. It allows you to place your monitor into its low power sleep mode at predefined times by shutting down or reducing power to most internal circuits. This helps protect the LCD panel - HP L1940T | HP L1940T 19" LCD Monitor User Guide (Accessibility Enhanced) - Page 40
Display LiteSaver. Display On Sets the time when the monitor automatically turns on. This does not affect screen saver operation, which has priority over the HP Display LiteSaver. Activity Extension Sets the time in minutes before the monitor turns off if there is any keyboard or mouse activity - HP L1940T | HP L1940T 19" LCD Monitor User Guide (Accessibility Enhanced) - Page 41
LiteSaver. It will no longer control the monitor power until it is next run. View "HP Display LiteSaver Readme" on the CD for additional information on how to configure the HP Display LiteSaver. sRGB Support The monitor is designed to support sRGB for color management, which adapts to the - HP L1940T | HP L1940T 19" LCD Monitor User Guide (Accessibility Enhanced) - Page 42
If the computer is connected to a network, network policy settings may prevent you from completing this procedure. The sRGB ICM file does not support Windows 95 and Windows NT operating systems 1. Click the Display icon in the Control Panel. 2. In the Display Properties windows, select the Settings - HP L1940T | HP L1940T 19" LCD Monitor User Guide (Accessibility Enhanced) - Page 43
A Troubleshooting Solving Common Problems The following table lists possible problems, the possible cause of each problem, and the recommended solutions. Problem Screen is blank. Possible Cause Power cord is disconnected. Power switch on front panel of the monitor is turned off. Video cable is - HP L1940T | HP L1940T 19" LCD Monitor User Guide (Accessibility Enhanced) - Page 44
is displayed on screen. Possible Cause Brightness and contrast are too low. Position may need adjustment. Monitor video cable is disconnected. Video resolution and/or refresh rate are set higher than what your monitor supports. Solution Press the Auto Adjust button on the front panel. If this does - HP L1940T | HP L1940T 19" LCD Monitor User Guide (Accessibility Enhanced) - Page 45
, online assistance, community forums of IT experts, broad multivendor knowledge base, monitoring and diagnostic tools, go to: http://www.hp.com/support. Preparing to call Technical Support If you cannot solve a problem using the troubleshooting tips in this section, you may need to call technical - HP L1940T | HP L1940T 19" LCD Monitor User Guide (Accessibility Enhanced) - Page 46
- HP L1940T | HP L1940T 19" LCD Monitor User Guide (Accessibility Enhanced) - Page 47
19" LCD Monitor L1940T Specifications Display Type 19.0 inches TFT LCD 48.3 cm Viewable Image Size 19.0-inch diagonal 48.3 cm Tilt Swivel --5 to 35° --90 to 90° Face Treatment Anti-glare polarizer with hard coating Maximum Weight (Unpacked, base attached) 18.5 lbs. 8.4 kg Dimensions - HP L1940T | HP L1940T 19" LCD Monitor User Guide (Accessibility Enhanced) - Page 48
100 - 240 VAC, 60-50 Hz Power Consumption - HP L1940T | HP L1940T 19" LCD Monitor User Guide (Accessibility Enhanced) - Page 49
Technical Specifications Preset 1 2 3 4 5 6 7 8 9 10 11 12 13 14 15 Factory Preset Display Modes Pixel Format Horz Freq (kHz) Vert Freq (Hz) 640 x 480 31.5 60.0 signal may occasionally call for a mode that is not preset if: ■ You are not using a standard graphics adapter. User Guide B-3 - HP L1940T | HP L1940T 19" LCD Monitor User Guide (Accessibility Enhanced) - Page 50
warm up period before the monitor will return to its normal operating mode. Refer to your computer manual for instructions on setting energy saver features (sometimes called power management features). ✎ The above energy saver feature only works when connected to computers that have energy saver - HP L1940T | HP L1940T 19" LCD Monitor User Guide (Accessibility Enhanced) - Page 51
energy and, if not installed and used in accordance with the instructions, may cause harmful interference to radio communications. However, there is and the receiver. ■ Connect the equipment into an outlet on a circuit different from that to which the receiver is connected. ■ Consult the dealer - HP L1940T | HP L1940T 19" LCD Monitor User Guide (Accessibility Enhanced) - Page 52
Packard Company P. O. Box 692000, Mail Stop 530113 Houston, Texas 77269-2000 Or, call 1-800-HP-INVENT (1-800 474-6836) For questions regarding this FCC declaration, contact: Hewlett Packard Company P. O. Box 692000, Mail Stop 510101 Houston, Texas 77269-2000 Or, call (281) 514-3333 C-2 User Guide - HP L1940T | HP L1940T 19" LCD Monitor User Guide (Accessibility Enhanced) - Page 53
on the product. Materials Disposal This HP product contains the following materials that might require special handling at end-of-life: ■ Mercury in the fluorescent lamp in the display LCD. ■ Lead in the solder and some : ■ Low Voltage Directive 73/23/EEC ■ EMC Directive 89/336/EEC User Guide C-3 - HP L1940T | HP L1940T 19" LCD Monitor User Guide (Accessibility Enhanced) - Page 54
(European Norms) which are listed on the EU Declaration of Conformity issued by Hewlett-Packard for this product or product family. This compliance is indicated by the please contact your local city office, your household waste disposal service or the shop where you purchased the product. C-4 User - HP L1940T | HP L1940T 19" LCD Monitor User Guide (Accessibility Enhanced) - Page 55
, Hewlett Packard Company has determined that this product meets the ENERGY STAR guidelines for energy efficiency. Specific details on using the Energy Saving features can be found in the energy saver or power management section of the computer manual. Power Cord Set Requirements The monitor power - HP L1940T | HP L1940T 19" LCD Monitor User Guide (Accessibility Enhanced) - Page 56
, and the length of the cord must be between 6 feet (1.8 m) and 12 feet (3.6 m). If you have questions about the type of power cord to use, contact your HP authorized service provider. A power cord should be routed so that it is not likely to be walked on or pinched by items placed upon it or - HP L1940T | HP L1940T 19" LCD Monitor User Guide (Accessibility Enhanced) - Page 57
D LCD Monitor Quality and Pixel Policy The TFT monitor uses high-precision technology, manufactured according to HP standards, to guarantee trouble-free performance. Nevertheless, the display may have cosmetic imperfections that appear as small bright or dark spots. This is common to all LCD - HP L1940T | HP L1940T 19" LCD Monitor User Guide (Accessibility Enhanced) - Page 58
mode at a supported resolution and refresh rate, from a distance of approximately 50 cm (16 in.). HP expects that, over time, the industry will continue to improve its ability to produce LCDs with fewer cosmetic imperfections and HP will adjust guidelines as improvements are made. D-2 User Guide
-
 1
1 -
 2
2 -
 3
3 -
 4
4 -
 5
5 -
 6
6 -
 7
7 -
8
-
9
-
10
-
11
-
12
-
13
-
14
-
15
-
16
-
17
-
18
-
19
-
20
-
21
-
22
-
23
-
24
-
25
-
26
-
27
-
28
-
29
-
30
-
31
-
32
-
33
-
34
-
35
-
36
-
37
-
38
-
39
-
40
-
41
-
42
-
43
-
44
-
45
-
46
-
47
-
48
-
49
-
50
-
51
-
52
-
53
-
54
-
55
-
56
-
57
-
58
 |
 |

User Guide
HP L1940T 19” LCD Monitor
Document Part Number: 407540-001±
January 2006
This guide provides information on setting up the monitor,
installing drivers, using the on-screen display menu,
troubleshooting and technical specifications.
Enhanced for Accessibility