HP LaserJet 9065mfp HP LaserJet 9055/9065 mfp - (English) System Administrator - Page 103
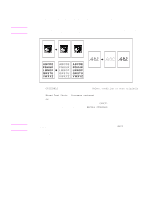
Increase contrast mode, ORIGINALS, Select condition to scan originals, Mixed, Photo, CANCEL
 |
View all HP LaserJet 9065mfp manuals
Add to My Manuals
Save this manual to your list of manuals |
Page 103 highlights
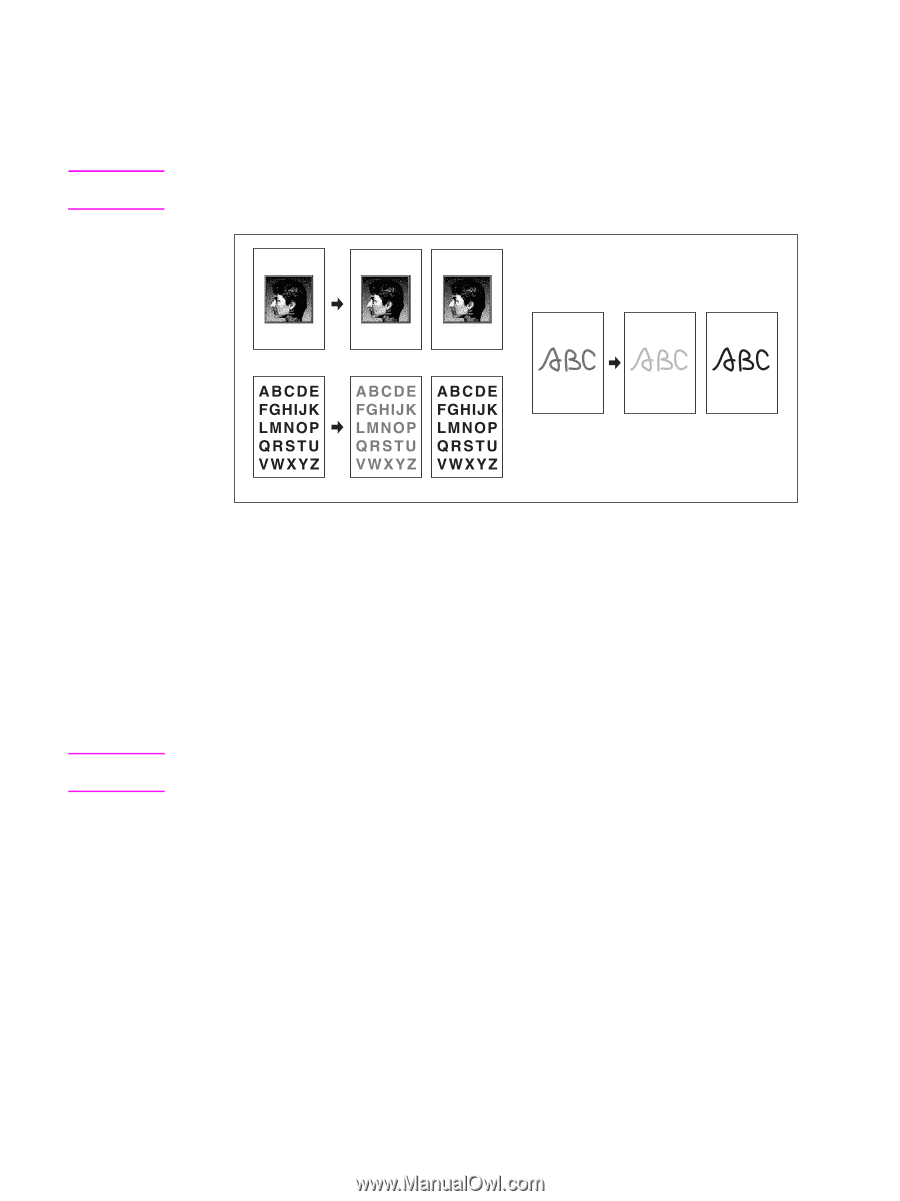
Note Increase contrast mode Select increase contrast to darken lightly printed images (e.g., pencil) without changing background exposure. In cases where the image is light and background is dark, the background will not be changed. ● original/copy paper: Ledger, Legal, Letter, Letter-R, 5.5 by 8.5 In each enhance mode, the copy contrast level can be shifted 3 levels darker or 3 levels lighter (density shift). See "Contrast" on page 57 if this setting is desired. Note Original Auto mode Photo mode Original Photo mode Text mode Original Photo mode Increase contrast mode 1 Touch ORIGINALS on the main screen to display the Select condition to scan originals menu. 2 Touch Mixed, Text, Photo, or Increase contrast, as required. 3 Touch OK to return to the main screen. To cancel the change before returning to the main screen, touch CANCEL. To recall the standard setting of the Originals, touch RECALL STANDARD. 4 Select additional copying features, as desired. 5 Enter the quantity. 6 Position original(s) face up in the document feeder or face down on the scanner glass. Press CHECK to view the selection, and make the proof copy, if desired; then touch EXIT to return to the main screen. 7 Press START. After copying is completed, press RESET to release the mode and reset the MFP. ENWW Text/photo enhance 93
-
 1
1 -
2
-
3
-
4
-
5
-
6
-
7
-
8
-
9
-
10
-
11
-
12
-
13
-
14
-
15
-
16
-
17
-
18
-
19
-
20
-
21
-
22
-
23
-
24
-
25
-
26
-
27
-
28
-
29
-
30
-
31
-
32
-
33
-
34
-
35
-
36
-
37
-
38
-
39
-
40
-
41
-
42
-
43
-
44
-
45
-
46
-
47
-
48
-
49
-
50
-
51
-
52
-
53
-
54
-
55
-
56
-
57
-
58
-
59
-
60
-
61
-
62
-
63
-
64
-
65
-
66
-
67
-
68
-
69
-
70
-
71
-
72
-
73
-
74
-
75
-
76
-
77
-
78
-
79
-
80
-
81
-
82
-
83
-
84
-
85
-
86
-
87
-
88
-
89
-
90
-
91
-
92
-
93
-
94
-
95
-
96
-
97
-
 98
98 -
 99
99 -
 100
100 -
 101
101 -
 102
102 -
 103
103 -
 104
104 -
 105
105 -
 106
106 -
 107
107 -
 108
108 -
109
-
110
-
111
-
112
-
113
-
114
-
115
-
116
-
117
-
118
-
119
-
120
-
121
-
122
-
123
-
124
-
125
-
126
-
127
-
128
-
129
-
130
-
131
-
132
-
133
-
134
-
135
-
136
-
137
-
138
-
139
-
140
-
141
-
142
-
143
-
144
-
145
-
146
-
147
-
148
-
149
-
150
-
151
-
152
-
153
-
154
-
155
-
156
-
157
-
158
-
159
-
160
-
161
-
162
-
163
-
164
-
165
-
166
-
167
-
168
-
169
-
170
-
171
-
172
-
173
-
174
-
175
-
176
-
177
-
178
-
179
-
180
-
181
-
182
-
183
-
184
-
185
-
186
-
187
-
188
-
189
-
190
-
191
-
192
-
193
-
194
-
195
-
196
-
197
-
198
-
199
-
200
-
201
-
202
-
203
-
204
-
205
-
206
-
207
-
208
-
209
-
210
-
211
-
212
-
213
-
214
-
215
-
216
-
217
-
218
-
219
-
220
-
221
-
222
-
223
-
224
 |
 |