HP LaserJet Pro 100 Service Manual
HP LaserJet Pro 100 Manual
 |
View all HP LaserJet Pro 100 manuals
Add to My Manuals
Save this manual to your list of manuals |
HP LaserJet Pro 100 manual content summary:
- HP LaserJet Pro 100 | Service Manual - Page 1
LASERJET PRO 100 COLOR MFP M175 Service Manual - HP LaserJet Pro 100 | Service Manual - Page 2
- HP LaserJet Pro 100 | Service Manual - Page 3
HP LaserJet Pro 100 color MFP M175 Service Manual - HP LaserJet Pro 100 | Service Manual - Page 4
are set forth in the express warranty statements accompanying such products and services. Nothing herein should be construed as constituting an additional warranty. HP shall not be liable for technical or editorial errors or omissions contained herein. Part number: CE865-90968 Edition 1, 4/2011 - HP LaserJet Pro 100 | Service Manual - Page 5
Conventions used in this guide TIP: Tips provide helpful hints or shortcuts. NOTE: Notes provide important information to explain a concept or to complete a task. CAUTION: Cautions indicate procedures that you - HP LaserJet Pro 100 | Service Manual - Page 6
iv Conventions used in this guide ENWW - HP LaserJet Pro 100 | Service Manual - Page 7
discharge ...3 Required tools ...3 Service approach ...4 Before performing service 4 After performing service 4 Post-service test ...4 Product verification test 4 Parts removal order 5 Removal and replacement procedures 7 Print cartridges ...7 Imaging drum ...9 Input tray ...11 Secondary - HP LaserJet Pro 100 | Service Manual - Page 8
base model 38 Formatter and wireless PCA (plus model 40 Remove the formatter and wireless PCA (plus model 40 problems ...77 Solve problems checklist ...78 Step 1: Test print functionality 78 Step 2: Test copy functionality 78 Menu map ...79 Troubleshooting processes ...80 Determine the problem - HP LaserJet Pro 100 | Service Manual - Page 9
troubleshooting tools 90 Repetitive image defects ruler 90 Calibrate the product 90 Control panel menus 91 Setup menu 91 Reports menu 91 System Setup menu 91 Service menu 94 Network Setup authorized service providers 102 Order replacement parts 102 Related documentation and software 102 - HP LaserJet Pro 100 | Service Manual - Page 10
Service and support 123 Hewlett-Packard limited warranty statement 124 HP's Premium Protection Warranty: LaserJet print cartridge limited warranty statement 126 HP's LaserJet imaging drum limited warranty statement for replacement imaging drums of conformity (wireless models 141 Certificate - HP LaserJet Pro 100 | Service Manual - Page 11
145 GS statement (Germany 145 Substances Table (China 146 Restriction on Hazardous Substances statement (Turkey 146 Additional statements for wireless products 147 FCC compliance statement-United States 147 Australia statement 147 Brazil ANATEL statement 147 Canadian statements 147 European - HP LaserJet Pro 100 | Service Manual - Page 12
x ENWW - HP LaserJet Pro 100 | Service Manual - Page 13
and doors (base 85 Table 2-2 Service menu ...97 Table 2-3 Secondary service menu ...98 Table 3-1 Order parts, accessories, and supplies 102 Table 3-2 Related documentation and software 102 Table 3-3 Supplies part numbers ...102 Table 3-4 Whole-unit replacement part numbers 103 Table 3-5 Base - HP LaserJet Pro 100 | Service Manual - Page 14
xii ENWW - HP LaserJet Pro 100 | Service Manual - Page 15
List of figures Figure 1-1 Phillips and Pozidriv screwdriver comparison 3 Figure 1-2 Parts removal order (base) ...5 Figure 1-3 Parts removal order (document feeder 6 Figure 1-4 Remove the tray ...11 Figure 1-5 Remove the secondary transfer roller 12 Figure 1-6 Remove the separation pad assembly - HP LaserJet Pro 100 | Service Manual - Page 16
formatter PCA (base model; 2 of 2 39 Figure 1-43 Remove the formatter and wireless PCA (plus model; 1 of 3 40 Figure 1-44 Remove the formatter and wireless PCA (plus mode; 2 of 3 40 Figure 1-45 Remove the formatter and wireless PCA (plus mode; 3 of 3 41 Figure 1-46 Remove the fuser power supply - HP LaserJet Pro 100 | Service Manual - Page 17
of 7 61 Figure 1-79 Remove the engine controller assembly (7 of 7 61 Figure 1-80 Installing a replacement engine controller assembly 62 Figure 4 72 Figure 1-99 Remove the document feeder core (3 of 4 73 Figure 1-100 Remove the document feeder core (4 of 4 73 Figure 1-101 Remove the post scan - HP LaserJet Pro 100 | Service Manual - Page 18
Figure 3-5 Scanner and document feeder main assemblies 112 Figure 3-6 Document feeder assembly parts 114 xvi ENWW - HP LaserJet Pro 100 | Service Manual - Page 19
1 Removal and replacement ● Introduction ● Removal and replacement strategy ● Electrostatic discharge ● Required tools ● Service approach ● Removal and replacement procedures ENWW 1 - HP LaserJet Pro 100 | Service Manual - Page 20
, notes and tips are included to provide directions for difficult or critical replacement procedures. HP does not support repairing individual subassemblies or troubleshooting to the component level. Note the length, diameter, color, type, and location of each screw. Be sure to return each screw - HP LaserJet Pro 100 | Service Manual - Page 21
). Look for the ESD reminder when removing product parts. Always perform service work at an ESD-protected workstation or mat, or use an ESD length ● Small flat-blade screwdriver ● Needle-nose pliers ● ESD mat (if one is available) or ESD strap ● Penlight (optional) CAUTION: Always use a Phillips - HP LaserJet Pro 100 | Service Manual - Page 22
cartridges on page 7 and Imaging drum on page 9 ● Remove the input tray. See Input tray on page 11. After performing service ● Plug in the power cable. ● Reinstall the print cartridges. ● Load paper in the product. Post-service test Perform the following test to verify that the repair or replacement - HP LaserJet Pro 100 | Service Manual - Page 23
Parts removal order (base) Print cartridges Imaging drum Input tray Secondary transfer roller Separation pad cover, Panel and delivery cover Left-front cover Left cover Formatter and wireless PCA (plus model) Left cover Fuser power supply Left cover ITB cover ENWW Service approach 5 - HP LaserJet Pro 100 | Service Manual - Page 24
pinch rollers Document feeder input tray Document feeder cover Document core Document feeder base assembly Document feeder input tray Document feeder cover 6 Chapter 1 Removal and replacement ENWW - HP LaserJet Pro 100 | Service Manual - Page 25
in the correct position, press the Cartridge button to rotate the print cartridge carousel to the cartridge color that you want to replace. NOTE: All doors must be closed when pressing the Cartridge button. Also, the imaging drum must be installed for the Cartridge button to work. NOTE: Wait until - HP LaserJet Pro 100 | Service Manual - Page 26
rotate the print cartridge carousel to the next cartridge. Repeat to remove all cartridges. NOTE: Make sure that you store the removed print cartridges away from strong light. HP recommends that you cover the print cartridges while servicing the product. 8 Chapter 1 Removal and replacement ENWW - HP LaserJet Pro 100 | Service Manual - Page 27
is covered by the product warranty. Replacement imaging drums have a one-year limited warranty from the date of installation. The imaging drum installation date displays on the supplies status page. The HP Premium Protection Warranty applies only to the print cartridges for the product. 1. Open the - HP LaserJet Pro 100 | Service Manual - Page 28
3. Lift the two levers that hold the imaging drum. 4. Remove the old imaging drum. NOTE: Make sure that you store the removed imaging drum away from strong light. HP recommends that you cover the imaging drum while servicing the product. 10 Chapter 1 Removal and replacement ENWW - HP LaserJet Pro 100 | Service Manual - Page 29
Input tray Pull the tray away from the printer to remove. Figure 1-4 Remove the tray ENWW Removal and replacement procedures 11 - HP LaserJet Pro 100 | Service Manual - Page 30
Secondary transfer roller CAUTION: Do not touch the black spongy part of the roller. Skin oils might cause print-quality problems. 1. Open the rear door. 2. Release two clips (callout 1), and then remove the roller from the product. Figure 1-5 Remove the secondary transfer roller 1 12 Chapter 1 - HP LaserJet Pro 100 | Service Manual - Page 31
is not captive and can open when the product is placed face up. Make sure that you support the ADF when handling the product. NOTE: Dirt and debris can scratch the surface of the (callout 2). Figure 1-6 Remove the separation pad assembly (1 of 1) 2 1 ENWW Removal and replacement procedures 13 - HP LaserJet Pro 100 | Service Manual - Page 32
17. Rotate the pickup roller to the service position To gain access to the roller one sheet of paper is loaded in the tray, this procedure will not be successful. 3. Press and release the Auto-On/Auto-Off (power) button and within two seconds press and hold down the cyan cartridge replacement ENWW - HP LaserJet Pro 100 | Service Manual - Page 33
the pickup roller assembly (1 of 2) 2 1 2. Release two tabs (callout 1) and remove the pickup roller (callout 2). Figure 1-8 Remove the pickup roller assembly (2 of 2) 1 ENWW 2 Removal and replacement procedures 15 - HP LaserJet Pro 100 | Service Manual - Page 34
Covers and document feeder Right cover 1. Open the document feeder. 2. Remove one screw (callout 1), and then starting at the rear vertical edge, release six tabs (callout 2) Remove the right cover (1 of 2) 2 1 Figure 1-10 Remove the right cover (2 of 2) 1 16 Chapter 1 Removal and replacement ENWW - HP LaserJet Pro 100 | Service Manual - Page 35
Left cover 1. Open the document feeder. 2. Remove one screw (callout 1), and then starting at the rear vertical edge, release two tabs (callout 2) and remove the . Figure 1-11 Remove the left cover (1 of 2) 2 1 Figure 1-12 Remove the left cover (2 of 2) 1 ENWW Removal and replacement procedures 17 - HP LaserJet Pro 100 | Service Manual - Page 36
. Remove the document feeder 1. Release two tabs (callout 1), and then remove the cover (callout 2). Figure 1-13 Remove the document feeder (1 of 4) 2 1 18 Chapter 1 Removal and replacement ENWW - HP LaserJet Pro 100 | Service Manual - Page 37
2. Disconnect two FFCs (callout 1), and then release them from the guides (callout 2). CAUTION: Do not bend or fold the flat flexible cables (FFCs) during removal or installation slide down on the hinges. Figure 1-15 Remove the document feeder (3 of 4) 1 ENWW Removal and replacement procedures 19 - HP LaserJet Pro 100 | Service Manual - Page 38
4. Lift and rotate the scanner assembly up and away from the hinges. Figure 1-16 Remove the document feeder (4 of 4) 1 2 20 Chapter 1 Removal and replacement ENWW - HP LaserJet Pro 100 | Service Manual - Page 39
feeder hinges ● Left cover. See Left cover on page 17. ● Document feeder. See Document feeder on page 18. Remove the document feeder hinges 1. Remove one screw (callout 1) from each hinge. Figure 1-17 Remove the scanner hinges (1 of 2) 1 2. Lift each hinge up to remove it. Figure 1-18 Remove the - HP LaserJet Pro 100 | Service Manual - Page 40
delivery cover 1. Remove two screws (callout 1 and callout 2). NOTE: When facing the product, the screw on the right is black (callout 2), and the one on the left (callout 1) is silver. Figure 1-19 Remove the top door, rear-top cover, and delivery cover (1 of 6) 1 2 22 Chapter 1 Removal and - HP LaserJet Pro 100 | Service Manual - Page 41
release two tabs on the rear-top cover (callout 1). Figure 1-21 Remove the top door, rear-top cover, and delivery cover (3 of 6) 1 ENWW Removal and replacement procedures 23 - HP LaserJet Pro 100 | Service Manual - Page 42
front of the product to release the assembly. Figure 1-23 Remove the top door, rear-top cover, and delivery cover (5 of 6) 1 2 24 Chapter 1 Removal and replacement ENWW - HP LaserJet Pro 100 | Service Manual - Page 43
1 2 3 Reinstall the top door, rear-top cover, and delivery cover Before reassembly, make sure that the two cartridge lock springs (callout 1; located to the right and left of the print-cartridge opening) are not damaged. Figure 1-25 Reinstall the top door, rear-top cover, and delivery cover (1 of - HP LaserJet Pro 100 | Service Manual - Page 44
Figure 1-26 Reinstall the top door, rear-top cover, and delivery cover (1 of 2) 1 26 Chapter 1 Removal and replacement ENWW - HP LaserJet Pro 100 | Service Manual - Page 45
door assembly Before proceeding, remove the following components: ● Right cover. See Right cover on page 16. Remove the rear door assembly 1. Remove one screw (callout 1) and the bushing (callout 2). Figure 1-27 Remove the rear door assembly (1 of 2) 1 2 2. Pull out the shaft (callout 1) and remove - HP LaserJet Pro 100 | Service Manual - Page 46
rear-lower cover Remove two screws (callout 1) and the rear lower cover assembly (callout 2). Figure 1-29 Remove the rear-lower cover 1 2 28 Chapter 1 Removal and replacement ENWW - HP LaserJet Pro 100 | Service Manual - Page 47
one FFC (callout 1), and then release the FFC from the guide (callout 2). CAUTION: Do not bend or fold the flat flexible cables (FFCs) during removal or installation. Also, do not straighten pre-folds in the FFCs. Figure 1-30 Remove the control panel (1 of 3) 2 1 ENWW Removal and replacement - HP LaserJet Pro 100 | Service Manual - Page 48
2. Remove two screws (callout 1). Figure 1-31 Remove the control panel (2 of 3) 1 3. Carefully separate the control panel from the product. NOTE: Guide the FFC through the opening in the product chassis (callout 1) to prevent it from being damaged when the control-panel is removed. Figure 1-32 - HP LaserJet Pro 100 | Service Manual - Page 49
Top door, rear-top cover, and delivery cover on page 22. ● Control panel. See Control panel on page 29. Remove the left-front cover 1. Remove one screw (callout 1), and then release two tabs (callout 2). Figure 1-33 Remove the left-front cover (1 of 2) 1 2 ENWW Removal and - HP LaserJet Pro 100 | Service Manual - Page 50
2. Release on tab (callout 1) by slightly rotating the top of the cover (callout 2) away from the product. Figure 1-34 Remove the left-front cover (2 of 2) 2 1 32 Chapter 1 Removal and replacement ENWW - HP LaserJet Pro 100 | Service Manual - Page 51
door 1. Open the front door. 2. Remove four screws (callout 1) and the laser/scanner cover (callout 2). Figure 1-35 Remove the front door (1 of 2) 1 2 ENWW Removal and replacement procedures 33 - HP LaserJet Pro 100 | Service Manual - Page 52
3. Release one tab (callout 1) and slide the front door (callout 2) to the right to remove it. Figure 1-36 Remove the front door (2 of 3) 2 1 34 Chapter 1 Removal and replacement ENWW - HP LaserJet Pro 100 | Service Manual - Page 53
page 22. ● Control panel. See Control panel on page 29. ● Left-front cover. See Left-front cover on page 31. Remove the inner cover 1. Remove one spring (callout 1), and then remove the door retainer arm (callout 2). Figure 1-37 Remove the inner cover (1 of 4) 2 1 ENWW Removal and - HP LaserJet Pro 100 | Service Manual - Page 54
2. Remove three machine screws (callout 1), and then remove one self-tapping screw (callout 2). Figure 1-38 Remove the inner cover (2 of 4) 1 2 3. Release one tab (callout 1). Figure 1-39 Remove the inner cover (3 of 4) 1 36 Chapter 1 Removal and replacement ENWW - HP LaserJet Pro 100 | Service Manual - Page 55
4. Remove the inner cover (callout 1). Figure 1-40 Remove the inner cover (4 of 4) 1 ENWW Removal and replacement procedures 37 - HP LaserJet Pro 100 | Service Manual - Page 56
page 17. Remove the formatter PCA (base model) 1. Disconnect three connectors (callout 1). Figure 1-41 Remove the formatter PCA (base model; 1 of 2) 1 38 Chapter 1 Removal and replacement ENWW - HP LaserJet Pro 100 | Service Manual - Page 57
2. Remove two screws (callout 1), and then remove the formatter PCA. Figure 1-42 Remove the formatter PCA (base model; 2 of 2) 1 ENWW Removal and replacement procedures 39 - HP LaserJet Pro 100 | Service Manual - Page 58
● Left cover. See Left cover on page 17. Remove the formatter and wireless PCA (plus model) 1. Remove one screw (callout 1), and then remove the wireless PCA (callout 2). Figure 1-43 Remove the formatter and wireless PCA (plus model; 1 of 3) 2 1 2. Disconnect two connectors (callout 1), and then - HP LaserJet Pro 100 | Service Manual - Page 59
3. Remove four screws (callout 1), and then remove the formatter PCA. Figure 1-45 Remove the formatter and wireless PCA (plus mode; 3 of 3) 1 ENWW Removal and replacement procedures 41 - HP LaserJet Pro 100 | Service Manual - Page 60
supply (1 of 2) 1 2. Remove three screws (callout 1), and then remove the fuser power supply. Figure 1-47 Remove the fuser power supply (2 of 2) 1 42 Chapter 1 Removal and replacement ENWW - HP LaserJet Pro 100 | Service Manual - Page 61
NOTE: If you have not removed the image drum before servicing the product, remove it now. See Imaging drum on page 9. Before proceeding, remove the 28. ● Formatter PCA or formatter and wireless PCA. See Formatter PCA (base model) on page 38 or Formatter and wireless PCA (plus model) on page 40. - HP LaserJet Pro 100 | Service Manual - Page 62
to the engine controller assembly. Do not attempt to completely remove the assembly. Figure 1-49 Remove the ITB assembly (2 of 17) 1 2 3 3. Disconnect one FFC (Callout 1), and then remove the sheet-metal plate and fuser power supply assembly. Figure 1-50 Remove the ITB assembly (3 of 17) 1 44 - HP LaserJet Pro 100 | Service Manual - Page 63
and then remove the cable cover (callout 2). Figure 1-51 Remove the ITB assembly (4 of 17) 2 1 5. Disconnect one connector (callout 1), release the wire harnesses (callout 2) from the guide (callout 3). Figure 1-52 Remove the ITB assembly (5 of 17) 1 2 3 ENWW Removal and replacement procedures 45 - HP LaserJet Pro 100 | Service Manual - Page 64
one tab (callout 1), and then remove the rear-door left-side arm (callout 2). Figure 1-53 Remove the ITB assembly (6 of 17) 2 1 7. Release the hook end (callout 1) of the ITB fixing spring (callout 2). Figure 1-54 Remove the ITB assembly (7 of 17) 1 2 46 Chapter 1 Removal and replacement ENWW - HP LaserJet Pro 100 | Service Manual - Page 65
8. Rotate the spring (callout 1) so that it faces out of the product. Figure 1-55 Remove the ITB assembly (8 of 17) 1 ENWW Removal and replacement procedures 47 - HP LaserJet Pro 100 | Service Manual - Page 66
9. Rotate the ITB fixing part (callout 1) so that it faces out of the product. Figure 1-56 Remove the ITB assembly (9 of 17) 1 Figure 1-57 Remove the ITB assembly (10 of 17) 1 48 Chapter 1 Removal and replacement ENWW - HP LaserJet Pro 100 | Service Manual - Page 67
10. Release two tabs (callout 1), and then remove the spring cover (callout 2). Figure 1-58 Remove the ITB assembly (11 of 17) 1 2 11. Release one tab (callout 1), and the remove the rear-door right-side arm (callout 2). Figure 1-59 Remove the ITB assembly (12 of 17) 1 2 ENWW Removal and - HP LaserJet Pro 100 | Service Manual - Page 68
. Rotate the spring (callout 1) so that it faces out of the product. Figure 1-61 Remove the ITB assembly (14 of 17) 1 50 Chapter 1 Removal and replacement ENWW - HP LaserJet Pro 100 | Service Manual - Page 69
14. Rotate the ITB fixing part (callout 1) so that it faces out of the product. Figure 1-62 Remove the ITB assembly (15 of 17) 1 Figure 1-63 Remove the ITB assembly (16 of 17) 1 ENWW Removal and replacement procedures 51 - HP LaserJet Pro 100 | Service Manual - Page 70
15. Pull the ITB assembly (callout 1) straight out of the product. CAUTION: Avoid touching the black plastic transfer belt. Skin oils on the belt might cause printquality problems. Figure 1-64 Remove the ITB assembly (17 of 17) 1 52 Chapter 1 Removal and replacement ENWW - HP LaserJet Pro 100 | Service Manual - Page 71
paper delivery components are one assembly. Position the not removed the image drum before servicing the product, remove it now. See Imaging drum on page 9. wireless PCA. See Formatter PCA (base model) on page 38 or Formatter and wireless PCA (plus model) on page 40. ENWW Removal and replacement procedures - HP LaserJet Pro 100 | Service Manual - Page 72
to the engine controller assembly. Do not attempt to completely remove the assembly. Figure 1-66 Remove the fuser delivery assembly (2 of 6) 1 2 3 54 Chapter 1 Removal and replacement ENWW - HP LaserJet Pro 100 | Service Manual - Page 73
(Callout 1), and then remove the sheet-metal plate and fuser power supply assembly. Figure 1-67 Remove the fuser delivery assembly (3 of 6) 1 4. Release one tab (callout 1), and then remove the cable cover (callout 2). Figure 1-68 Remove the fuser delivery assembly (4 of 6) 2 1 ENWW Removal and - HP LaserJet Pro 100 | Service Manual - Page 74
5. Disconnect four connectors (callout 1), Release the wire harnesses (callout 2) from the guide (callout 3). Figure 1-69 Remove the fuser delivery assembly (5 of 6) 2 3 1 6. Remove six screws (callout 1), and then remove the fuser delivery assembly (callout 2). Figure 1-70 Remove the - HP LaserJet Pro 100 | Service Manual - Page 75
release is positioned as shown below. Figure 1-71 Reinstall the fuser delivery assembly (1 of 2) 1 Figure 1-72 Reinstall the fuser delivery assembly (2 of 2) 1 ENWW Removal and replacement procedures 57 - HP LaserJet Pro 100 | Service Manual - Page 76
-front cover on page 31. ● Inner cover. See Inner cover on page 35. ● Formatter PCA or formatter and wireless PCA. See Formatter PCA (base model) on page 38 or Formatter and wireless PCA (plus model) on page 40. Remove the engine controller assembly 1. Disconnect four connectors. Figure 1-73 Remove - HP LaserJet Pro 100 | Service Manual - Page 77
engine controller assembly. Do not attempt to completely remove the assembly. Figure 1-74 Remove the engine controller assembly (2 of 7) 1 2 3 3. Disconnect one FFC (Callout 1), and then remove the sheet-metal plate and fuser power supply assembly. Figure 1-75 Remove the engine controller assembly - HP LaserJet Pro 100 | Service Manual - Page 78
one tab (callout 1) and remove the cable cover (callout 2). Figure 1-76 Remove the engine controller assembly (4 of 7) 2 1 5. Release one tab (callout 1), and then remove the cover (callout 2). Figure 1-77 Remove the engine controller assembly (5 of 7) 1 2 60 Chapter 1 Removal and replacement - HP LaserJet Pro 100 | Service Manual - Page 79
(callout 1). Figure 1-78 Remove the engine controller assembly (6 of 7) 1 7. Remove six screws (callout 1), release two tabs (callout 2), and then remove the engine controller assembly. Figure 1-79 Remove the engine controller assembly (7 of 7) 1 ENWW 2 Removal and replacement procedures 61 - HP LaserJet Pro 100 | Service Manual - Page 80
engine controller assembly Release one tab (callout 1), remove the guide (callout 2) from the discarded engine controller assembly (callout 3), and then install the guide on the replacement assembly. Figure 1-80 Installing a replacement engine controller assembly 3 1 2 62 Chapter 1 Removal - HP LaserJet Pro 100 | Service Manual - Page 81
-front cover on page 31. ● Inner cover. See Inner cover on page 35. ● Formatter PCA or formatter and wireless PCA. See Formatter PCA (base model) on page 38 or Formatter and wireless PCA (plus model) on page 40. Remove the low-voltage power supply assembly 1. Disconnect four connectors. Figure 1-81 - HP LaserJet Pro 100 | Service Manual - Page 82
controller assembly. Do not attempt to completely remove the assembly. Figure 1-82 Remove the low-voltage power supply assembly (2 of 9) 1 2 3 3. Disconnect one FFC (Callout 1), and then remove the sheet-metal plate and fuser power supply assembly. Figure 1-83 Remove the low-voltage power supply - HP LaserJet Pro 100 | Service Manual - Page 83
an assembly. Reinstallation tip Make sure that these parts are correctly assembled, before reinstalling the receptacle and guide. See Reinstall the low-voltage power supply on page 68. Figure 1-85 Remove the low-voltage power supply assembly (5 of 9) 2 1 ENWW Removal and replacement procedures 65 - HP LaserJet Pro 100 | Service Manual - Page 84
low-voltage power supply assembly (6 of 9) 1 7. Remove three screws (callout 1), disconnect one connector (callout 2) and separate the lowvoltage power supply assembly (callout 3) from the product. CAUTION voltage power supply assembly (7 of 9) 2 3 1 66 Chapter 1 Removal and replacement ENWW - HP LaserJet Pro 100 | Service Manual - Page 85
8. Release the wire harness (callout 1) from the guide (callout 2), and then pull the wire harness through the hole in the chassis. Figure 1-88 Remove the low- assembly (callout 2). Figure 1-89 Remove the low-voltage power supply assembly (9 of 9) ENWW 1 2 Removal and replacement procedures 67 - HP LaserJet Pro 100 | Service Manual - Page 86
power supply 1 23 Installing a replacement low-voltage power supply Release two tabs (callout 1), remove the cover (callout 2) from the discarded low-voltage power supply, and then install the guide on the replacement assembly. Figure 1-91 Installing a replacement low-voltage power supply 2 1 68 - HP LaserJet Pro 100 | Service Manual - Page 87
Document feeder components NOTE: This section describes replacement and removal of individual document feeder components. To remove the complete document feeder, see Document feeder then remove it. Figure 1-93 Remove the document feeder input tray (2 of 2) ENWW Removal and replacement procedures 69 - HP LaserJet Pro 100 | Service Manual - Page 88
Document feeder cover 1. Open the document feeder cover. Figure 1-94 Remove the document feeder cover (1 of 3) 2. Release one tab (callout 1), and then fully open the document feeder cover. Figure 1-95 Remove the document feeder cover (2 of 3) 1 70 Chapter 1 Removal and replacement ENWW - HP LaserJet Pro 100 | Service Manual - Page 89
3. Release the hinges (callout 1), and then remove the document feeder cover. Figure 1-96 Remove the document feeder cover (3 of 3) 1 ENWW Removal and replacement procedures 71 - HP LaserJet Pro 100 | Service Manual - Page 90
tray. See Document feeder input tray on page 69. ● Document feeder cover. See Document feeder cover on page 70. Remove the document feeder core 1. Release one tab (callout 1), and then remove the cover (callout 2). Figure 1-97 Remove the document feeder core (1 of 4) 2 1 2. Disconnect - HP LaserJet Pro 100 | Service Manual - Page 91
3. Carefully flex the hinge retainer to release one hinge pin. Figure 1-99 Remove the document feeder core (3 of 4) 4. Remove the document feeder core. Figure 1-100 Remove the document feeder core (4 of 4) ENWW Removal and replacement procedures 73 - HP LaserJet Pro 100 | Service Manual - Page 92
. Remove the post scan pinch rollers ▲ Remove the post scan pinch rollers (callout 1). Figure 1-101 Remove the post scan pinch rollers 1 74 Chapter 1 Removal and replacement ENWW - HP LaserJet Pro 100 | Service Manual - Page 93
. See Document feeder input tray on page 69. ● Document feeder cover. See Document feeder cover on page 70. Remove the document feeder base assembly 1. Disconnect one FFC (callout 1), and then release the adhesive FFC protector on the document feeder base (callout 2). TIP: Use two-sided tape to - HP LaserJet Pro 100 | Service Manual - Page 94
Remove two screws (callout 1). TIP: These screws require a #10 torx driver Figure 1-103 Remove the document feeder base assembly (2 of 3) 1 3. feed the FFC through the slot during removal and during replacement. Figure 1-104 Remove the document feeder base assembly (3 of 3) 1 76 Chapter 1 Removal - HP LaserJet Pro 100 | Service Manual - Page 95
2 Solve problems ● Solve problems checklist ● Menu map ● Troubleshooting processes ● Tools for troubleshooting ● Service mode functions ● Product updates ENWW 77 - HP LaserJet Pro 100 | Service Manual - Page 96
when trying to solve a problem with the product. ● sure that the print cartridge is not empty. 6. Clean the paper pick roller and the separation pad. 7. Replace the paper pick roller paper guides, and then make a copy. If paper does not feed through the document feeder smoothly, replace the document - HP LaserJet Pro 100 | Service Manual - Page 97
Menu map Use the following procedure to print a control-panel menu layout map. 1. On the product control panel, press the Setup button. 2. Use the arrow buttons to select the Reports menu, and then press the OK button. 3. Use the arrow buttons to scroll to the Menu - HP LaserJet Pro 100 | Service Manual - Page 98
placed in the tray? ● Are the paper guides aligned with the stack? ● Are the print cartridges and the imaging-drum installed correctly and firmly seated? ● Has the sealing tape been removed from each print cartridge? ● Are the print cartridges and imaging drum within their estimated life? (Check the - HP LaserJet Pro 100 | Service Manual - Page 99
1 to 2 hours. ● Check for and remove any non-HP components (for example, a print cartridge or imaging drum) from the product. ● Remove the product from the network and make sure that the failure is with the product before beginning troubleshooting. Power subsystem Power-on checks Turn on the power - HP LaserJet Pro 100 | Service Manual - Page 100
test menu. Test the control-panel buttons 1. Press the Setup button. 2. Press the left arrow button, and then quickly press the Cancel button. 3. Press the Setup button to return to the main menus. 4. Open the Secondary service menu. 5. Open the Button test menu. 82 Chapter 2 Solve problems ENWW - HP LaserJet Pro 100 | Service Manual - Page 101
cleaner solenoid (SL1) Description Fuser pressure release sensor (SR4) Rear door open detection switch (SW1) ITB Low-voltage power supply Not used ENWW Tools for troubleshooting 83 - HP LaserJet Pro 100 | Service Manual - Page 102
Density ITB_TOP sensor Print cartridge Imaging drum Imaging-drum Laser scanner assembly Input tray Item 10 11 12 13 14 15 16 17 18 Description T1 pad ITB Pickup roller Separation pad Feed roller T2 roller ITB drive roller ITB cleaning brush ITB cleaning roller 84 Chapter 2 Solve problems ENWW - HP LaserJet Pro 100 | Service Manual - Page 103
-top cover 5 Rear door 6 Rear-bottom cover Item 7 8 9 10 11 Description Right cover Left-front cover Inner cover Left cover Top door ENWW Tools for troubleshooting 85 - HP LaserJet Pro 100 | Service Manual - Page 104
ENWW 86 Chapter 2 Solve problems Timing chart two consecutive prints on LTR paper (Full-color 1/1 speed mode) Print command Operation STBY INTR 1 Cassette pickup solenoid 2 Pickup motor 3 TOP sensor 4 Delivery sensor 5 Fuser motor 6 Scanner motor 7 Main motor 8 TOP signal 9 ITB_TOP - HP LaserJet Pro 100 | Service Manual - Page 105
Tools for troubleshooting 87 ENWW Low-voltage Power Supply Ass'y NEUTRAL1 (W) LIVE1 (BK) SOLD1 SOLD2 J204 J206 21 6 J115L M3 M J703 SL1 SL 21 4321 87654321 M4 M J704 87654321 J705 M5 M J802 Laser Driver PCA J801 11 1 D Scanner Ass'y C +24B +24B GNDB GNDB MAINMFR /MAINMACC /MAINMDEC / - HP LaserJet Pro 100 | Service Manual - Page 106
pages Print a Diagnostics Page If the printed output has colored shadows, blurry graphics, or areas that have poor color, you might need to calibrate the product to align the colors. Use the Diagnostics Page to check the color alignment. 1. Press the Setup button to open the menus. 2. Use the arrow - HP LaserJet Pro 100 | Service Manual - Page 107
color; for example, if magenta dots appear in all five color bands. If the dots are all the same color, replace that print cartridge. ● If streaks appear in multiple color bands, contact HP. A component other than the print cartridge is probably causing the problem. ENWW Tools for troubleshooting - HP LaserJet Pro 100 | Service Manual - Page 108
1 The primary charging roller, photosensitive drum, and developing drum cannot be cleaned. If these rollers cause a repetitive defect, replace the corresponding cartridge, either the imaging-drum cartridge, or developing cartridge. Calibrate the product 1. Press the Setup button to open the menus - HP LaserJet Pro 100 | Service Manual - Page 109
are available: ● Reports ● System Setup ● Service ● Network Setup Reports menu First level Demo Page Menu Structure Config Report Supplies Status Network Summary (network models only) Usage Page PCL Font List PS Font List PCL6 Font List Color Usage Log Service Page Diagnostics Page Print Quality - HP LaserJet Pro 100 | Service Manual - Page 110
Paper Setup Second level Def. Paper Size Third level Def. Paper Type Tray 1 Paper Out Action Paper Type Paper Size Print Quality Energy Settings Calibrate Color Sleep Delay 1 Hour 2 Hours 4 Hours 8 Hours 24 Hours USB Job LAN Job Wireless Job Button Press 92 Chapter 2 Solve problems ENWW - HP LaserJet Pro 100 | Service Manual - Page 111
Black Cartridge Color Cartridges Imaging Drum Store Usage Data Third level Very Low Setting Low Threshold Very Low Setting Low Threshold Very Low Setting Low Threshold Values Stop Prompt* Continue NOTE: A customer configurable option on this product is "Prompt to Remind Me in 50 pages, 100 pages - HP LaserJet Pro 100 | Service Manual - Page 112
level Courier Font Allow Color Color Copy Second level Third level Values Regular* Dark Yes* No On* Off Service menu In the Wireless Menu TCP/IP Config Second level Wi-Fi Protected Setup Run Network Test Turn Wireless On/Off Values On* Off Automatic* Manual 94 Chapter 2 Solve problems - HP LaserJet Pro 100 | Service Manual - Page 113
First level Auto Crossover Network Services Show IP Address Link Speed Second level IPv4 IPv6 default setting. First level # of copies ID Copy Reduce/Enlarge Second level Values (Range of 1*-99) Original=100%* Legal to Letter=78% Legal to A4=83% A4 to Letter=94% Letter to A4=97% Full Page - HP LaserJet Pro 100 | Service Manual - Page 114
Paper Type Collation Tray Select Two-Sided Draft Mode Image Adjustment Lightness Contrast Sharpen Background Color Balance Set as New Defaults Restore Defaults Grayness Values (Slider with a range range of 11 settings.) (Slider with a range of 11 settings.) 96 Chapter 2 Solve problems ENWW - HP LaserJet Pro 100 | Service Manual - Page 115
level Values High* Full On Off* On Off* Secondary service menu Use the secondary service menu to print service-related reports and to run special tests. Customers do not have access to this menu. Open the secondary service menu 1. Press the Setup button. 2. Press the Cancel button, and then press - HP LaserJet Pro 100 | Service Manual - Page 116
Cal. Clean Belt Pick roller Adjust color Timing Description This item prints a continuous configuration page. This item prints an error report that contains the last 5 instances of 49 Error, Turn off then on or 79 Error, Turn off then on errors. This item sets certain product parameters that are - HP LaserJet Pro 100 | Service Manual - Page 117
1. On the product control panel, press the Setup button. 2. Use the arrows buttons to select the Service menu, and then press the OK button. 3. Software and firmware updates and installation instructions for this product are available at www.hp.com/support/LJColorMFPM175. Click Downloads and drivers - HP LaserJet Pro 100 | Service Manual - Page 118
100 Chapter 2 Solve problems ENWW - HP LaserJet Pro 100 | Service Manual - Page 119
3 Parts and diagrams ● Order parts by authorized service providers ● How to use the parts lists and diagrams ● Assembly locations ● Covers, panels, and doors ● Internal assembly ● PCAs ● Scanner and document feeder (ADF) main assemblies ● - HP LaserJet Pro 100 | Service Manual - Page 120
HP-authorized service or support provider. Related documentation and software Table 3-2 Related documentation and software Item Description HP LaserJet Pro 100 Color MFP M175 User Guide Product user guide. HP LaserJet Pro 100 Color MFP M175 Service Manual English service manual (this manual - HP LaserJet Pro 100 | Service Manual - Page 121
formatter PCA. Table 3-4 Whole-unit replacement part numbers Item Description HP LaserJet Pro 100 Color MFP M175a 110 V 220 V HP LaserJet Pro 100 Color MFP M175nw 110 V 220 V Part number CE913-67001 (new) CE913-69001 (exchange) CE913-67002 (new) CE913-67002 (new; China) CE913-69002 (exchange - HP LaserJet Pro 100 | Service Manual - Page 122
so will make sure that the part number selected is for the correct model. NOTE: In this manual, the abbreviation "PCA" stands for "printed circuit-board assembly." Components described as a PCA might in the table, then it is not a field replacement unit (FRU). 104 Chapter 3 Parts and diagrams ENWW - HP LaserJet Pro 100 | Service Manual - Page 123
Assembly locations Base product (no optional trays or accessories) Figure 3-1 Base product (no optional trays or accessories) 8 1 7 6 2 5 Table 3-5 Base product Item Description 1 Face-down output bin 2 Power switch 3 Extension tray 4 Power receptacle Item 5 6 7 8 ENWW 3 4 Description - HP LaserJet Pro 100 | Service Manual - Page 124
Covers, panels, and doors Figure 3-2 Covers, panels, and doors 6 12 *A01 *A01 8 2 5 *A02 7 4 *A01 9 3 *A01 10 *A03 13 1 11 106 Chapter 3 Parts and diagrams ENWW - HP LaserJet Pro 100 | Service Manual - Page 125
assembly 6 Upper cover assembly 7 Power supply cover assembly 8 Cover, right upper 9 Cover, left 10 Right cover assembly 11 Cover, left front 12 Guide, flexible flat cable 13 Cover, CP hole Part number Qty RL1-3287-000 1 RC3-1294-000 1 RC3-1287-000 1 RC3-1808-000 1 RM1 - HP LaserJet Pro 100 | Service Manual - Page 126
Internal assembly Internal assembly Figure 3-3 Internal assembly *A14 3 2 (J130) (J302) *A31 *A15 (J106) (J107) (J119) *A14 9 *A27 *A14 *A12 *A17 *A09 *A08 *A04 *A03 *A14 *A18 *A20 *A26 *A30 *A19 *A05 *A10 (J103) *A14 (J3) *A01 *A02 *A25 *A21 8 *A13 SEE PCAs *A28 5 *A29 10 SEE - HP LaserJet Pro 100 | Service Manual - Page 127
Table 3-7 Internal assembly) Ref Description 1 Roller, paper pick-up 2 Intermediate transfer belt assembly (ITB) 3 Paper delivery assembly, fuser (110-127 V) 3 Paper delivery assembly, fuser (220-240 V) 4 Plate assembly, base 5 Pad assembly, separation 6 Tray, main assembly 7 Cover - HP LaserJet Pro 100 | Service Manual - Page 128
PCAs Figure 3-4 PCAs 1 5 2 4 3 110 Chapter 3 Parts and diagrams ENWW - HP LaserJet Pro 100 | Service Manual - Page 129
-240 V) 2 Engine controller PCA 3 Fuser power supply PCA (110-127 V) 3 Fuser power supply PCA (220-240 V) 4 Formatter, base 4 Formatter, wireless 5 Wireless N module (wireless models only) Part number Qty RM1-8203-000 1 RM1-8204-000 1 RM1-8205-000 1 RM1-8201-000 1 RM1-8202-000 - HP LaserJet Pro 100 | Service Manual - Page 130
Scanner and document feeder (ADF) main assemblies Figure 3-5 Scanner and document feeder main assemblies 2 1 3 4 112 Chapter 3 Parts and diagrams ENWW - HP LaserJet Pro 100 | Service Manual - Page 131
Table 3-9 Scanner and document feeder main assemblies Ref Description Part number Qty 1 Scanner/ADF assembly (no control panel) CE865-60125 2 Document feeder (ADF) assembly CE865-60121 1 4 Control panel assembly, Western CE865-60106 1 4 Control panel assembly, Asian CE865-60107 1 - HP LaserJet Pro 100 | Service Manual - Page 132
Document feeder internal components Figure 3-6 Document feeder assembly parts 5 78 6 10 4 1 2 9 3 114 Chapter 3 Parts and diagrams ENWW - HP LaserJet Pro 100 | Service Manual - Page 133
(ADF) 5 Pick arm assembly (ADF) 9 Cover, inner (ADF) 10 Roller assembly, post-scan pinch (ADF) Not shown Paper guide-front polished, (ADF) Not shown Paper guide-rear polished, (ADF) Part number Qty Q7400-60005 1 CE538-60122 1 CE865-40033 1 CE538-60137 1 CE538-40028 1 Q7400-60163 - HP LaserJet Pro 100 | Service Manual - Page 134
Cover, right upper Document feeder (ADF) assembly Door, front Engine controller PCA Formatter, base Formatter, wireless Fuser power supply PCA (110-127 V) Fuser power supply PCA (220-240 V) Guide, flexible flat cable Hinge, control panel Hinge, floating 116 Chapter 3 Parts and diagrams Part number - HP LaserJet Pro 100 | Service Manual - Page 135
Paper delivery assembly, fuser (110-127 V) RM1-7211-000 Paper delivery assembly, fuser (220-240 V) RM1-7269-000 Paper guide-front polished, (ADF) CE538-40034 Paper guide-rear polished, (ADF) CE538-40035 Pick arm assembly (ADF) CE538-60137 Plate assembly, base RM1-7213-000 Power supply - HP LaserJet Pro 100 | Service Manual - Page 136
(continued) Description Spring, control panel Part number CE865-00009 Tray, main assembly RM1-7276-000 Upper cover assembly RM1-7278-000 Wireless N module (wireless models only) 1150-7940 Table and page Scanner and document feeder main assemblies on page 113 Internal assembly) on page 109 - HP LaserJet Pro 100 | Service Manual - Page 137
Table 3-12 Numerical parts list Part number Description 1150-7940 CE538-40028 Wireless N module (wireless models only) Cover, inner (ADF) CE538-40034 Paper guide-front polished, (ADF) CE538-40035 Paper guide-rear polished, (ADF) CE538-60122 Input tray, assembly (ADF) CE538-60135 Hinge - HP LaserJet Pro 100 | Service Manual - Page 138
RC3-1287-000 Cover, blanking RC3-1288-000 Cover, left front RC3-1289-000 Cover, CP hole RC3-1294-000 Cover, fixing RC3-1799-000 Guide, flexible flat cable RC3-1808-000 Cover, network plug RL1-2671-000 Roller, paper pick-up RL1-2729-000 Cover, left RL1-3287-000 Door - HP LaserJet Pro 100 | Service Manual - Page 139
Table 3-12 Numerical parts list (continued) Part number Description RM1-7280-000 Right cover assembly RM1-8201-000 RM1-8202-000 RM1-8203-000 RM1-8204-000 RM1-8205-000 Fuser power supply PCA (110-127 V) Fuser power supply PCA (220-240 V) Power supply, low-voltage (110-127 V) Power supply, low- - HP LaserJet Pro 100 | Service Manual - Page 140
122 Chapter 3 Parts and diagrams ENWW - HP LaserJet Pro 100 | Service Manual - Page 141
A Service and support ● Hewlett-Packard limited warranty statement ● HP's Premium Protection Warranty: LaserJet print cartridge limited warranty statement ● HP's LaserJet imaging drum limited warranty statement for replacement imaging drums ● Data stored on the print cartridge and imaging drum ● End - HP LaserJet Pro 100 | Service Manual - Page 142
-Packard limited warranty statement HP PRODUCT HP LaserJet Pro 100 color MFP M175a, M175nw Imaging drum, CE314A, ships with product DURATION OF LIMITED WARRANTY One-year product exchange One-year product exchange HP warrants to you, the end-user customer, that HP hardware and accessories will - HP LaserJet Pro 100 | Service Manual - Page 143
THE WARRANTY TERMS CONTAINED IN THIS STATEMENT, EXCEPT TO THE EXTENT LAWFULLY PERMITTED, DO NOT EXCLUDE, RESTRICT OR MODIFY AND ARE IN ADDITION TO THE MANDATORY STATUTORY RIGHTS APPLICABLE TO THE SALE OF THIS PRODUCT TO YOU. ENWW Hewlett-Packard limited warranty statement 125 - HP LaserJet Pro 100 | Service Manual - Page 144
specifications for the printer product or (c) exhibit wear from ordinary use. To obtain warranty service, please return the product to place of purchase (with a written description of the problem and print samples) or contact HP customer support. At HP's option, HP will either replace products that - HP LaserJet Pro 100 | Service Manual - Page 145
HP's LaserJet imaging drum limited warranty statement for replacement imaging drums This HP Product is warranted to be free from defects in materials and workmanship for one-year from installation. This warranty does not apply to imaging drums that (a) have been refurbished, remanufactured or - HP LaserJet Pro 100 | Service Manual - Page 146
using the print cartridge and imaging drum, the page coverage, the printing modes used, any printing errors that might have occurred, and the product model. This information helps HP design future products , the memory chip cannot be used in an HP product. 128 Appendix A Service and support ENWW - HP LaserJet Pro 100 | Service Manual - Page 147
using the HP Software. You may not modify the HP Software or disable any licensing or control feature of the HP Software. If this Software is provided by HP for Use with an imaging or printing product (for example, if the Software is a printer driver, firmware, or add-on), the HP Software may only - HP LaserJet Pro 100 | Service Manual - Page 148
. The initial end user of the HP Software may make a one-time transfer of the HP Software to another end user. Any transfer Software or the HP Product, or (ii) the provision of support services related to the Software or the HP Product. All such information will be subject to HP's privacy policy. HP - HP LaserJet Pro 100 | Service Manual - Page 149
for use in the OpenSSL Toolkit (http://www.openssl.org/) THIS SOFTWARE IS PROVIDED BY THE OpenSSL PROJECT ``AS IS'' AND ANY CONSEQUENTIAL DAMAGES (INCLUDING, BUT NOT LIMITED TO, PROCUREMENT OF SUBSTITUTE GOODS OR SERVICES; LOSS OF USE, DATA, OR PROFITS; OR BUSINESS INTERRUPTION) HOWEVER CAUSED AND - HP LaserJet Pro 100 | Service Manual - Page 150
at www.hp.com/support/. Get 24-hour Internet support www.hp.com/support/LJColorMFPM175 Get support for products used with a Macintosh computer www.hp.com/go/macosx Download software utilities, drivers, and electronic information www.hp.com/support/LJColorMFPM175 Order additional HP service or - HP LaserJet Pro 100 | Service Manual - Page 151
toner. To prevent damage to the print cartridge, avoid touching the roller on it, and store the print cartridge in its original packing material or so 50 to 100 sheets of paper or other print media that did not print correctly. 4. In the U.S., call HP Customer Care to request new packing material. - HP LaserJet Pro 100 | Service Manual - Page 152
134 Appendix A Service and support ENWW - HP LaserJet Pro 100 | Service Manual - Page 153
B Specifications ● Physical specifications ● Power consumption, electrical specifications, and acoustic emissions ● Environmental specifications ENWW 135 - HP LaserJet Pro 100 | Service Manual - Page 154
specifications1 Specification HP LaserJet Pro 100 color MFP M175 Product weight 11.6 kg (25.6 lb) Product height 222.8 mm (8.77 in) Product depth 410.2 mm (16.15 in) Product width 399.6 mm (15.73 in) 1 Values are based on preliminary data. See www.hp.com/support/LJColorMFPM175. Power - HP LaserJet Pro 100 | Service Manual - Page 155
C Regulatory information ● FCC regulations ● Declaration of conformity (base models) ● Declaration of conformity (wireless models) ● Certificate of Volatility ● Safety statements ● Additional statements for wireless products ENWW 137 - HP LaserJet Pro 100 | Service Manual - Page 156
and used in accordance with the instructions, it may cause harmful interference to is encouraged to try to correct the interference by one or more of the following measures: ● Reorient Any changes or modifications to the printer that are not expressly approved by HP could void the user's authority - HP LaserJet Pro 100 | Service Manual - Page 157
Name: HP LaserJet Pro 100 color MFP M175a Regulatory Model Number2) BOISB-1001-02 Product Options: ALL Print Cartridges: CE310A, EC) No. 1275/2008 Supplementary Information: ENERGY STAR® Qualified Imaging Equipment Typical Electricity Consumption (TEC) Test Procedure The product herewith - HP LaserJet Pro 100 | Service Manual - Page 158
Boise, Idaho USA October 2010 Your Local Hewlett-Packard Sales and Service Office or Hewlett-Packard GmbH, Department HQTRE / Standards Europe, Herrenberger Strasse 140, D-71034, Böblingen (FAX: +49-7031-14-3143) www.hp.com/go/certificates Product Regulations Manager, Hewlett-Packard Company, PO Box - HP LaserJet Pro 100 | Service Manual - Page 159
HP LaserJet Pro 100 color MFP M175nw Regulatory Model Number2) BOISB-1001-03 Product Options: ALL Radio Module3) SDGOB - 0892 Print Cartridges ) No. 1275/2008 Supplementary Information: ENERGY STAR® Qualified Imaging Equipment Typical Electricity Consumption (TEC) Test Procedure The product - HP LaserJet Pro 100 | Service Manual - Page 160
only: October 2010 European Contact: Your Local Hewlett-Packard Sales and Service Office or Hewlett-Packard GmbH, Department HQTRE / Standards Europe, 140, D-71034, Böblingen (FAX: +49-7031-14-3143) www.hp.com/go/certificates USA Contact: Product Regulations Manager, Hewlett-Packard Company, PO - HP LaserJet Pro 100 | Service Manual - Page 161
Address: M175n CE865A 11311 Chinden Blvd. M175nw CE866A Boise, ID 83714 Volatile Memory DRAM 160 MB total Run-time firmware Power off printer 80 MB image, print job info available during printing Type (SRAM, Unit: LaserJet Business Date Prepared: 4/1/2011 ENWW Certificate of - HP LaserJet Pro 100 | Service Manual - Page 162
under the U.S. Department of Health and Human Services (DHHS) Radiation Performance Standard according to the other than those specified in this user guide may result in exposure to hazardous CEM ». » VCCI statement (Japan) Power cord instructions Make sure your power source is adequate for the - HP LaserJet Pro 100 | Service Manual - Page 163
bruksanvisning specificerats, kan användaren utsättas för osynlig laserstrålning, som överskrider gränsen för laserklass 1. HUOLTO HP LaserJet Pro 100 color M175a, M175nw - kirjoittimen sisällä ei ole käyttäjän huollettavissa olevia kohteita. Laitteen saa avata ja huoltaa ainoastaan sen huoltamiseen - HP LaserJet Pro 100 | Service Manual - Page 164
Substances Table (China) Restriction on Hazardous Substances statement (Turkey) Türkiye Cumhuriyeti: EEE Yönetmeliğine Uygundur 146 Appendix C Regulatory information ENWW - HP LaserJet Pro 100 | Service Manual - Page 165
for radio noise emissions from digital apparatus as set out in the radio interference regulations of the Canadian Department of Communications. The internal wireless radio complies with RSS 210 of Industry Canada. Pour l´usage d´intérieur. Le présent appareil numérique n´émet pas de bruits radio - HP LaserJet Pro 100 | Service Manual - Page 166
2400-2454 MHz frequency band (channels 1-9) may be used. For the latest requirements, see www.arcep.fr. L'utilisation de cet equipement (2.4 GHz Wireless LAN) est soumise à certaines restrictions : Cet équipement peut être utilisé à l'intérieur d'un bâtiment en utilisant toutes les fréquences de - HP LaserJet Pro 100 | Service Manual - Page 167
, 145 license, software 129 location assemblies (base product) 0 setting 98 M Macintosh support 132 memory NVRAM initialization 99 memory chip, imaging drum description 128 memory chip, print cartridge description 128 menu Copy Menu 95 Network Setup 94 Reports 91 Service 94, 97 System Setup 91 menu - HP LaserJet Pro 100 | Service Manual - Page 168
specifications 136 tests post-service 4 print-quality 4 tips iii toner cartridges. See print cartridges tools, required 3 troubleshooting checklist 78 control-panel tests 82 NVRAM initialization 99 problem source 80 W warnings iii warranty customer self repair 132 imaging drum 127 license 129 print - HP LaserJet Pro 100 | Service Manual - Page 169
- HP LaserJet Pro 100 | Service Manual - Page 170
© 2011 Hewlett-Packard Development Company, L.P. www.hp.com *CE865-90968* *CE865-90968* CE865-90968
-
 1
1 -
 2
2 -
 3
3 -
 4
4 -
 5
5 -
 6
6 -
 7
7 -
8
-
9
-
10
-
11
-
12
-
13
-
14
-
15
-
16
-
17
-
18
-
19
-
20
-
21
-
22
-
23
-
24
-
25
-
26
-
27
-
28
-
29
-
30
-
31
-
32
-
33
-
34
-
35
-
36
-
37
-
38
-
39
-
40
-
41
-
42
-
43
-
44
-
45
-
46
-
47
-
48
-
49
-
50
-
51
-
52
-
53
-
54
-
55
-
56
-
57
-
58
-
59
-
60
-
61
-
62
-
63
-
64
-
65
-
66
-
67
-
68
-
69
-
70
-
71
-
72
-
73
-
74
-
75
-
76
-
77
-
78
-
79
-
80
-
81
-
82
-
83
-
84
-
85
-
86
-
87
-
88
-
89
-
90
-
91
-
92
-
93
-
94
-
95
-
96
-
97
-
98
-
99
-
100
-
101
-
102
-
103
-
104
-
105
-
106
-
107
-
108
-
109
-
110
-
111
-
112
-
113
-
114
-
115
-
116
-
117
-
118
-
119
-
120
-
121
-
122
-
123
-
124
-
125
-
126
-
127
-
128
-
129
-
130
-
131
-
132
-
133
-
134
-
135
-
136
-
137
-
138
-
139
-
140
-
141
-
142
-
143
-
144
-
145
-
146
-
147
-
148
-
149
-
150
-
151
-
152
-
153
-
154
-
155
-
156
-
157
-
158
-
159
-
160
-
161
-
162
-
163
-
164
-
165
-
166
-
167
-
168
-
169
-
170
 |
 |
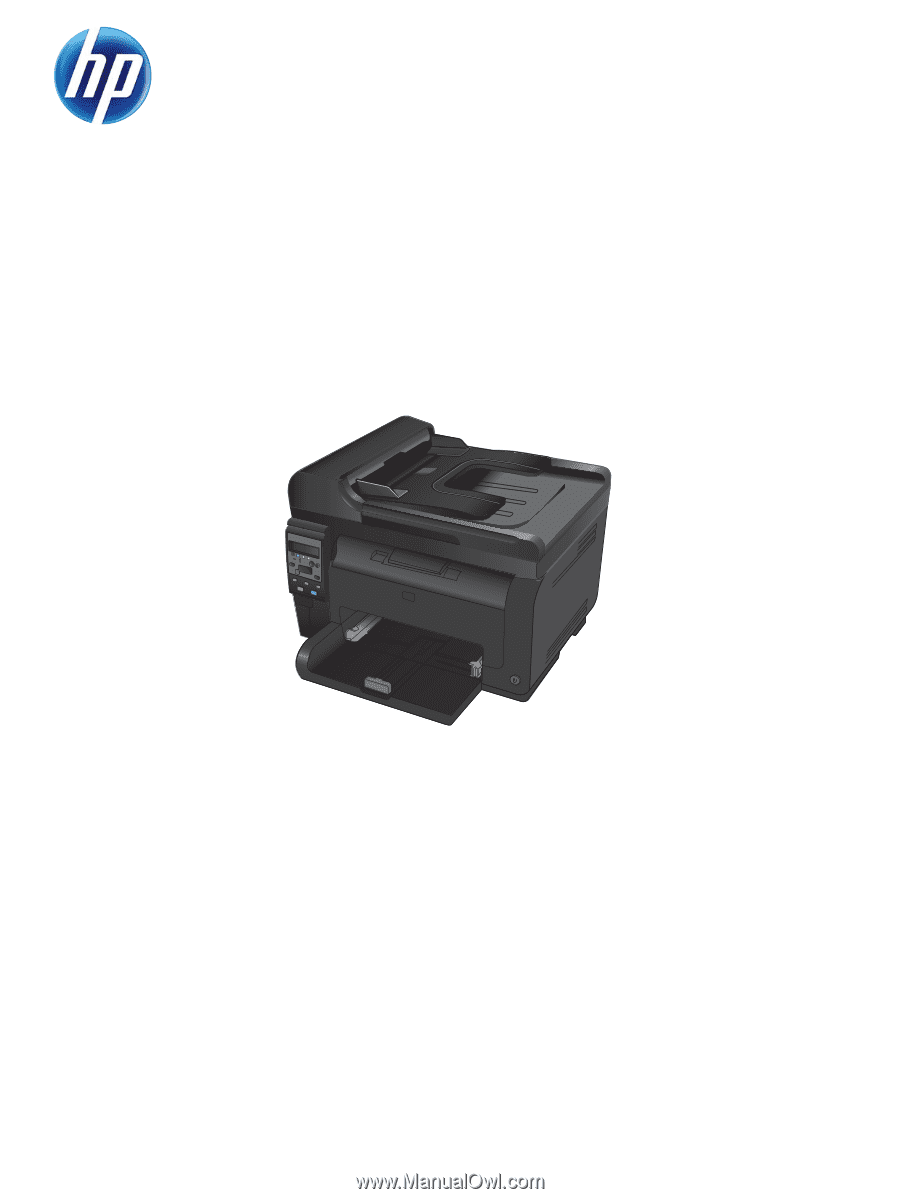
LASERJET PRO 100 COLOR MFP M175
Service Manual