HP LaserJet Pro 100 Service Manual - Page 68
Remove the ITB assembly 14 of 17
 |
View all HP LaserJet Pro 100 manuals
Add to My Manuals
Save this manual to your list of manuals |
Page 68 highlights
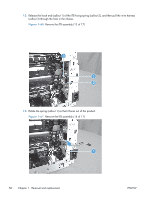
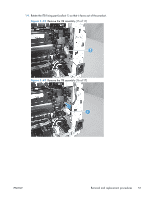
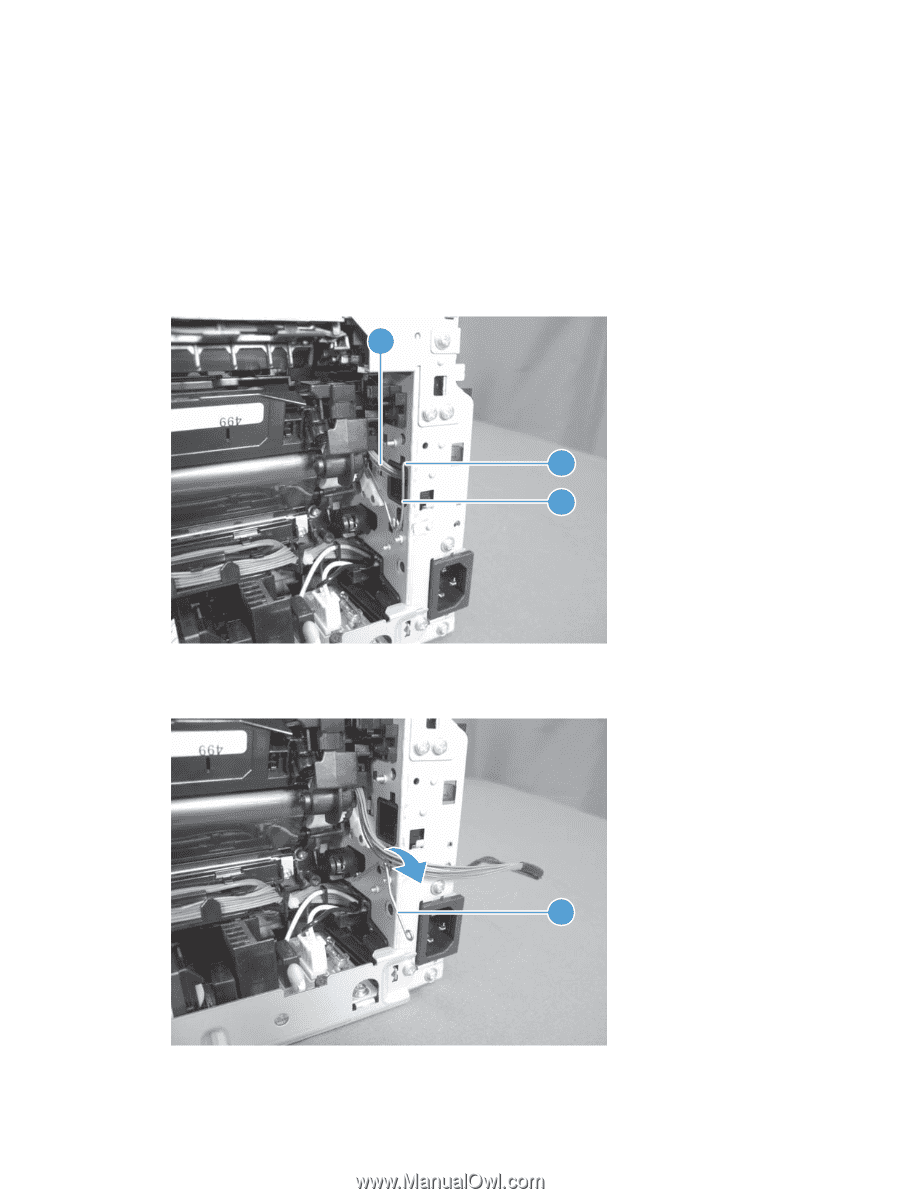
12. Release the hook end (callout 1) of the ITB fixing spring (callout 2), and then pull the wire harness (callout 3) through the hole in the chassis. Figure 1-60 Remove the ITB assembly (13 of 17) 3 1 2 13. Rotate the spring (callout 1) so that it faces out of the product. Figure 1-61 Remove the ITB assembly (14 of 17) 1 50 Chapter 1 Removal and replacement ENWW
-
 1
1 -
2
-
3
-
4
-
5
-
6
-
7
-
8
-
9
-
10
-
11
-
12
-
13
-
14
-
15
-
16
-
17
-
18
-
19
-
20
-
21
-
22
-
23
-
24
-
25
-
26
-
27
-
28
-
29
-
30
-
31
-
32
-
33
-
34
-
35
-
36
-
37
-
38
-
39
-
40
-
41
-
42
-
43
-
44
-
45
-
46
-
47
-
48
-
49
-
50
-
51
-
52
-
53
-
54
-
55
-
56
-
57
-
58
-
59
-
60
-
61
-
62
-
 63
63 -
 64
64 -
 65
65 -
 66
66 -
 67
67 -
 68
68 -
 69
69 -
 70
70 -
 71
71 -
 72
72 -
 73
73 -
74
-
75
-
76
-
77
-
78
-
79
-
80
-
81
-
82
-
83
-
84
-
85
-
86
-
87
-
88
-
89
-
90
-
91
-
92
-
93
-
94
-
95
-
96
-
97
-
98
-
99
-
100
-
101
-
102
-
103
-
104
-
105
-
106
-
107
-
108
-
109
-
110
-
111
-
112
-
113
-
114
-
115
-
116
-
117
-
118
-
119
-
120
-
121
-
122
-
123
-
124
-
125
-
126
-
127
-
128
-
129
-
130
-
131
-
132
-
133
-
134
-
135
-
136
-
137
-
138
-
139
-
140
-
141
-
142
-
143
-
144
-
145
-
146
-
147
-
148
-
149
-
150
-
151
-
152
-
153
-
154
-
155
-
156
-
157
-
158
-
159
-
160
-
161
-
162
-
163
-
164
-
165
-
166
-
167
-
168
-
169
-
170
 |
 |
12.
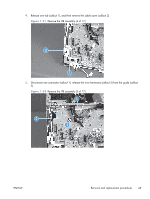
Release the hook end (callout 1) of the ITB fixing spring (callout 2), and then pull the wire harness
(callout 3) through the hole in the chassis.
Figure 1-60
Remove the ITB assembly (13 of 17)
1
2
3
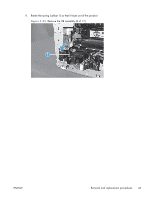
13.
Rotate the spring (callout 1) so that it faces out of the product.
Figure 1-61
Remove the ITB assembly (14 of 17)
1
50
Chapter 1
Removal and replacement
ENWW