HP Nc6400 Drives - Windows Vista - Page 17
MultiBay II Optical Drive, Inserting an Optical Drive, Removing an Optical Drive
 |
View all HP Nc6400 manuals
Add to My Manuals
Save this manual to your list of manuals |
Page 17 highlights
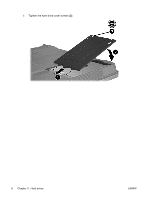
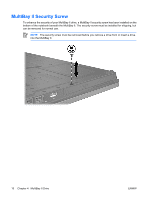
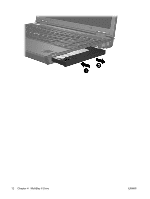
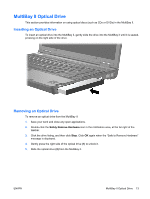
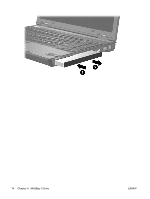
MultiBay II Optical Drive This section provides information on using optical discs (such as CDs or DVDs) in the MultiBay II. Inserting an Optical Drive To insert an optical drive into the MultiBay II, gently slide the drive into the MultiBay II until it is seated, pressing on the right side of the drive. Removing an Optical Drive To remove an optical drive from the MultiBay II: 1. Save your work and close any open applications. 2. Double-click the Safely Remove Hardware icon in the notification area, at the far right of the taskbar. 3. Click the drive listing, and then click Stop. Click OK again when the "Safe to Remove Hardware" message is displayed. 4. Gently press the right side of the optical drive (1) to unlock it. 5. Slide the optical drive (2) from the MultiBay II. ENWW MultiBay II Optical Drive 13
-
 1
1 -
2
-
3
-
4
-
5
-
6
-
7
-
8
-
9
-
10
-
11
-
 12
12 -
 13
13 -
 14
14 -
 15
15 -
 16
16 -
 17
17 -
 18
18 -
 19
19 -
 20
20 -
 21
21 -
 22
22 -
23
-
24
-
25
-
26
-
27
-
28
 |
 |
