HP Q3722A HP LaserJet 9040/9050 - User Guide - Page 81
Specifying paper to print on, Benefits of printing by type and size of paper
 |
View all HP Q3722A manuals
Add to My Manuals
Save this manual to your list of manuals |
Page 81 highlights
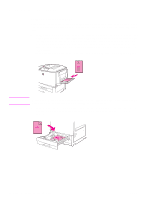
Specifying paper to print on Note Note ENWW You can configure the printer to select paper by type (such as plain or letterhead) and size (such as letter or A4), as opposed to source (a paper tray). Printing by Type and Size means that the printer to pulls paper from the first tray that is loaded with the type or size that you select. Selecting paper by type rather than source is similar to locking out trays, which helps to protect special paper from accidental use. (However, selecting the ANY SIZE, ANY TYPE, or PLAIN setting does not turn on the tray lock-out function.) For example, if Tray 2 is configured for letterhead, and you specify in the driver that you want to print on plain paper, the printer will not pull the letterhead from Tray 2. Instead, the printer pulls paper from a tray that has plain paper loaded and is configured for plain paper on the printer control panel. Selecting paper by type and size results in significantly better print quality for heavy paper, glossy paper, and transparencies. Using the wrong setting can result in unsatisfactory print quality. Always print by type for special print media such as labels or grayscale transparencies. Always print by size for envelopes. Benefits of printing by type and size of paper If you frequently use several kinds of paper, once trays are set correctly, you do not have to check which paper is loaded in each tray before you print. This is especially helpful when the printer is shared and more than one person loads or removes paper. Printing by type and size of paper is a way to be sure that print jobs always print on the appropriate paper. To set the type for the paper or media you loaded when you are unsure which type (such as bond or recycled) to choose, check the label on the package of paper. For supported types of paper, see Paper specifications or go to www.hp.com/support/lj9050_lj9040. The type and size settings can also be configured from the embedded Web server or HP Web Jetadmin software for networked printers. See the printer driver online help. To print by type and size of paper Settings in the printer driver and software program override control-panel settings. (Software program settings generally override printer driver settings.) 1 Load and adjust the trays. (See Loading input trays, or go to www.hp.com/support/ lj9050_lj9040.) 2 At the printer control panel, press , use or to scroll to PAPER HANDLING, and then press . 3 Do one of the following: • To allow the printer to automatically pull the type and size of paper loaded in optional Tray 1: Set TRAY 1 SIZE=ANY SIZE and TRAY 1 TYPE=ANY TYPE. • To print by type and size from optional Tray 1: Set TRAY 1 SIZE to the size loaded, and set TRAY 1 TYPE to the type loaded. • To print by type and size from Tray 2, Tray 3, or optional Tray 4 when the tray is loaded with standard size paper: Just set the type. If the size is a detectable standard size, it will be automatically detected. If the size is an undetectable size, set the size. • To print by type and size from Tray 2, Tray 3, or optional Tray 4 when the tray is loaded with a custom size paper: set the size and type. For the size, select Custom, and then set the values using the measurements on the guides in the trays. 4 From the program or printer driver, select the type and size of paper. Specifying paper to print on 79
-
 1
1 -
2
-
3
-
4
-
5
-
6
-
7
-
8
-
9
-
10
-
11
-
12
-
13
-
14
-
15
-
16
-
17
-
18
-
19
-
20
-
21
-
22
-
23
-
24
-
25
-
26
-
27
-
28
-
29
-
30
-
31
-
32
-
33
-
34
-
35
-
36
-
37
-
38
-
39
-
40
-
41
-
42
-
43
-
44
-
45
-
46
-
47
-
48
-
49
-
50
-
51
-
52
-
53
-
54
-
55
-
56
-
57
-
58
-
59
-
60
-
61
-
62
-
63
-
64
-
65
-
66
-
67
-
68
-
69
-
70
-
71
-
72
-
73
-
74
-
75
-
 76
76 -
 77
77 -
 78
78 -
 79
79 -
 80
80 -
 81
81 -
 82
82 -
 83
83 -
 84
84 -
 85
85 -
 86
86 -
87
-
88
-
89
-
90
-
91
-
92
-
93
-
94
-
95
-
96
-
97
-
98
-
99
-
100
-
101
-
102
-
103
-
104
-
105
-
106
-
107
-
108
-
109
-
110
-
111
-
112
-
113
-
114
-
115
-
116
-
117
-
118
-
119
-
120
-
121
-
122
-
123
-
124
-
125
-
126
-
127
-
128
-
129
-
130
-
131
-
132
-
133
-
134
-
135
-
136
-
137
-
138
-
139
-
140
-
141
-
142
-
143
-
144
-
145
-
146
-
147
-
148
-
149
-
150
-
151
-
152
-
153
-
154
-
155
-
156
-
157
-
158
-
159
-
160
-
161
-
162
-
163
-
164
-
165
-
166
-
167
-
168
-
169
-
170
-
171
-
172
-
173
-
174
-
175
-
176
-
177
-
178
-
179
-
180
-
181
-
182
-
183
-
184
-
185
-
186
-
187
-
188
-
189
-
190
-
191
-
192
-
193
-
194
-
195
-
196
-
197
-
198
-
199
-
200
-
201
-
202
-
203
-
204
-
205
-
206
-
207
-
208
-
209
-
210
-
211
-
212
-
213
-
214
-
215
-
216
-
217
-
218
 |
 |