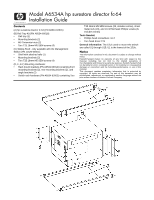
HP Surestore 64 Installation Guide - Page 3
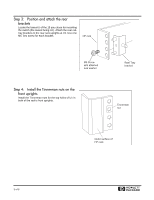
Step 3: Position and attach the rear brackets
 |
View all HP Surestore 64 manuals
Add to My Manuals
Save this manual to your list of manuals |
Page 3 highlights
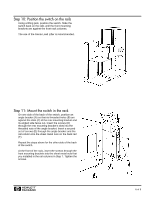
Step 3: Position and attach the rear brackets Locate the lowest U of the 15 you chose for mounting the switch (the lowest being U1). Attach the rear railtray brackets to the rear rack uprights at U1. Use one M5 Torx screw for each bracket. HP rack M5 Screw with attached lock washer Rear Tray bracket Step 4: Install the Tinnerman nuts on the front uprights Install the Tinnerman nuts for the top holes of U1 in both of the rack's front uprights. Tinnerman nut Outer surface of HP rack 3 of 8 H
-
 1
1 -
 2
2 -
 3
3 -
 4
4 -
 5
5 -
 6
6 -
 7
7 -
 8
8 -
 9
9 -
10
 |
 |

3 of 8
H
Step 3:
Position and attach the rear
brackets
Locate the lowest U of the 15 you chose for mounting
the switch (the lowest being U1). Attach the rear rail-
tray brackets to the rear rack uprights at U1. Use one
M5 Torx screw for each bracket.
Step 4:
Install the Tinnerman nuts on the
front uprights
Install the Tinnerman nuts for the top holes of U1 in
both of the rack’s front uprights.
M5 Screw
with attached
lock washer
HP rack
Rear Tray
bracket
Tinnerman
nut
Outer surface of
HP rack