HP TouchSmart 610-1150xt Wall-Mounting your HP TouchSmart User Guide - Page 19
Do not skip steps 7 and 8 when replacing the computer stand. The VESA adapter
 |
View all HP TouchSmart 610-1150xt manuals
Add to My Manuals
Save this manual to your list of manuals |
Page 19 highlights
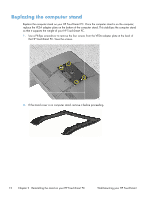
7. Position the VESA adapter plate over the bottom of the computer stand, aligning the round cutout with the raised circle, and align the four screw holes. 8. Use a Phillips screwdriver to tighten all four screws attaching the VESA adapter plate to the bottom of the computer stand. CAUTION: Do not skip steps 7 and 8 when replacing the computer stand. The VESA adapter plate is required on the computer stand to support the weight of the computer. Wall-Mounting your HP TouchSmart Replacing the computer stand 15
-
 1
1 -
2
-
3
-
4
-
5
-
6
-
7
-
8
-
9
-
10
-
11
-
12
-
13
-
 14
14 -
 15
15 -
 16
16 -
 17
17 -
 18
18 -
 19
19 -
 20
20
 |
 |
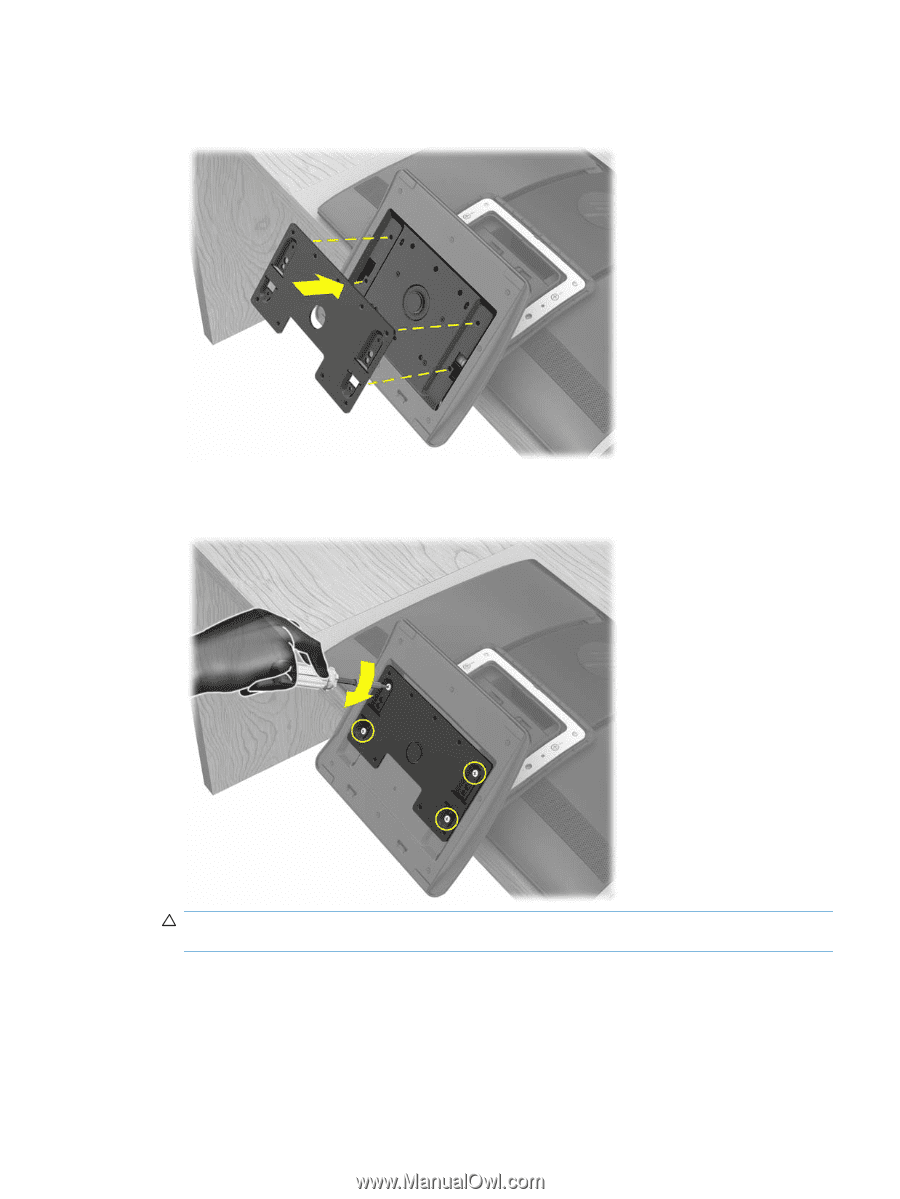
7.
Position the VESA adapter plate over the bottom of the computer stand, aligning the round cutout
with the raised circle, and align the four screw holes.
8.
Use a Phillips screwdriver to tighten all four screws attaching the VESA adapter plate to the bottom
of the computer stand.
CAUTION:
Do not skip steps 7 and 8 when replacing the computer stand. The VESA adapter
plate is required on the computer stand to support the weight of the computer.
Wall-Mounting your HP TouchSmart
Replacing the computer stand
15