HP Vectra XE310 hp vectra xe310, troubleshooting guide - Page 29
HP Setup Program, Entering the Setup Program, Setup Program Menus - bios update
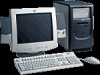 |
View all HP Vectra XE310 manuals
Add to My Manuals
Save this manual to your list of manuals |
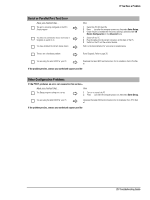
Page 29 highlights
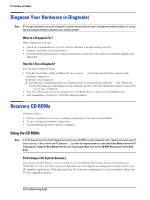
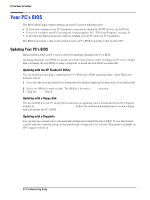
If You Have a Problem Caution Restoring the original factory configuration will completely erase the main hard drive partition. It is highly recommended to (a) back up all your data before proceeding, (b) remove all devices you have added, (c) update your PC's BIOS (refer to page 34) and (d) have driver software to hand for any add-on hardware. The whole process normally takes about half an hour. 1 Insert the HP Image Creation & Recovery CD-ROM in your CD-ROM drive and restart your PC. 2 Follow the onscreen instructions. You will be instructed to insert the HP Image Library & Diagnostics CD-ROM at some point. 3 Reinstall drivers or software for any devices that were not part of your PC's original configuration. 4 Restore all data files and software applications that were not part of your PC's original configuration. If you received any software CDs with your PC in addition to the HP Image Creation & Recovery CDROM and HP Image Library & Diagnostics CD-ROM, you must also reinstall these applications. Manually Reinstalling Drivers Note The most up-to-date drivers are available on HP's Vectra support website at www.hp.com/go/vectrasupport. 1 Insert the HP Image Library & Diagnostics CD-ROM in the CD-ROM drive while your operating system is running. 2 Using Windows Explorer, select the driver(s) you need to reinstall. 3 Follow the installation instructions contained in the what's new file accompanying the driver. Running HP e-Diagtools from the CD-ROM 1 Insert the HP Image Library & Diagnostics CD-ROM or Diagtools CD-ROM in the CD-ROM drive and restart the PC. 2 In the menu that appears, select the option to run hardware diagnostics. 3 Follow the onscreen instructions in the e-Diagtools screen that appears. HP Setup Program The HP Setup program allows you to view and change the configuration of your PC. Sometimes you may also need to enter the Setup program to reconfigure your PC after installing new hardware components. The Setup program has online help to guide you through any changes you have to make. Entering the Setup Program To enter the Setup program, press F8 just after the computer powers-on, then select Enter Setup from within the list of options. Setup Program Menus Your PC's Setup program contains a series of menus, which are selected with the right and left arrow keys on your keyboard. You can select an item within a menu with the up and down arrow keys. When an item is selected, Setup displays a description of its function on the right of the screen. The Setup program contains the following menus: 29 Troubleshooting Guide
-
 1
1 -
2
-
3
-
4
-
5
-
6
-
7
-
8
-
9
-
10
-
11
-
12
-
13
-
14
-
15
-
16
-
17
-
18
-
19
-
20
-
21
-
22
-
23
-
 24
24 -
 25
25 -
 26
26 -
 27
27 -
 28
28 -
 29
29 -
 30
30 -
 31
31 -
 32
32 -
 33
33 -
 34
34 -
35
-
36
-
37
-
38
-
39
-
40
-
41
-
42
 |
 |