HP s3720y Upgrading and Servicing Guide
HP s3720y - Pavilion - Slimline Manual
 |
UPC - 884420938309
View all HP s3720y manuals
Add to My Manuals
Save this manual to your list of manuals |
HP s3720y manual content summary:
- HP s3720y | Upgrading and Servicing Guide - Page 1
Upgrading and Servicing Guide - HP s3720y | Upgrading and Servicing Guide - Page 2
express statements accompanying such products and services. Nothing herein should be construed as constituting an additional warranty. HP shall not be liable for technical or editorial errors or omissions contained herein. HP assumes no responsibility for the use or reliability of its software on - HP s3720y | Upgrading and Servicing Guide - Page 3
Optical Disc Drive 11 Removing and Replacing a Hard Disk Drive 12 Before You Begin 12 Removing a Hard Disk Drive 12 Replacing a Hard Disk Drive 14 Removing and Replacing Memory 16 Before You Begin 16 Removing a Memory Module 17 Replacing a Memory Module 18 Removing and Replacing a PCI Card - HP s3720y | Upgrading and Servicing Guide - Page 4
iv Upgrading and Servicing Guide - HP s3720y | Upgrading and Servicing Guide - Page 5
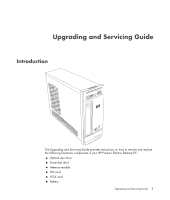
and Servicing Guide Introduction The Upgrading and Servicing Guide provides instructions on how to remove and replace the following hardware components in your HP Pavilion Slimline Desktop PC: Optical disc drive Hard disk drive Memory module PCI card PCI-E card Battery Upgrading and Servicing Guide - HP s3720y | Upgrading and Servicing Guide - Page 6
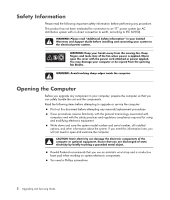
read "Additional Safety Information" in your Limited Warranty and Support Guide before installing and connecting your system to the electrical power system. WARNING: Keep your hands away from the moving fan. Keep fingers and tools clear of the fan when power is applied. Never open the cover with the - HP s3720y | Upgrading and Servicing Guide - Page 7
follow this procedure before opening the computer: 1 Remove any of the following: Memory card from the memory card reader Optical disc (CD or DVD) from the optical drive Pocket Media Drive from the Pocket Media Drive bay 2 Turn off the computer. Click the Windows Start Button®, click the Arrow - HP s3720y | Upgrading and Servicing Guide - Page 8
. T 4 Slide the computer cover back about 1.25 centimeters (1/2 inch), and then lift it off the computer. Set it aside. 1394 r digitaOl UaTudio wiraenletsesnnLAaN S-VIDEO NOTE: Use the screwdriver slot on the back of the cover to loosen the cover, as required. 4 Upgrading and Servicing Guide - HP s3720y | Upgrading and Servicing Guide - Page 9
an Optical Disc Drive" CD-ROM, CD-RW, on page 8. DVD-ROM, DVD+RW, or combination drive B Hard disk drive (located "Removing and Replacing a Hard Disk Drive" on under the optical drive bay) page 12. C Memory module (2) "Removing and Replacing Memory" on page 16. D Modem card (PCI card) and - HP s3720y | Upgrading and Servicing Guide - Page 10
The following illustration shows component locations: A C digitOaUl aT udiowriaenletesnsnLaAN S-VIDEO E B D 6 Upgrading and Servicing Guide - HP s3720y | Upgrading and Servicing Guide - Page 11
Reconnect the modem/telephone cable and all other attached cables, such as the keyboard, mouse, Ethernet, and monitor cables. 2 Reconnect external devices, such as a printer. 3 Reconnect the power cord. 4 Turn on the computer and all peripherals, such as the monitor. Upgrading and Servicing Guide 7 - HP s3720y | Upgrading and Servicing Guide - Page 12
less than the approximate length of 170 millimeters (6.7 inches). Optical disc drive Your computer comes with a SATA (serial advanced technology attachment) drive that uses a narrow data cable with an optional latch. This procedure requires a Phillips screwdriver. 8 Upgrading and Servicing Guide - HP s3720y | Upgrading and Servicing Guide - Page 13
press the two tabs together at the top of the cover; then push the cover out. digitaOlUauTdio wiraenletsesnLnAaN S-VIDEO 3 If your computer includes a Pocket Media Drive, lift the tab on the Pocket Media Drive cage. Then pull the cage back and out of the chassis. Upgrading and Servicing Guide 9 - HP s3720y | Upgrading and Servicing Guide - Page 14
connector by the handle only. 6 Disconnect the sound cable, if present. 7 Remove the screw from the optical disc drive side. 8 Pull the latch away from the drive, and push the drive through the front of the computer. IMPORTANT: Do not tilt the drive during removal. 10 Upgrading and Servicing Guide - HP s3720y | Upgrading and Servicing Guide - Page 15
data cable firmly to the back of the optical disc drive. Ensure that the cables are completely inserted. 5 Some drive models may have a sound cable. If so, connect the sound cable. 6 If your computer includes a Pocket Media Drive, insert the Pocket Media Drive cage: a Align the arrow on the PMD cage - HP s3720y | Upgrading and Servicing Guide - Page 16
the hard disk drive, perform the System Recovery procedure. Use the recovery discs to load the factory-installed files. Refer to the Troubleshooting and Maintenance Guide for detailed System Recovery steps. IMPORTANT: Before upgrading a hard disk drive, make sure a recovery disc is available - HP s3720y | Upgrading and Servicing Guide - Page 17
drive tray. NOTE: Ensure that the computer cables are clear of the drive tray when removing. Push them away, as required, before removing the tray. 7 Remove the four screws that secure the hard disk drive to the drive tray, and slide the hard disk drive out of the tray. Upgrading and Servicing Guide - HP s3720y | Upgrading and Servicing Guide - Page 18
the hard disk drive into the tray. 3 Insert and tighten the four screws that secure the hard disk drive to the drive tray. 4 Slide the hard disk drive tray into the computer drive bay. 5 Insert and tighten the hard disk drive retaining screw into the drive tray. 14 Upgrading and Servicing Guide - HP s3720y | Upgrading and Servicing Guide - Page 19
cover and close the computer. See "Closing the Computer" on page 7. 9 Perform a System Recovery, as required. Use the recovery discs to replace the factory-installed files. Refer to the Troubleshooting and Maintenance Guide for detailed System Recovery procedures. Upgrading and Servicing Guide 15 - HP s3720y | Upgrading and Servicing Guide - Page 20
speed of memory module your computer uses, and for specific memory module information and specifications: 1 Go to http://www.hp.com/support in your Web browser. 2 Select your country/region and language. 3 From the Support and Drivers page, click See support and troubleshooting information, enter - HP s3720y | Upgrading and Servicing Guide - Page 21
Module 1 Remove the optical disc drive. See "Removing an Optical Disc Drive" on page 9. 2 Locate the memory socket on the motherboard. 3 Move any cabling out of the way, if necessary. WARNING: Do not pull the memory module out of the socket. Use the retaining clips to eject the module. 4 Push down - HP s3720y | Upgrading and Servicing Guide - Page 22
that the latches on both ends snap into place. A B 5 Repeat steps 1 to 4 for the second memory slot, as required. 6 Replace any cabling that was moved. 7 Complete the procedures to replace the optical disc drive. See "Replacing an Optical Disc Drive" on page 11. 18 Upgrading and Servicing Guide - HP s3720y | Upgrading and Servicing Guide - Page 23
PCI-E) card slot. You can replace these cards with a new modem card or graphics card. You may also replace with a different PCI card or PCI-E card. The modem card is a telephone modem circuit board that fits into a PCI card slot. Modem PCI card Graphics PCI-E card Upgrading and Servicing Guide 19 - HP s3720y | Upgrading and Servicing Guide - Page 24
the component: IMPORTANT: Due to the small computer size, you can only install a small, low-profile PCI card of the same approximate size of the modem card. HP recommends that you install a card with power consumption of 5 watts or less. Not all low-profile cards will fit into the PCI slot. Some - HP s3720y | Upgrading and Servicing Guide - Page 25
manufacturer if you are installing another PCI card - or as required. NOTE: If the new card or device isn't working, read the card manufacturer's installation instructions, and recheck all connections, including those to the card, power supply, keyboard, and monitor. Upgrading and Servicing Guide 21 - HP s3720y | Upgrading and Servicing Guide - Page 26
disconnect them. 4 Remove the screw on the modem card bracket holder on the outside of the frame. Remove the bracket holder. 5 While lifting the latch holding the card to the motherboard, hold the card at the top, and carefully pull the card straight out of the slot. 22 Upgrading and Servicing Guide - HP s3720y | Upgrading and Servicing Guide - Page 27
if you are installing another PCI-E card - or as required. NOTE: If the new card or device isn't working, read the card manufacturer's installation instructions, and recheck all connections, including those to the card, power supply, keyboard, and monitor. Upgrading and Servicing Guide 23 - HP s3720y | Upgrading and Servicing Guide - Page 28
lay the computer on its side. 3 Complete the procedure "Removing an Optical Disc Drive" on page 9. 4 Remove any cabling, if necessary, to reach the battery. 5 Move the retaining clip away from the battery. Lift the battery from the socket to release the battery. 24 Upgrading and Servicing Guide - HP s3720y | Upgrading and Servicing Guide - Page 29
the procedure "Replacing an Optical Disc Drive" on page 11. 9 Complete the procedures to replace the computer cover and close the computer. See "Closing the Computer" on page 7. NOTE: You may have to manually set the time and date on the computer after startup. Upgrading and Servicing Guide 25 - HP s3720y | Upgrading and Servicing Guide - Page 30
Part number: 5991-8366
-
 1
1 -
 2
2 -
 3
3 -
 4
4 -
 5
5 -
 6
6 -
 7
7 -
8
-
9
-
10
-
11
-
12
-
13
-
14
-
15
-
16
-
17
-
18
-
19
-
20
-
21
-
22
-
23
-
24
-
25
-
26
-
27
-
28
-
29
-
30
 |
 |

Upgrading and Servicing Guide