Hitachi CP-A221N User Manual - Page 18
Power on/off
 |
View all Hitachi CP-A221N manuals
Add to My Manuals
Save this manual to your list of manuals |
Page 18 highlights
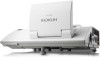
Power on/off Power on/off Turning on the power 1. Make sure that the power cord is firmly and correctly connected to the projector and the outlet. 2. Make sure that the POWER indicator is steady orange (101). STANDBY/ON button POWER indicator 3. Confirm that there is nothing that the lens door hits while opening. Press STANDBY/ ON button on the projector or the remote control. The lens door opens, the projection lamp lights up, and the POWER indicator begins to blink green. When the power is completely on, the indicator will stop blinking and light in steady green (101). MY SOURCE/ MY SOURCE/ VIDEO COMPUTER DOC.CAMERA VIDEO COMPUTER DOC.CAMERA ASPECT AUTO SEARCH BLANK MAGNIFY PAGE VOLUME ON FREEZE UP + ASPECT AUTO SEARCH OFF DOWN ー BLANK KEYSTONE MY BUTTON 1 2 MUTE MAGNIFY -FFORCUES +EZE- D-ZOOMP+AGUEP ON POSITION MENU VOLUME 㧗 ENTER OFF ESC DOWN RESET KEYSTONE MY BUTTON MUTE 1 2 POSITION MENU ENTER WARNING ►Never look into the projection lens or mirror while ESC RESET the projection lamp lights, since the projection lamp ray may cause a trouble on your eyes. ►Be careful not to pinch your finger with the lens door, to prevent an injury. ►Do not place the projector vertically with the lens door open as shown in the figure on the right. It could cause malfunction or injury. Tabletop use must be setup with the designated optional accessories. ►Do not stand under the projector mounted on the wall or ceiling, when its lens door is opening or closing. Moreover, do not look at the mirror when the lens door is opening or closing. ►Never touch a lens door or mirror. If the mirror is broken, the projected image will be distorted. Close the lens door, and contact your dealer. 18
-
 1
1 -
2
-
3
-
4
-
5
-
6
-
7
-
8
-
9
-
10
-
11
-
12
-
 13
13 -
 14
14 -
 15
15 -
 16
16 -
 17
17 -
 18
18 -
 19
19 -
 20
20 -
 21
21 -
 22
22 -
 23
23 -
24
-
25
-
26
-
27
-
28
-
29
-
30
-
31
-
32
-
33
-
34
-
35
-
36
-
37
-
38
-
39
-
40
-
41
-
42
-
43
-
44
-
45
-
46
-
47
-
48
-
49
-
50
-
51
-
52
-
53
-
54
-
55
-
56
-
57
-
58
-
59
-
60
-
61
-
62
-
63
-
64
-
65
-
66
-
67
-
68
-
69
-
70
-
71
-
72
-
73
-
74
-
75
-
76
-
77
-
78
-
79
-
80
-
81
-
82
-
83
-
84
-
85
-
86
-
87
-
88
-
89
-
90
-
91
-
92
-
93
-
94
-
95
-
96
-
97
-
98
-
99
-
100
-
101
-
102
-
103
-
104
-
105
-
106
-
107
 |
 |
