Hitachi D10VG Instruction Manual
Hitachi D10VG - 3/8 Inch Drill 9.0 Amp Manual
 |
UPC - 717709006157
View all Hitachi D10VG manuals
Add to My Manuals
Save this manual to your list of manuals |
Hitachi D10VG manual content summary:
- Hitachi D10VG | Instruction Manual - Page 1
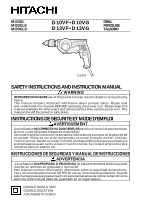
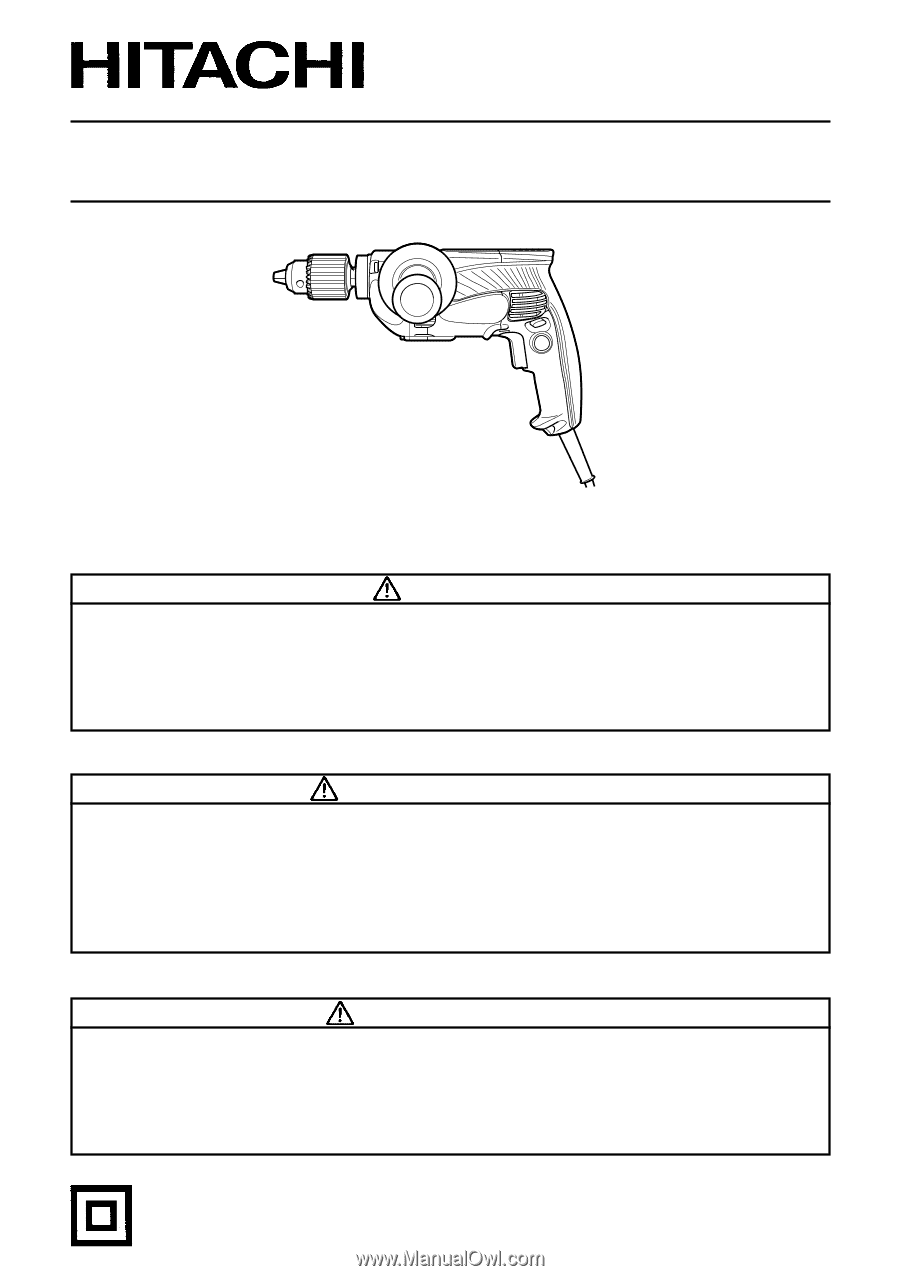
MODEL MODÈLE MODELO English D 10VF • D 10VG D 13VF • D 13VG DRILL PERCEUSE TALADRO D13VF SAFETY INSTRUCTIONS AND INSTRUCTION MANUAL WARNING IMPROPER OR UNSAFE use of this power tool can result in death or serious bodily injury! This manual contains important information about product safety. - Hitachi D10VG | Instruction Manual - Page 2
SAFER MAINTENANCE AND INSPECTION .... 16 OPERATION 8 FUNCTIONAL DESCRIPTION 9 NAME OF PARTS 9 Français TABLE DES MATIERES Page IINFORMATIONS IMPORTANTES Page DE SÉCURIT 18 SPECIFICATIONS 25 SIGNIFICATION DES MOTS D'AVERTISSEMENT 18 ASSEMBLAGE ET FONCTIONNEMENT .... 26 SECURITE - Hitachi D10VG | Instruction Manual - Page 3
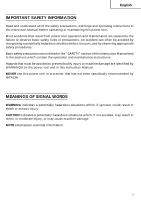
to prevent bodily injury or machine damage are identified by WARNINGS on the power tool and in this Instruction Manual. NEVER use this power tool in a manner that has not been specifically recommended by HITACHI. MEANINGS OF SIGNAL WORDS WARNING indicates a potentially hazardous situations which, if - Hitachi D10VG | Instruction Manual - Page 4
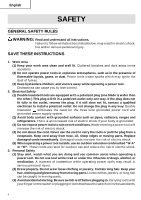
to follow all instructions listed below, may result in electric shock, fire and/or serious personal injury. SAVE THESE INSTRUCTIONS 1. Work Area (1) Keep your work area clean and well lit. Cluttered benches and dark areas invite accidents. (2) Do not operate power tools in explosive atmospheres - Hitachi D10VG | Instruction Manual - Page 5
personnel could result in a risk of injury. (2) When servicing a tool, use only identical replacement parts. Follow instructions in the Maintenance section of this manual. Use of unauthorized parts or failure to follow Maintenance Instruction may create a risk of electric shock or injury. 5 - Hitachi D10VG | Instruction Manual - Page 6
, etc. 5. For D10VF ALWAYS securely grip the Drill. For D10VG, D13VF and D13VG ALWAYS attach the side handle and securely grip the Drill. 6. NEVER touch moving parts. NEVER place your hands, fingers or other body parts near the tool's moving parts. 7. NEVER operate without all guards in place. NEVER - Hitachi D10VG | Instruction Manual - Page 7
be operating unusually, making strange noises, or otherwise appears defective, stop using it immediately and arrange for repairs by a Hitachi authorized service center. 17. NEVER leave tool running unattended. Turn power off. Don't leave tool until it comes to a complete stop. 18. Carefully handle - Hitachi D10VG | Instruction Manual - Page 8
must still follow the normal electrical safety precautions given in this Instruction Manual, including not using the power tool in wet environments. To keep the double insulation system effective, follow these precautions: ⅜ Only HITACHI AUTHORIZED SERVICE CENTER should disassemble or assemble this - Hitachi D10VG | Instruction Manual - Page 9
first read and understood all safety instructions contained in this manual. Some illustrations in this Instruction Manual may show details or attachments that differ from those on your own power tool NAME OF PARTS Gear Cover Housing Nameplate Drill Chuck Side Handle Switch Trigger Handle Cover - Hitachi D10VG | Instruction Manual - Page 10
English SPECIFICATIONS Model D10VF D10VG D13VF D13VG Motor Single Phase, Series Commutator Motor Power Source Single Phase 120V AC 60 Hz Current 9.0A No-Load Speed 0-3000/min. 0-1200/min. 0-850/min. 0-600/min. Drill Chuck Capacity 3/8" (10mm) 1/2" (13mm) Electric Brake No No Yes - Hitachi D10VG | Instruction Manual - Page 11
3. Extension cord When the work area is far away from the power source, use an extension cord of sufficient thickness and rated capacity. drill bit: ⅜ When boring metal or plastic Use an ordinary metalworking drill bit. ⅜ When boring wood Use an ordinary woodworking drill bit. However, when drilling - Hitachi D10VG | Instruction Manual - Page 12
. 8. Installing the side handle (Fig. 5) A Side handle is supplied with drill. (except D10VF) It can be installed on either side of the tool for the angle unit. (Optional accessory for D13VF and D13VG) (1) Removing chuck from drill (Fig. 7) 12 Drill chuck Chuck Wrench Tighten Loosen Fig. 2 - Hitachi D10VG | Instruction Manual - Page 13
the drill to a HITACHI AUTHORIZED SERVICE CENTER. (2) Attaching the angle unit. ⅜ After removing the chuck, engage the coupling to the drill the side marked "LOW" and secure the locking screw. At this setting, the drilling speed is decreased to about 70% and the drilling torque increased to about - Hitachi D10VG | Instruction Manual - Page 14
English drilling torque decreased to about 70%. (Fig. 10) (3) electrical shock protection, installing the hook on this drill should ONLY be performed by a HITACHI AUTHORIZED SERVICE CENTER. Side Handle Fig. 11 Open End Wrench Hex. Bar Wrench Fig. 12 Hook (A) Fig. 13 CAUTION: When the power - Hitachi D10VG | Instruction Manual - Page 15
(D13VF and D13VG) When releasing the trigger of the switch, the brake will be applied for immediate stopping. CAUTION: ⅷ As there is some reaction when the brake functions, sure to hold the drill securely. ⅷ When the brake becomes ineffective, send the tool to a HITACHI AUTHORIZED SERVICE CENTRE - Hitachi D10VG | Instruction Manual - Page 16
or water. 6. Service and repairs All quality power tools will eventually require servicing or replacement of parts because of wear from normal use. To assure that only authorized replacement parts will be used, all service and repairs must be performed by a HITACHI AUTHORIZED SERVICE CENTER, ONLY - Hitachi D10VG | Instruction Manual - Page 17
17 - Hitachi D10VG | Instruction Manual - Page 18
de ce mode d'emploi et dans les sections qui contiennent les instructions de fonctionnement et d'entretien. Les dangers qui doivent être évités manière qui n'est pas spécifiquement recommandée par HITACHI. SIGNIFICATION DES MOTS D'AVERTISSEMENT AVERTISSEMENT indique des situations potentiellement - Hitachi D10VG | Instruction Manual - Page 19
ci-dessous peut entraîner une électrocution, un incendie et/ou de sérieuses blessures personnelles. CONSERVER CES INSTRUCTIONS 1. Zone de travail (1) Garder la zone de travail propre et bien éclairée. Les établis mal rangés et les zones sombres invitent aux accidents. (2) Ne pas - Hitachi D10VG | Instruction Manual - Page 20
paration de l'outil ne doit être réalisée que par un centre de service HITACHI autorisé. Une réparation ou un entretien réalisé par un personnel non qualifié uniquement des pièces de rechange identiques. Suivre les instructions de la section d'entretien de ce mode d'emploi. L'utilisation de piè - Hitachi D10VG | Instruction Manual - Page 21
du coton, de la laine, de la toile ou de la ficelle, etc. 5. Modèle D10VF TOUJOURS tenir la perceuse fermement. Modèles D10VG, D13VF et D13VG) TOUJOURS fixer la poignée latérale et tenir la peroceuse solidement. 6. NE JAMAIS toucher les parties mobiles. NE JAMAIS placer ses mains, ses doigts ou - Hitachi D10VG | Instruction Manual - Page 22
, fait des bruits étranges ou sans cela paraît défectueux, arrêter de l'utiliser immédiatement et le faire réparer par un centre de service Hitachi autorisé. 17. NE JAMAIS laisser fonctionner l'outil sans surveillance. Le mettre hors tension. Ne pas abandonner l'outil avant qu'il ne soit compl - Hitachi D10VG | Instruction Manual - Page 23
Seuls les CENTRES DE SERVICE AUTORISES HITACHI peuvent démonter et remonter cet outil motorisé et uniquement des pièces de rechange HITACHI garanties d'origine doivent être le plastique risquerait de se dissoudre. CONSERVER CES INSTRUCTIONS ET LES METTRE A LA DISPOSITION DES AUTRES UTILISATEURS ET PROPRIETAIRES - Hitachi D10VG | Instruction Manual - Page 24
et un entretien de l'outil motorisé. NE JAMAIS utiliser ni entreprendre une révision de l'outil sans avoir d'abord lu et compris toutes les instructions de sécurité contenues dans ce manuel. Certaines illustrations dans ce mode d'emploi peuvent montrer des détails ou des accessoires différents de - Hitachi D10VG | Instruction Manual - Page 25
Français SPECIFICATIONS Modèle D10VF D10VG D13VF D13VG Moteur Moteur série monophasé à collecteur Source d' ) - Modèle D13VF D13VG Vitesse de l'angle LENTE RAPIDE LENTE RAPIDE (650/min.) (1350/min - Hitachi D10VG | Instruction Manual - Page 26
Français ASSEMBLAGE ET FONCTIONNEMENT APPLICATIONS ⅜ Perçage de trous dans métal, bois et matières plastiques. AVANT L'UTILISATION 1. Source d'alimentation S'assurer que la source d'alimentation qui doit être utilisée est conforme à la source d'alimentation requise spécifiée sur la plaque signalé - Hitachi D10VG | Instruction Manual - Page 27
Français 7. Montage et démontage de la mèche Mèche avec clavette (Fig. 2) (1) Ouvrir les mâchoires du mandrin et insérer la mèche dans le mandrin. (2) Mettre la clavette à mandrin dans chacun des trois trous du mandrin, et la tourner dans le sens des aiguilles d'une montre (vue depuis l'avant). - Hitachi D10VG | Instruction Manual - Page 28
accessoire disponible en option pour les modèles D13VF et D13VG) (1) Retrait du mandrin de la perceuse la clé et envoyer la perceuse à un SERVICE APRES-VENTE HITACHI AGREE. (2) Fixation de l'angle ⅜ Après axe de l'angle en face du repère latéral "LOW", et fixer avec la vis de verrouillage. A ce ré - Hitachi D10VG | Instruction Manual - Page 29
réussit pas à retirer le mandrin en le frappant avec la clé, ne pas frapper trop fort avec la clé et envoyer la perceuse à un SERVICE APRES-VENTE HITACHI AGREE. 11.Fixation du crochet (accessoire en option) (Fig. 13) Pour pouvoir fixer le crochet, il faut démonter la section de la poignée qui - Hitachi D10VG | Instruction Manual - Page 30
2. Frein électrique (modèles D13VF et D13VG) Quand on relâche la gâchette de l'interrupteur, le frein entre en service pour arrêter immédiatement l'outil. entre en service, bien tenir la perceuse fermement. ⅷ Si le frein ne fonctionne plus, envoyer l'outil à un SERVICE APRES-VENTE HITACHI AGREE. 3. - Hitachi D10VG | Instruction Manual - Page 31
Français ⅜ Plus le diamètre de la mèche est grand, plus la force de réaction sur le bras est forte. Faire attention à ne pas perdre le contrôle de la perceuse à cause de cette force de réaction. Pour garder un bon contrôle de l'outil, se tenir bien en équilibre, utiliser la poignée latérale, tenir - Hitachi D10VG | Instruction Manual - Page 32
contre les chocs électrique, confier l'inspection et le remplacement des balais en carbone de l'outil EXCLUSIVEMENT à un centre de service après-vente agréé par HITACHI. 5. Entretien du moteur Le bobinage de l'ensemble moteur est le "cœur" même de l'outil électro-portatif. Veiller soigneusement à ce - Hitachi D10VG | Instruction Manual - Page 33
33 - Hitachi D10VG | Instruction Manual - Page 34
, los riesgos están identificados con ADVERTENCIAS en dicha herramienta y en este Manual de instrucciones. No utilice NUNCA esta herramienta eléctrica de ninguna forma que no esté específicamente recomendada por HITACHI. SIGNIFICADO DE LAS PALABRAS DE SEÑALIZACIÓN ADVERTENCIA indica situaciones - Hitachi D10VG | Instruction Manual - Page 35
de alimentación para transportar la herramienta ni para desconectarla del tomacorriente. Mantenga el cable alejado del calor, aceite, bordes cortantes, o partes móviles. Reemplace inmediatamente cualquier cable dañado. Un cable dañado puede ser la causa de descargas eléctricas. (5) Cuando utilice - Hitachi D10VG | Instruction Manual - Page 36
funcionamiento la herramienta. Una llave dejada en una parte móvil de la herramienta podría resultar en reparar en un centro de servicio autorizado HITACHI antes de utilizarla. Muchos de los accidentes manual. La utilización de piezas no autorizadas, o el no seguir las indicaciones del Manual - Hitachi D10VG | Instruction Manual - Page 37
contacto con un conductor "activo" "activará" las partes metálicas de la herramienta y el operador recibir D10VF SIEMPRE sujete el taladro firmemente. Para D10VG, D13VF y D13VG. Fije SIEMPRE la empuñadunral lateral del taladro aplicaciones no especificadas en este Manual de instrucciones. 10. Maneje - Hitachi D10VG | Instruction Manual - Page 38
solicite su arreglo a un centro de reparaciones autorizado por Hitachi. 17. NO deje NUNCA la herramienta en funcionamiento desatendida. posible que se haya deformado, rajado, o dañado. 19. No limpie las partes de plástico con disolvente. Los disolventes, como gasolina, diluidor de pintura, bencina, - Hitachi D10VG | Instruction Manual - Page 39
seguridad eléctrica ofrecidas en este Manual de instrucciones, incluyendo la no HITACHI. ⅜ Limpie el exterior de la herramienta eléctrica solamente con un paño suave humedecido en agua jabonosa, y después séquela bien. No utilice disolventes, gasolina, ni diluidor de pintura para limpiar las partes - Hitachi D10VG | Instruction Manual - Page 40
úe el mantenimiento de la herramienta antes de leer y comprender todas las instrucciones de seguridad contenidas en este manual. Algunas ilustraciones de este Manual de Instrucciones pueden mostrar detalles o accesorios diferentes a los de la propia herramienta eléctrica. NOMENCLATURA Cubierta de - Hitachi D10VG | Instruction Manual - Page 41
Español SPECIFICATIONS Modelo D10VF D10VG D13VF D13VG Motor Motor conmutador en serie monofásico (1,9kg) 4,4 lbs(2,0kg) - Modelo D13VF D13VG Velocidad de la unidad angular BAJA(650/min.) ALTA(1350/min.) BAJA(400 - Hitachi D10VG | Instruction Manual - Page 42
Español MONTAJE Y OPERACIÓN APLICACIONES ⅜ Por acción de orificios en metal, madera y plástico. ANTES DE LA OPERACIÓN 1. Fuente de alimentación Cerciórese de que la fuente de alimentación que vaya a utilizar cumpla los requisitos indicados en la placa de características del producto. 2. Interruptor - Hitachi D10VG | Instruction Manual - Page 43
Español 7. Montaje y desmontaje de la broca Portabrocas Para portabrocas con llave (Fig.2) (1) Abra las mordazas del portabrocas e inserte la broca en el portabrocas. (2) Coloque la llave del portabrocas en cada uno de los tres orificios del portabrocas, y gírela Llave del Apretar - Hitachi D10VG | Instruction Manual - Page 44
opcional para D13VF y D13VG) (1) Desmontaje de aprox. 30˚ con respecto a la parte superior del banco de trabajo, y golpee taladro al CENTRO DE SERVICIO AUTORIZADO HITACHI. (2) Fijación de la unidad de la unidad angular sobre el lado marcado "LOW" y apriete el tornillo de fijación. En este - Hitachi D10VG | Instruction Manual - Page 45
golpeando la llave, no fuerce la llave. Envíe el taladro al CENTRO DE SERVICIO AUTORIZADO HITACHI. 11. Fijación del gancho. (Accesorio opcional) (Fig.13) Para fijar el gancho, es necesario desarmar la parte del asa que cubre el sistema eléctrico de la herramienta. Para poder utilizar la herramienta - Hitachi D10VG | Instruction Manual - Page 46
antes de instalar o desmontar brocas u otras partes. La alimentación también deberá desconectarse gatillo otra vez. 2. Freno eléctrico (D13VF y D13VG) Al soltar el gatillo del interruptor, el la herramienta a un CENTRO DE SERVICIO AUTORIZADO HITACHI. 3. Taladrado ⅜ Para taladrar, inicie el taladro - Hitachi D10VG | Instruction Manual - Page 47
Español ⅜ Si el taladro se atasca, suelte inmediatamente el gatillo, saque la broca de la pieza de trabajo y empiece otra vez. No haga clic en el gatillo para conectarlo y desconectarlo con la intención de poner en marcha el taladro atascado, pues se podrá dañar el taladro. ⅜ Cuanto mayor sea el diá - Hitachi D10VG | Instruction Manual - Page 48
seguridad contra descargas eléctricas, la inspección y el reemplazo de las escobillas deberán realizarse SOLAMENTE en un CENTRO DE SERVICIO AUTORIZADO POR HITACHI. 5. Mantenimiento d motor La unidad de devanado del motor es el verdadero "corazón" del herramientas eléctricas. Prestar el mayor cuidado - Hitachi D10VG | Instruction Manual - Page 49
49 - Hitachi D10VG | Instruction Manual - Page 50
- Hitachi D10VG | Instruction Manual - Page 51
- Hitachi D10VG | Instruction Manual - Page 52
WARNING: Some dust created by power sanding, sawing, grinding, drilling, and other construction activities contains chemicals known , tal como las máscares para el polvo especialmente diseñados para eliminar las partículas minúsculas. Issued by Sinagawa Intercity Tower A, 15-1, Konan 2-chome, Minato
-
 1
1 -
 2
2 -
 3
3 -
 4
4 -
 5
5 -
 6
6 -
 7
7 -
8
-
9
-
10
-
11
-
12
-
13
-
14
-
15
-
16
-
17
-
18
-
19
-
20
-
21
-
22
-
23
-
24
-
25
-
26
-
27
-
28
-
29
-
30
-
31
-
32
-
33
-
34
-
35
-
36
-
37
-
38
-
39
-
40
-
41
-
42
-
43
-
44
-
45
-
46
-
47
-
48
-
49
-
50
-
51
-
52
 |
 |
MODEL
DRILL
MODÈLE
PERCEUSE
MODELO
TALADRO
D
10VF
•
D
10VG
D
13VF
•
D
13VG
DOUBLE INSULATION
DOUBLE ISOLATION
AISLAMIENTO DOBLE
INSTRUCTIONS DE SECURITE ET MODE D’EMPLOI
AVERTISSEMENT
Une utilisation
INCORRECTE OU DANGEREUSE
de cet outil motorisé peut entraîner
la mort ou de sérieuses blessures corporelles!
Ce mode d’emploi contient d’importantes informations à propos de la sécurité de
ce produit. Prière de lire et de comprendre ce mode d’emploi AVANT d’utiliser
l’outil motorisé. Garder ce mode d’emploi à la disponibilité des autres utilisateurs
et propriétaires avant qu’ils utilisent l’outil motorisé. Ce mode d’emploi doit être
conservé dans un endroit sûr.
SAFETY INSTRUCTIONS AND INSTRUCTION MANUAL
WARNING
IMPROPER OR UNSAFE
use of this power tool can result in death or serious bodily
injury!
This manual contains important information about product safety. Please read
and understand this manual BEFORE operating the power tool. Please keep this
manual available for other users and owners before they use the power tool. This
manual should be stored in safe place.
INSTRUCCIONES DE SEGURIDAD Y MANUAL DE INSTRUCCIONES
ADVERTENCIA
¡La utilización
INAPROPIADA O PELIGROSA
de esta herramienta eléctrica puede
resultar en lesiones de gravedad o la muerte!
Este manual contiene información importante sobre la seguridad del producto.
Lea y comprenda este manual ANTES de utilizar la herramienta eléctrica. Guarde
este manual para que puedan leerlo otras personas antes de utilizar la herramienta
eléctrica. Este manual debe ser guardado en un lugar seguro.
D13VF