Hoover F7411 Manual - Page 9
Recovery tank, How to empty
 |
UPC - 073502029244
View all Hoover F7411 manuals
Add to My Manuals
Save this manual to your list of manuals |
Page 9 highlights
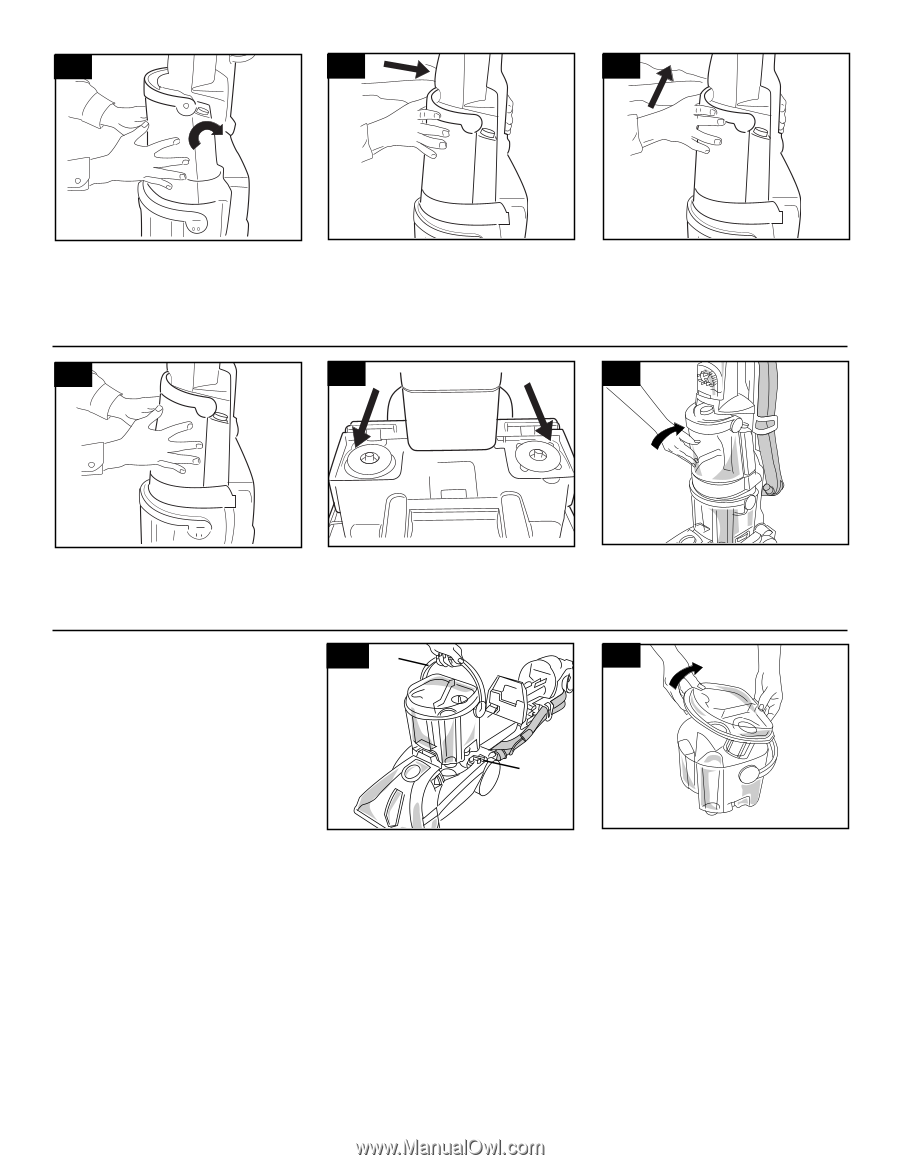
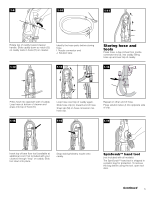
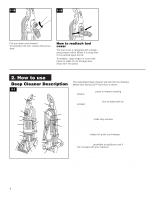
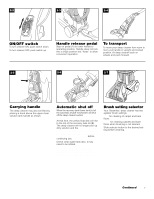
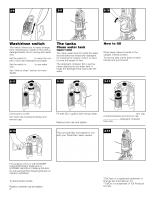
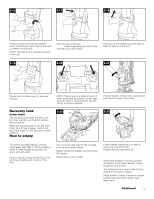
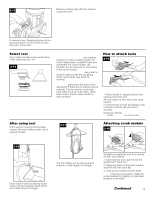
2-16 2-17 2-18 Position bottom of tank onto cleaner using one hand on each side of the tank to center it on the unit. NOTE: the tank pivots towards the back of the unit. Push the top of the tank and tank handle while supporting the back of the unit with your other hand. Push up on the handle once the tank is back to latch it to the unit. 2-19 2-20 2-21 Check tank to make sure it is securely latched. NOTE: There may be a small amount of water (indicated by arrows) on the base when the tank is removed from the unit. This is a normal condition. Position bottom of tank onto cleaner and pivot tank to snap it into place. Recovery tank (lower tank) The recovery tank holds the dirty solution that is picked up from the surface being cleaned. When the recovery tank is full, the automatic shut-off will engage, suction will stop (see page 7), and the tank must be emptied. How to empty Turn deep cleaner off and unplug from electrical outlet. To prevent possible leaking, remove clean water tank (Fig. 2-10) by pressing down on tank handle and pulling forward; set tank aside (do not set tank on furniture). Step on handle release pedal (Fig. 2-3) and lower handle until it rests on the floor. 2-22 H G Turn recovery tank latches (G) outward (one on each side of tank). Raise handle (H) straight up and lift tank off cleaner. Carry tank to sink or drain. 2-23 Lower handle toward back of tank to unlock lid. Lift lid off tank. Empty tank and reposition lid. For full suction, it is important that the recovery tank lid is properly secured before cleaning. Raise tank handle to carrying position and place it onto deep cleaner. Lower handle to front of tank. Turn latches (one on each side of tank) inward to lock tank in place. Raise handle of deep cleaner to upright position and reposition upper clean water tank. Continued § 9
-
 1
1 -
2
-
3
-
 4
4 -
 5
5 -
 6
6 -
 7
7 -
 8
8 -
 9
9 -
 10
10 -
 11
11 -
 12
12 -
 13
13 -
 14
14 -
15
-
16
-
17
-
18
-
19
-
20
-
21
-
22
-
23
-
24
-
25
-
26
-
27
-
28
-
29
-
30
-
31
-
32
-
33
-
34
-
35
-
36
-
37
-
38
-
39
-
40
 |
 |