Hunter 21117 Owner's Manual - Page 4
DIP Switch Settings
 |
View all Hunter 21117 manuals
Add to My Manuals
Save this manual to your list of manuals |
Page 4 highlights
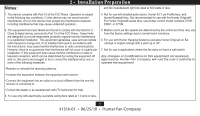
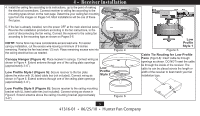
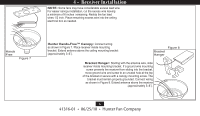
3 • DIP Switch Settings BEFORE INSTALLING THE CONTROL: 1. Use the pull chain switch to set the fan speed to the HIGH position before installation. Do not use the pull chain to change the fan speed after installation, as damage to your ceiling fan or universal control may result. The speed of the fan should only be changed by the Hunter control. Figure 1 Example DIP Switch Settings Receiver Transmitter 2. Set the ceiling fan light kit to the ON position before installation. The light level should only be changed by the Hunter control. Installation Instructions: 1. Disconnect power to the ceiling fan and light kit at the main electrical panel. Remove fuse or move circuit breaker to the OFF position. 2. IMPORTANT! Before installing this control, check the factory default DIP switch settings. Refer to Figure 1. Be sure the DIP switch positions of the transmitters and receiver match, or the ceiling fan will not function. Select different combinations of dip switches to prevent mis-operation due to other Figure 2 remote control fans. Transmitter DIP 3. IMPORTANT! If your ceiling fan light kit is using Switches incandescent bulbs, then slide the CFL / INC switch to the INC position. If your ceiling fan light kit is using compact fluorescent light bulbs (CFL), then slide the CFL / INC switch to the CFL position. NOTE: When the switch is in the CFL position, the dimming feature is disabled, and you will not be able to dim the light bulbs. This feature is to protect both your bulbs and your receiver as CFL bulbs are not able to dim and INC CFL will malfunction if dimming is attempted. DDiIpPSSwwiittcchheess SSeetttoto0011110 Figure 3 Receiver DIP Switches 4 41316-01 • 06/25/10 • Hunter Fan Company DDDiIpPipSSwwSwiittcicthhcehesses SSeSetetttotoo00101111010 1
-
 1
1 -
 2
2 -
 3
3 -
 4
4 -
 5
5 -
 6
6 -
 7
7 -
 8
8 -
 9
9 -
 10
10 -
11
 |
 |
