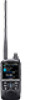
Icom ID-52A Instructions - Page 3
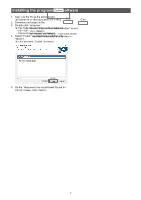
Setting up from a PC using a USB cable
 |
View all Icom ID-52A manuals
Add to My Manuals
Save this manual to your list of manuals |
Page 3 highlights
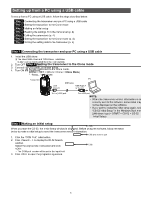
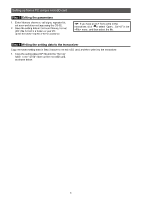
Setting up from a PC using a USB cable To setup from a PC using a USB cable, follow the steps described below. Step 1 Connecting the transceiver and your PC using a USB cable Step 2 Setting the transceiver to the Clone mode Step 3 Making an Initial setup Step 4 Reading the settings from the transceiver (p. 4) Step 5 Editing the parameters (p. 4) Step 6 Setting the transceiver to the Clone mode (p. 4) Step 7 Writing the setting data to the transceiver (p. 4) Step 1 Connecting the transceiver and your PC using a USB cable 1. Install the USB driver. L The latest USB driver and "USB Driver Installation Guide" can be downloaded from the Icom website. 2. Turn OFF the transceiver. 3. Connect the USB cable, as shown below. 4. Turn ON the transceiver. Transceiver USB Micro-B PC USB cable USB Type-A or Type-C To the [USB] port To a USB port Step 2 Setting the transceiver to the Clone mode z Set the transceiver to the Clone mode. (MENU > SET > Others > Clone > Clone Mode) • "Ready..." is displayed. Step 3 Making an Initial setup When you start the CS-52, the Initial Setup window is displayed. Before using the software, follow the steps below to make a initial setup to send the transceiver version information. 1. Click the "COM Port" radio button. 2. Click to display the ID-52 Search window. Select the appropriate transceiver and click . • The COM port number will be set in the input field. 3. Click to open the programming screen. NOTE: • When the transceiver version information is not correctly sent to the software, some items may not be displayed on the software. • If you want to make the initial setup again, select "CS-52 Initial Setup" in the Windows Start menu. ((Windows logo) > START > CS-52 > CS-52 Initial Setup) 1 Click 2 Click and select a port 3 Click 3
-
 1
1 -
 2
2 -
 3
3 -
 4
4 -
 5
5 -
 6
6 -
 7
7 -
 8
8 -
 9
9
 |
 |
