Image Fitness 5.0 Bench User Manual
Image Fitness 5.0 Bench Manual
 |
View all Image Fitness 5.0 Bench manuals
Add to My Manuals
Save this manual to your list of manuals |
Image Fitness 5.0 Bench manual content summary:
- Image Fitness 5.0 Bench | User Manual - Page 1
CUSTOMER HOT LINE: 1-800-999-3756 Mon.-Fri., 6 a.m.-6 p.m. MST CAUTION Read all precautions and instructions in this manual before using this equipment. Save this manual for future reference. USER'S MANUAL Visit our website at www.imagefitness.com new products, prizes, fitness tips, and much more! - Image Fitness 5.0 Bench | User Manual - Page 2
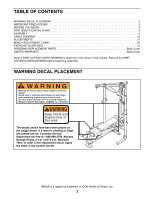
LIST/EXPLODED DRAWING is attached in the center of this manual. Remove the PART LIST/EXPLODED DRAWING before beginning assembly. on the weight bench. If a decal is missing or illegible, please call our Customer Service Department toll-free at 1-800-999-3756, Monday through Friday, 6 a.m. until 6 - Image Fitness 5.0 Bench | User Manual - Page 3
instructions in this manual before using the weight bench. Use the weight bench only as described in this manual setting. 11. The weight bench is designed to support a maximum user weight of 250 pounds. Do not -existing health problems. Read all instructions before using. ICON assumes no - Image Fitness 5.0 Bench | User Manual - Page 4
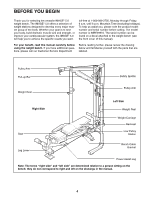
dramatic muscle size and strength, or improve your cardiovascular system, the IMAGE® 5.0 will help you to achieve the specific results you want. manual). For your benefit, read this manual carefully before using the weight bench. If you have additional questions, please call our Customer Service - Image Fitness 5.0 Bench | User Manual - Page 5
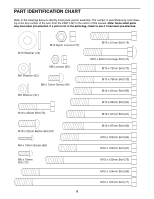
in assembly. The number in parentheses by each drawing is the key number of the part, from the PART LIST in the center of this manual. Note: Some small parts may have been pre-attached. If a part is not in the parts bag, check to see if it has been pre - Image Fitness 5.0 Bench | User Manual - Page 6
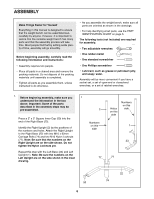
Make Things Easier for Yourself Everything in this manual is designed to ensure that the weight bench the packing materials until assembly is completed. • Tighten all parts as you assemble them, unless instructed to do otherwise. • As you assemble the weight bench, make sure all parts are oriented - Image Fitness 5.0 Bench | User Manual - Page 7
2. Press two 50mm Thick Square Inner Caps (53) and a 2" x 3" Inner Cap (50) into the ends of the Center Base (24). Have a second person hold the Right and Left Uprights (1, 2 [not shown]). Attach the Right and Left Bases (22, 23) to the Center Base (24) with two M10 x 97mm Bolts (90) and two M10 - Image Fitness 5.0 Bench | User Manual - Page 8
6. Press two 75mm Bushings (26) into the top and bottom of the Right Weight Rest (12). 6 Pull the Knob (30) out as far as it will go. Slide the Right Weight Rest (12) onto the Right Upright (2) and engage the Knob into an adjustment hole in the Upright. Turn the Knob clockwise until tight. Repeat - Image Fitness 5.0 Bench | User Manual - Page 9
10. Orient the Pull-up Bar (8) with the bend on top. Attach the Pull-up Bar to the Right Frame (5) with two M10 x 57mm Bolts (78), two M10 Washers (79), and two M10 Nylon Locknuts (77). Do not tighten the Nylon Locknuts yet. Attach the Pull-up Bar (8) to the Left Frame (not shown) in the same manner - Image Fitness 5.0 Bench | User Manual - Page 10
and an M10 Nylon Locknut (77). Lubricate an M10 x 164mm Bolt (71). Attach the Support Leg (13) to the Back Leg (39) with the Bolt, two M10 Washers (79 M10 Nylon Locknuts (77). Do not overtighten the M10 Nylon Locknuts (77); the Support Leg (13) and the Backrest Frame (16) must be able to pivot easily - Image Fitness 5.0 Bench | User Manual - Page 11
). 77 72 72 17 77 79 16 79 Lubricate 69 20 19 21 21. Refer to the CABLE DIAGRAMS on page 16 of 21 this manual to identify the different cables included with the weight bench. 19 Locate the Bench Cable (58). Route the Cable through the Front Leg (18) and - Image Fitness 5.0 Bench | User Manual - Page 12
22. Route the Bench Cable (58) under a 4 1/2" Pulley 22 (35). Attach the Pulley to the Front Leg (18) with an M10 x 75mm Bolt (73), two 17mm Spacers (96), two M10 Washers (79), and an M10 Nylon Locknut (77). 77 79 18 23. Attach the Bench Cable (58) to the Back Leg (39) 23 with a Cable Clip - Image Fitness 5.0 Bench | User Manual - Page 13
26. Wrap the High Cable (61) around an 88mm 26 Pulley (36). Attach the Pulley and a Small Cable Trap (93) to the Left Frame (6) with an M10 x 45mm Bolt (76) and an M10 Nylon Locknut (77). 27. Wrap the High Cable (61) around a 4 1/2" Pulley 27 (35). Attach the Pulley and a Large Cable Trap ( - Image Fitness 5.0 Bench | User Manual - Page 14
31. Wrap the Carriage Cable (60) around a 4 1/2" 31 Pulley (35). Attach the Pulley and a Large Cable Trap (55) to the single set of holes in the pair of Pulley Plates (31) with an M10 x 45mm Bolt (76) and an M10 Nylon Locknut (77). 32. Wrap the Carriage Cable (60) around an 88mm 32 Pulley ( - Image Fitness 5.0 Bench | User Manual - Page 15
35. Locate the Low Cable (59). Lay the Cable inside 35 the bracket on the Center Base (24) so that the ball is on the side shown. Attach a 4 1/2" Pulley (35) inside the bracket with an M10 x 45mm Bolt (76) and an M10 Nylon Locknut (77). 35 77 36. Route the Low Cable (59) through the Center - Image Fitness 5.0 Bench | User Manual - Page 16
each cable a few times to make sure the cables move smoothly over the pulleys. If the cables do not move smoothly, locate and correct the problem. When weights are used, the cables may be damaged if they are incorrectly routed. Refer to the CABLE DIAGRAMS below for correct cable routing. The - Image Fitness 5.0 Bench | User Manual - Page 17
and safety spotter on the BENCH ADJUSTMENT CHART, on page 20 of this manual. When preparing to perform the exercise again, refer back to the chart for benefit from your exercise program. Also, refer to the accompanying exercise guide to see the correct form for each exercise. Make sure all parts - Image Fitness 5.0 Bench | User Manual - Page 18
ATTACHING THE BENCH TO THE RACK To perform bench and leg lever exercises, the weight bench must be attached to the weight rack. To attach the bench to the rack, rest the Back Leg (39) over the crossbar on the Center Base (24). Note: Be sure that the Low Cable (59) goes through the Back Leg. Next, - Image Fitness 5.0 Bench | User Manual - Page 19
USING THE POWER ASSIST LEGS If you are unable to complete the repetition after performing a bench exercise, the Power Assist Legs (20, 21) can be used to help lift the barbell back to the Weight Rests (not shown). To use the Power Assist Legs (20, 21), attach the bench to the rack and a barbell to - Image Fitness 5.0 Bench | User Manual - Page 20
bench for one of these exercises, follow the steps listed below. For information about each of these steps, refer to the ADJUSTMENTS section of this manual. Make sure the bench cable is attached to the low cable when performing any of the bench exercises. For each exercise, determine the positions - Image Fitness 5.0 Bench | User Manual - Page 21
Cross training is an efficient way to get a complete and well-balanced fitness program. An example of a balanced program is: • Plan weight training manner will leave you feeling exhausted. On the exercise guide accompanying this manual you will find photographs showing the correct form for several - Image Fitness 5.0 Bench | User Manual - Page 22
each workout is an effective way to increase flexibility. STAYING MOTIVATED For motivation, keep a record of each workout. The chart on page 23 of this manual can be photocopied and used to schedule and record your workouts. List the date, the exercises performed, the weight used, and the numbers of - Image Fitness 5.0 Bench | User Manual - Page 23
MONDAY Date: / / EXERCISE WEIGHT SETS REPS TUESDAY Date: / / WEDNESDAY Date: / / AEROBIC EXERCISE EXERCISE WEIGHT SETS REPS THURSDAY Date: / / FRIDAY Date: / / AEROBIC EXERCISE EXERCISE WEIGHT SETS REPS Make photocopies of this page for scheduling and recording your workouts. 23 - Image Fitness 5.0 Bench | User Manual - Page 24
Safety Spotter 11 1 Left Weight Rest 12 1 Right Weight Rest 13 1 Support Leg 14 1 Bench Frame 15 1 Sliding Seat Frame 16 1 Backrest Frame 17 Clip 99 4 Weight Clip Sleeve # 1 User's Manual # 1 Exercise Guide Note: "#" indicates a non-illustrated part. Specifications are - Image Fitness 5.0 Bench | User Manual - Page 25
38 37 44 72 42 48 79 77 76 77 44 79 45 17 79 79 16 72 64 69 77 30 26 79 76 72 69 72 26 15 46 70 48 7 45 61 56 80 57 13 44 14 79 77 77 79 77 79 77 32 77 32 49 35 76 12 44 77 79 95 52 39 46 26 78 30 26 77 79 5 8 70 70 79 75 83 36 78 78 4 76 93 36 89 77 79 9 83 96 - Image Fitness 5.0 Bench | User Manual - Page 26
(see the PART LIST and EXPLODED DRAWING at the center of this manual). LIMITED WARRANTY ICON Health & Fitness, Inc. (ICON), warrants this product to be free from defects in workmanship and material, under normal use and service conditions, for a period of ninety (90) days from the date of purchase
-
 1
1 -
 2
2 -
 3
3 -
 4
4 -
 5
5 -
 6
6 -
 7
7 -
8
-
9
-
10
-
11
-
12
-
13
-
14
-
15
-
16
-
17
-
18
-
19
-
20
-
21
-
22
-
23
-
24
-
25
-
26
 |
 |
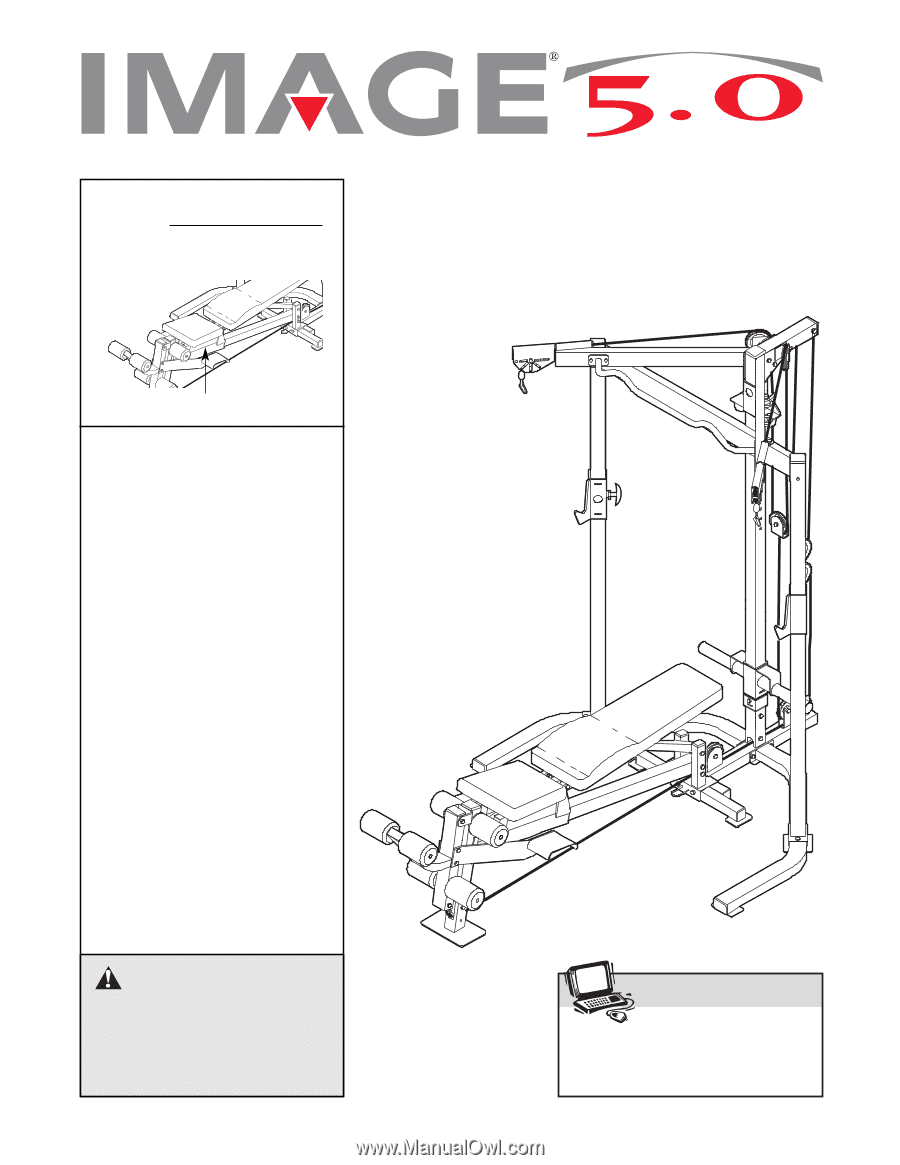
USER’S MANUAL
Visit our website at
www.imagefitness.com
new products, prizes,
fitness tips, and much more!
CAUTION
Read all precautions and instruc-
tions in this manual before using
this equipment. Save this manual
for future reference.
Model No. IMBE29910
Serial No.
Write the serial number in the
space above for future reference.
Serial Number Decal (Under Seat)
QUESTIONS?
As a manufacturer, we are com-
mitted to providing complete
customer satisfaction. If you
have questions, or if there are
missing or damaged parts, we
will guarantee complete satisfac-
tion through direct assistance
from our factory.
TO AVOID DELAYS, PLEASE
CALL DIRECT TO OUR TOLL-
FREE CUSTOMER HOT LINE.
The trained technicians on our
customer hot line will provide
immediate assistance, free of
charge.
CUSTOMER HOT LINE:
1-800-999-3756
Mon.–Fri., 6 a.m.–6 p.m. MST