Intermec CV61 CV61 Direct Wiring Kit Installation Instructions
Intermec CV61 Manual
 |
View all Intermec CV61 manuals
Add to My Manuals
Save this manual to your list of manuals |
Intermec CV61 manual content summary:
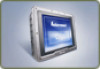
- Intermec CV61 | CV61 Direct Wiring Kit Installation Instructions - Page 1
CV61 Direct Wiring Kit Installation Instructions - Intermec CV61 | CV61 Direct Wiring Kit Installation Instructions - Page 2
intermec.com The information contained herein is provided solely for the purpose of allowing customers to operate and service Intermec Intermec Technologies Corporation. © 2012 by Intermec Technologies Corporation. All rights reserved. The word Intermec, the Intermec of Intermec Technologies - Intermec CV61 | CV61 Direct Wiring Kit Installation Instructions - Page 3
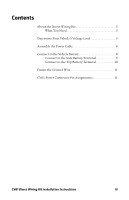
Power Cable 6 Connect to the Vehicle Battery 8 Connect to the Side Battery Terminal 9 Connect to the Top Battery Terminal 10 Fasten the Ground Wire 11 CV61 Power Connector Pin Assignments 11 CV61 Direct Wiring Kit Installation Instructions iii - Intermec CV61 | CV61 Direct Wiring Kit Installation Instructions - Page 4
iv CV61 Direct Wiring Kit Installation Instructions - Intermec CV61 | CV61 Direct Wiring Kit Installation Instructions - Page 5
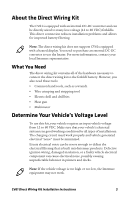
reduces installation problems and allows for improved battery filtering. Note: The direct wiring kit does not support CV61s equipped with a heated display. You need to purchase an external DC-DC converter to use the heater. For more information, contact your local Intermec representative. What - Intermec CV61 | CV61 Direct Wiring Kit Installation Instructions - Page 6
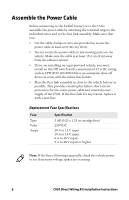
failure short-circuit protection for the entire power cable and internal power supply of the CV61. If the fuse fails for any reason, replace it with a new fuse. Replacement check the vehicle power to see if excessive voltage spikes are occuring. 6 CV61 Direct Wiring Kit Installation Instructions - Intermec CV61 | CV61 Direct Wiring Kit Installation Instructions - Page 7
To assemble the power cable 1 Route the power cable from the CV61 to the vehicle battery. 2 Cut the power cable near the battery leaving enough of the cable to the other end of the fuse block. d Crimp a 3/8-inch terminal ring onto the red wire. CV61 Direct Wiring Kit Installation Instructions 7 - Intermec CV61 | CV61 Direct Wiring Kit Installation Instructions - Page 8
terminal. Note: When you remove the battery terminal side post bolts from the vehicle battery, the vehicle's computer and radio will return to default settings. 8 CV61 Direct Wiring Kit Installation Instructions - Intermec CV61 | CV61 Direct Wiring Kit Installation Instructions - Page 9
tighten the nut securely. 6 Repeat Steps 1 through 5 for the negative wire. 7 Connect the ground wire. For help, see "Fasten the Ground Wire" on page 11. CV61 Direct Wiring Kit Installation Instructions 9 - Intermec CV61 | CV61 Direct Wiring Kit Installation Instructions - Page 10
Step 2 to secure the washers and cables firmly in place. 10 Repeat Steps 1 through 9 for the negative wire. 11 Connect the 6-pin connector the the CV61. 12 Connect the ground strap. For help, see the next section. 10 CV61 Direct Wiring Kit Installation Instructions - Intermec CV61 | CV61 Direct Wiring Kit Installation Instructions - Page 11
• external DC to DC converter 3 Vin- GND 4 Vin- heater Auxiliary input for heated display power. 5 Vin+ heater Auxiliary input for heated display power. 6 Vin+ 12 to 60 VDC vehicle power direct input. An external fuse is required. CV61 Direct Wiring Kit Installation Instructions 11 - Intermec CV61 | CV61 Direct Wiring Kit Installation Instructions - Page 12
Worldwide Headquarters 6001 36th Avenue West Everett, Washington 98203 U.S.A. tel 425.348.2600 fax 425.355.9551 www.intermec.com © 2012 Intermec Technologies Corporation. All rights reserved. CV61 Direct Wiring Kit Installation Instructions *931-116-001* P/N 931-116-001
-
 1
1 -
 2
2 -
 3
3 -
 4
4 -
 5
5 -
 6
6 -
 7
7 -
8
-
9
-
10
-
11
-
12
 |
 |

Direct Wiring Kit
CV
61
Installation Instructions