JVC GY-DV5000U Wired Peer-to-Peer Connections from Streamcorder to Computer - Page 2
Peer-to-Peer Network Basics, What You Need, Configuring the KA-DV300, KA-DV350, KA-DV5000 or SA- - manual
 |
View all JVC GY-DV5000U manuals
Add to My Manuals
Save this manual to your list of manuals |
Page 2 highlights
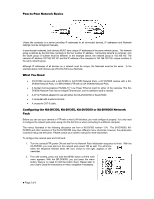
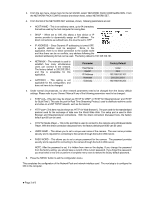
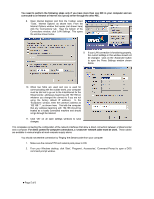
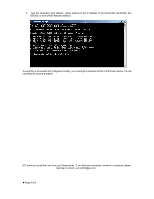
Peer-to-Peer Network Basics Unless the computer is a server providing IP addresses to all connected devices, IP addresses and Netmask settings must be configured manually. In peer-to-peer networks, both devices MUST have unique IP addresses in the same network group. The network group is defined by the first three numbers of the four number IP address. Connecting camera to computer, only the fourth group of number must be different. In the example above, the network group is 192.168.100. The camera's IP address 192.168.100.101 and the IP address of the computer is 192.168.100.100, unique numbers in the same network group. Although IP addresses of all devices on a network must be unique, the Netmask must be the same. In the example above, both devices use 255.255.255.0 as a Netmask. What You Need • GY-DV300 camera with a KA-DV300 or KA-DV350 Network Pack, a GY-DV5000 camera with a KADV5000 Network Pack, or a BR-DV6000 VTR with an SA-DV6000 Network Pack. • A Socket Communications EA2900-117 Low Power Ethernet Card for either of the cameras. The SADV6000 Network Pack has an integral Ethernet port, and no additional card is needed. • A CF to PCMCIA adapter for use with either the KA-DV300/350 or KA-DV5000. • A computer with a wired LAN card. • A crossover CAT-5 cable. Configuring the KA-DV300, KA-DV350, KA-DV5000 or SA-DV6000 Network Pack Before you can use your camera or VTR with a wired LAN interface, you must configure it properly. You only need to configure the network pack when using it for the first time or when connecting to a different computer. The menus illustrated in the following discussion are from a KA-DV300 revision 1.04. The SA-DV6000, KADV5000 and other revisions of the KA-DV300/350 may have different menu structures; however, the parameters involved in setup are the same. Please consult your owners' manual for more information. To configure the network pack and LAN card: 1. Turn the camera/VTR power ON and wait for the Network Pack initialization sequence to finish. With the KA-DV5000, you must also turn the network pack power ON as well. You will know when the sequence finished when the icon, shown to the right, appears in the viewfinder. 2. From the camera, press and hold the MENU button until the main menu appears. With the BR-DV6000, you just press the menu button; there is no need to hold the button down. Please refer to your User's Guide for instructions on menu navigation if necessary. z Page 2 of 6
-
 1
1 -
 2
2 -
 3
3 -
 4
4 -
 5
5 -
 6
6
 |
 |
