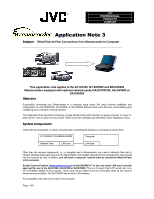
JVC GY-DV5000U Wired Peer-to-Peer Connections from Streamcorder to Computer - Page 4
Configuring the PC's LAN connection - professional
 |
View all JVC GY-DV5000U manuals
Add to My Manuals
Save this manual to your list of manuals |
Page 4 highlights
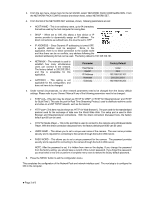
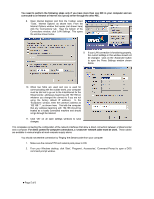
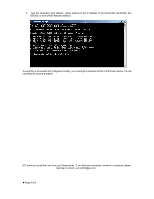
Configuring the PC's LAN connection: To connect to the Streamcorder, it is necessary to have a LAN card in the computer (many computers have this built-in). The installation of the LAN card and any associated drivers required in the PC is covered by each specific LAN card manufacturer, and as such, is beyond the scope of this Application Note. Please refer to the documentation supplied with your computer and/or network interface The exact LAN card configuration procedures depend on the PCs operating system. The examples shown here are for Windows XP Professional and may not correspond exactly to your system. MAC users configure the network interface from the 'Preferences' pane. 1. From the Windows Task Bar, click 'Start' then 'Control Panel (Windows XP) or 'Start', 'Settings', 'Control Panel' (Windows 2000). 2. From the Control Panel, select 'Network Connections' and then select the LAN connection that will be connecting to the Streamcorder (shown at right). This example shows I have two NICs in my computer. 3. From the Status window that opens when the connection is selected (not shown here), click on 'Properties'. 4. From the Connection Properties window shown below, double click on 'Internet Protocol (TCP/IP)'. Please note: We recommend that the 'Show icon in notification area...' option be selected as shown here. This places a network condition icon in the Windows notification area as shown here, enabling you to tell the status at a glance. 5. From the 'Internet Protocol (TCP/IP) Properties' window (shown below), select 'Use the following IP address' and enter an IP address. NOTE: you must select a unique IP address using the same Network Group (using the first three sets of numbers) as the cameras NIC. In this example, the IP address is 192.168.100.102 as shown here below. 6. Use the same Subnet mask as the camera, in our case, 255.255.255.0. 7. Click 'OK' on all LAN configuration and property windows to save these settings. z Page 4 of 6
-
 1
1 -
 2
2 -
 3
3 -
 4
4 -
 5
5 -
 6
6
 |
 |
