JVC GY-DV5000U Wireless Peer-to-Peer Connections from Streamcorder to Computer - Page 5
From the 'Internet Protocol TCP/IP Properties
 |
View all JVC GY-DV5000U manuals
Add to My Manuals
Save this manual to your list of manuals |
Page 5 highlights
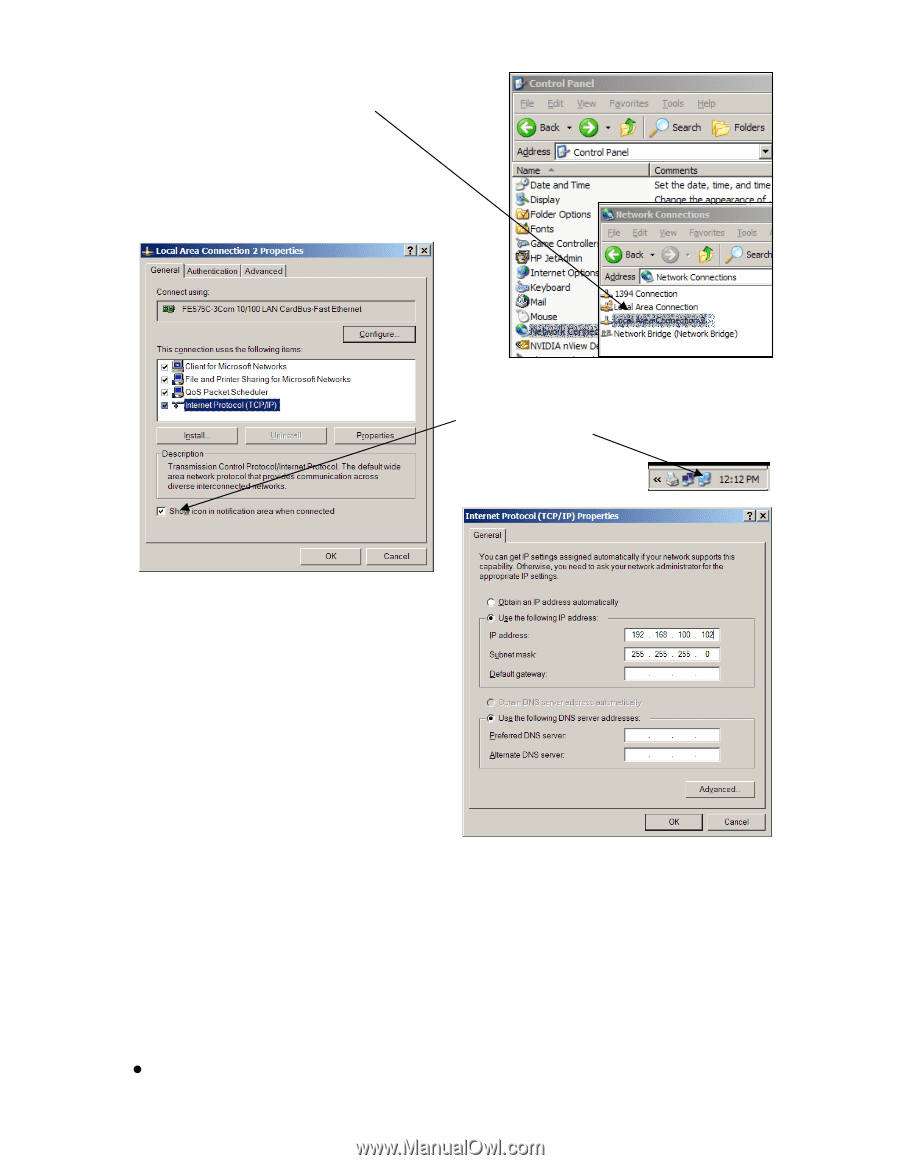
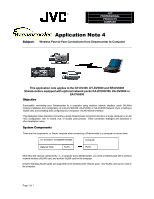
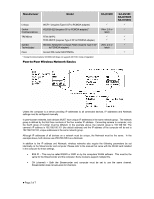
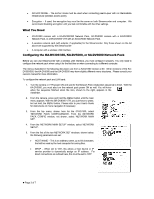
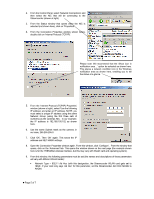
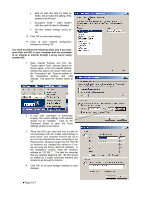
2. From the Control Panel, select 'Network Connections' and then select the NIC that will be connecting to the Streamcorder (shown at right). 3. From the Status window that opens when the NIC is selected (not shown here), click on 'Properties'. 4. From the Connection Properties window shown below, double click on 'Internet Protocol (TCP/IP)'. Please note: We recommend that the 'Show icon in notification area...' option be selected as shown here. This places a network condition icon in the Windows notification area as shown here, enabling you to tell the status at a glance. 5. From the 'Internet Protocol (TCP/IP) Properties' window (shown at right), select 'Use the following IP address' and enter an IP address. NOTE: you must select a unique IP address using the same Network Group (using the first three sets of numbers) as the cameras NIC. In our example, the IP address is 192.168.100.102 as shown here. 6. Use the same Subnet mask as the camera, in our case, 255.255.255.0. 7. Click 'OK'. Then 'OK' again. This saves the IP address and NET MASK settings. 8. Open the Connection Properties window again. From this window, click 'Configure'. From the window that opens, click on the 'Advanced' tab. This opens the window shown on the next page (the example shown here is for the TRENDNet wireless interface, but this may vary with WLAN card and operating system). 9. From this window, the following parameters must be set (the names and descriptions of these parameters will vary with different WLAN cards): • Network Type = 802.11 Ad Hoc (with this designation, the Streamcorder WLAN card gets set to 'IBSS'. If your card only says 'Ad Hoc' for this parameter, set the Streamcorder AD HOC MODE to AHDM. z Page 5 of 7
-
 1
1 -
 2
2 -
 3
3 -
 4
4 -
 5
5 -
 6
6 -
 7
7
 |
 |