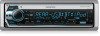
Kenwood KMR-D772BT Instruction manual - Page 44
How to remove the unit, Installing the unit in-dash mounting, When installing without the mounting,
 |
View all Kenwood KMR-D772BT manuals
Add to My Manuals
Save this manual to your list of manuals |
Page 44 highlights
INSTALLATION/CONNECTION Part list for installation (A) Faceplate (B) Trim plate Installing the unit (in-dash mounting) Do the required wiring. ( 41) (C) Mounting sleeve (D) Wiring harness Hook on the top side Orientate the trim plate as illustrated before fitting. Dashboard of your car (E) Extraction key (F) Screws (supplied for / ) Basic procedure 1 Remove the key from the ignition switch, then disconnect the [ terminal of the car battery. 2 Connect the wires properly. See Wiring connection. ( 41) 3 Install the unit to your car. See Installing the unit (in-dash mounting). 4 Connect the [ terminal of the car battery. 5 Press to turn on the power. 6 Detach the faceplate and reset the unit within 5 seconds. ( 3) When installing without the mounting sleeve 1 Remove the mounting sleeve and trim plate from the unit. 2 Align the holes in the unit (on both sides) with the vehicle mounting bracket and secure the unit with screws (supplied/commercially available). Use only the specified screws. Using wrong screws might damage the unit. Bend the appropriate tabs to hold the mounting sleeve firmly in place. How to remove the unit 1 Detach the faceplate. 2 Fit the catch pin on the extraction keys into the holes on both sides of the trim plate, then pull it out. 3 Insert the extraction keys deeply into the slots on each side, then follow the arrows as shown on the illustration. 40 ENGLISH
-
 1
1 -
2
-
3
-
4
-
5
-
6
-
7
-
8
-
9
-
10
-
11
-
12
-
13
-
14
-
15
-
16
-
17
-
18
-
19
-
20
-
21
-
22
-
23
-
24
-
25
-
26
-
27
-
28
-
29
-
30
-
31
-
32
-
33
-
34
-
35
-
36
-
37
-
38
-
 39
39 -
 40
40 -
 41
41 -
 42
42 -
 43
43 -
 44
44 -
 45
45 -
 46
46 -
 47
47 -
 48
48 -
 49
49 -
50
-
51
-
52
-
53
-
54
-
55
-
56
-
57
-
58
-
59
-
60
-
61
-
62
-
63
-
64
-
65
-
66
-
67
-
68
-
69
-
70
-
71
-
72
-
73
-
74
-
75
-
76
-
77
-
78
-
79
-
80
-
81
-
82
-
83
-
84
-
85
-
86
-
87
-
88
-
89
-
90
-
91
-
92
-
93
-
94
-
95
-
96
-
97
-
98
-
99
-
100
-
101
-
102
-
103
-
104
-
105
-
106
-
107
-
108
-
109
-
110
-
111
-
112
-
113
-
114
-
115
-
116
-
117
-
118
-
119
-
120
-
121
-
122
-
123
-
124
-
125
-
126
-
127
-
128
-
129
-
130
-
131
-
132
-
133
-
134
-
135
-
136
-
137
-
138
-
139
-
140
 |
 |
