KitchenAid KBPU182VSS Use & Care Guide - Page 13
Gas Connection to Natural Gas or Local LP Gas
 |
UPC - 883049184746
View all KitchenAid KBPU182VSS manuals
Add to My Manuals
Save this manual to your list of manuals |
Page 13 highlights
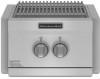
To Install the 20 lb LP Gas Fuel Tank: 1. Open cabinet doors. 2. Pull out the tank tray. Gas Connection to Natural Gas or Local LP Gas WARNING Tank tray 3. Place the 20 lb LP gas fuel tank bottom collar into the mounting hole in the tank tray. 4. Tighten the locking screw against the bottom collar of the 20 lb LP gas fuel tank to secure. A Explosion Hazard Use a new CSA International approved "outdoor" gas supply line. Securely tighten all gas connections. If connected to LP, have a qualified person make sure gas pressure does not exceed 11" (28 cm) water column. Examples of a qualified person include: licensed heating personnel, authorized gas company personnel, and authorized service personnel. Failure to do so can result in death, explosion, or fire. B C A. Locking screw B. Mounting hole C. Bottom collar 5. Screw the gas pressure regulator/hose assembly to the 20 lb LP gas fuel tank as shown. (To disconnect, turn off the gas supply to the 20 lb LP gas fuel tank, then unscrew the gas pressure regulator/hose assembly from the 20 lb LP gas fuel tank as shown.) connect disconnect B A This installation must conform with local codes and ordinances. In the absence of local codes, installations must conform with either the National Fuel Gas Code ANSI Z223.1 - latest edition, or CAN/CGA-B149.1 Natural Gas and Propane installation code. Copies of the standards listed above may be obtained from: CSA International 8501 East Pleasant Valley Rd. Cleveland, Ohio 44131-5575 National Fire Protection Association One Batterymarch Park Quincy, Massachusetts 02269 1. Make gas connections. A combination of pipe fittings must be used to connect the Power™ burner to the existing gas line. ■ If local codes permit, use an outdoor flexible stainless steel tubing gas connector, design-certified by CSA International, to connect the Power™ burner to the rigid gas supply line. A ⁵⁄₈" diameter line is recommended. Using a wrench to tighten, connect the gas supply to the Power™ burner. Use pipe-joint compound on all nonflared male threads. Do not kink or damage the flexible connector when moving the Power™ burner. ■ Pipe-joint compounds suitable for use with LP gas must be used. Do not use TEFLON®† tape. A. 20 lb LP gas fuel tank B. Gas pressure regulator/hose assembly 6. Turn on the gas supply. Wait a few minutes for gas to move through the gas line. 7. Test all connections by brushing on an approved noncorrosive leak-detection solution. Bubbles will show a leak. Correct any leak found. 8. Slide tank tray back into the cabinet. 9. Go to "Plug in Power™ Burner" in this section. A B C A. New CSA International approved "outdoor" flexible gas supply line B. Rear of Power™ burner C. To Natural gas or local LP gas supply †®TEFLON is a registered trademark of E.I. Du Pont De Nemours and Company. 13
-
 1
1 -
2
-
3
-
4
-
5
-
6
-
7
-
 8
8 -
 9
9 -
 10
10 -
 11
11 -
 12
12 -
 13
13 -
 14
14 -
 15
15 -
 16
16 -
 17
17 -
 18
18 -
19
-
20
-
21
-
22
-
23
-
24
-
25
-
26
-
27
-
28
-
29
-
30
-
31
-
32
-
33
-
34
-
35
-
36
-
37
-
38
-
39
-
40
-
41
-
42
-
43
-
44
-
45
-
46
-
47
-
48
 |
 |
