Konica Minolta bizhub 4752 bizhub 4752/4052 Additional Functions User Guide - Page 8
Installation procedure, Select the [Agree the Software End User License Agreement.] check box.
 |
View all Konica Minolta bizhub 4752 manuals
Add to My Manuals
Save this manual to your list of manuals |
Page 8 highlights
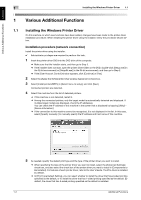
Various Additional Functions Chapter 1 1.2 Installing the Fax Driver 1 5 Select the [Advanced Settings] check box, and check that the [FAX] check box is selected in [Compo- nents to Be Installed]. 6 Click [Next]. 7 Check the items to be installed, and click [Install]. 8 Change the printer name or print a test page if necessary, then click [Finish]. The fax driver has been installed on the PC. Installation procedure Install the fax driver on the PC by using the installer. 0 Administrator privileges are required to perform this task. 1 Connect a USB cable to the USB port of this machine. % For details on the cable connection port, refer to the User's Guide. % If a wizard screen appears to add new hardware, click [Cancel]. 2 Insert the fax driver DVD into the DVD drive of the PC. % Make sure that the installer starts, and then go to Step 3. % If the installer does not start, open the printer driver folder on the DVD, double-click [Setup.exe] (in the 32-bit environment) or [Setup64.exe] (in the 64-bit environment), and then go to Step 3. % If the [User Account Control] window appears, click [Continue] or [Yes]. 3 Select the [Agree the Software End User License Agreement.] check box. 4 Select [Install printers/MFPs] in [Select menu to setup], and click [Next]. Connected printers are detected. Additional Functions 1-5
-
 1
1 -
2
-
 3
3 -
 4
4 -
 5
5 -
 6
6 -
 7
7 -
 8
8 -
 9
9 -
 10
10 -
 11
11 -
 12
12 -
 13
13 -
14
-
15
-
16
 |
 |
