Kyocera KM-C3232E PF-700/710 Installation Guide - Page 7
Nur Für 120 und 220 - 240 V Spezifikationen
 |
View all Kyocera KM-C3232E manuals
Add to My Manuals
Save this manual to your list of manuals |
Page 7 highlights
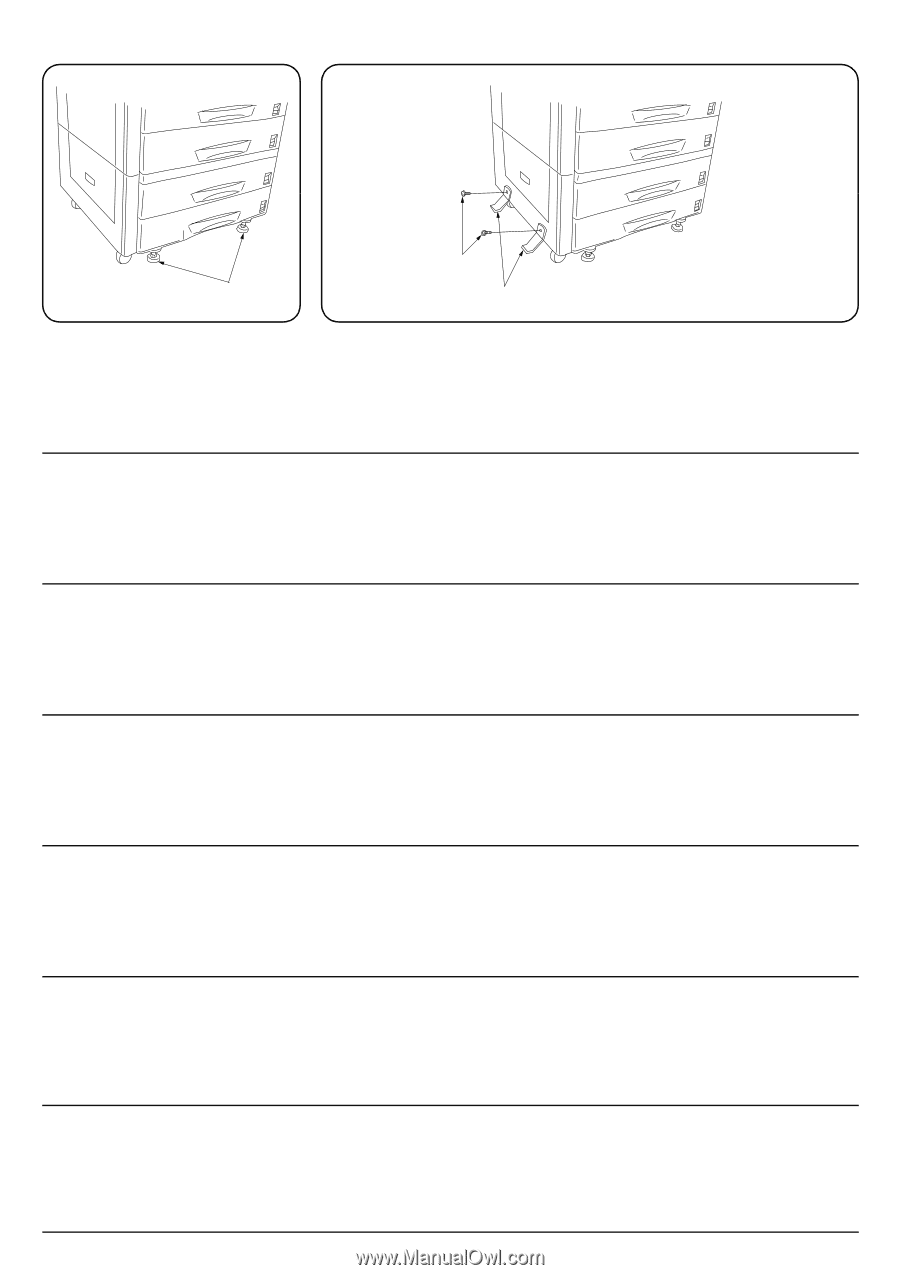
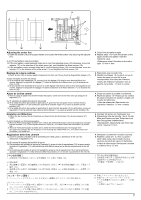
G 13 F 11. Turn the four adjusters (13) until they reach the floor and adjust them to level the machine. For 120 and 220 - 240 V specifications only 12. Fit the two stays (F) to the left of the paper feed desk (one toward the front and the other the rear) using the two M4 × 10 TP screws (G) such that they make contact with the floor. Note: Do not fit the stays (F) if the document finisher is to be installed. 11. Tourner les quatre pieds réglables (13) jusqu'à ce qu'ils atteignent le sol, et les régler au niveau de la machine. Pour spécifications 120 et 220 - 240 V uniquement 12. Installer les deux supports (F) sur la gauche du bureau d'alimentation de papier (l'un vers l'avant et l'autre vers l'arrière) à l'aide des deux vis TP M4 × 10 (G), de façon à ce qu'elles soient en contact avec le sol. Remarque: Ne pas mettre en place les supports (F) si le retoucheur de document doit être installé. 11. Gire los cuatro ajustadores (13) hasta que lleguen al piso y ajústelos hasta que nivelen la máquina. Para especificaciones de 120 V y 220 - 240 V solamente 12.Coloque las dos bases (F) en el lado izquierdo de la unidad de alimentación de papel (una hacia el frente y la otra hacia la parte de atrás) usando los dos tornillos TP M4 × 10 (G) de modo que hagan contacto con el piso. Nota: No coloque los bases (F) si se va a instalar el finalizador de documentos. 11. Drehen Sie die vier Einstellfüße (13), bis sie den Boden erreichen und stellen Sie sie so ein, daß die Maschine nivelliert ist. Nur Für 120 und 220 - 240 V Spezifikationen 12. Bringen Sie die zwei Stützen (F) links am Papiereinzugstisch (eine in Richtung Vorderseite und eine in Richtung Rückseite) an. Benutzen Sie dazu die zwei M4 × 10 TPSchrauben (G) so, daß diese mit dem Boden in Berührung kommen. Hinweis: Bringen Sie die Stützen (F) nicht an, wenn der Dokumentenfixierer installiert werden soll. 11. Ruotare i quattro piedini regolabili (13) sino a quando vengono a contatto con il pavimento; quindi regolarne l'altezza in modo da livellare la macchina. Specifiche solo per 120 V e 220 - 240 V 12. Inserire le due sospensioni (F) alla sinistra dell'unità di alimentazione della carta (una verso la parte anteriore e l'altra verso la parte posteriore) utilizzando le due viti TP M4 × 10 (G) in modo tale che sia a contatto col pavimento. Nota: Non inserire le sospensioni (F) se la finitrice di documenti deve essere installata. 11.旋转 4 13 MFP 120V、220/240V 的产品 12 1 个 TP 螺丝 M4 × 10 (G F F F)。 11.4 13 MFP 12 F M4 × 10TP(G)1 F) を前後 2 F 5
-
 1
1 -
 2
2 -
 3
3 -
 4
4 -
 5
5 -
 6
6 -
 7
7 -
 8
8 -
 9
9 -
 10
10 -
 11
11 -
 12
12
 |
 |