LG 42PT350 Owner's Manual
LG 42PT350 Manual
 |
UPC - 719192579507
View all LG 42PT350 manuals
Add to My Manuals
Save this manual to your list of manuals |
LG 42PT350 manual content summary:
- LG 42PT350 | Owner's Manual - Page 1
OWNER'S MANUAL PLASMA TV Please read this manual carefully before operating your set and retain it for future reference. 42PT200 50PT200 42PT330 50PT330 42PT350 50PT350 50PV400 60PV400 50PV430 60PV430 50PV450 60PV450 42PT250U 50PT250U 50PV550U 60PV550U 42PT350C 50PT350C 50PV450C 60PV450C P/NO - LG 42PT350 | Owner's Manual - Page 2
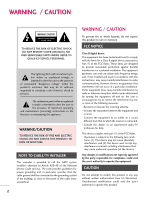
the presence of important operating and maintenance (servicing) instructions in the literature accompanying the appliance. WARNING/CAUTION TO REDUCE THE RISK OF FIRE AND ELECTRIC SHOCK, DO NOT EXPOSE THIS PRODUCT TO RAIN OR MOISTURE. NOTE TO CABLE/TV INSTALLER This reminder is provided to call the - LG 42PT350 | Owner's Manual - Page 3
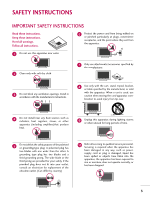
accordance with the manufacturer's instructions. 8 Use only with the cart, stand, tripod, bracket, or table specified by the manufacturer, or sold with the apparatus. When a cart is used, use caution when moving the cart/apparatus com- bination to avoid injury from tip-over. 4 Do not install - LG 42PT350 | Owner's Manual - Page 4
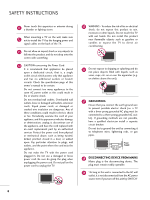
storm. When mounting a TV on the wall, make sure 12 not to install the TV by the hanging power and signal cables on the back of the TV. 13 Do not allow an impact shock or any objects to fall into the product, and do not drop onto the screen with something. 14 CAUTION concerning the Power Cord: It - LG 42PT350 | Owner's Manual - Page 5
does not affect the performance of the product or cause defects in the proudct. 25 If you smell smoke or other odors coming from the TV or hear strange sounds, unplug the power cord contact an authorized service center. 26 Do not press strongly upon the panel with hand or sharp object such as - LG 42PT350 | Owner's Manual - Page 6
Setup 26 USB Connection 26 Audio Out Connection 27 PC Setup 28 WATCHING TV / CHANNEL CONTROL Remote Control Functions 34 Turning On TV 36 Channel Selection 36 Volume Adjustment 36 Initial Setting 37 On-Screen Menus Selection 38 Quick Menu 39 Channel Setup - Auto Scan (Auto Tuning 40 - LG 42PT350 | Owner's Manual - Page 7
SOUND & LANGUAGE CONTROL Auto Volume Leveler (Auto Volume 82 Clear Voice II 83 Preset Sound Settings (Sound Mode) 84 Sound Setting Adjustment - User Mode 85 Infinite Surround 86 Balance 87 TV Speakers On/Off Setup 88 Audio Reset 89 Stereo/SAP Broadcast Setup 90 Audio Language 91 On-Screen - LG 42PT350 | Owner's Manual - Page 8
and amplifies the sound of human voice frequency range to help keep dialogue audible when background noise swells. Displays HDTV programs in full 1920 x 1080p resolution for a more detailed picture. View videos and photos and listen to music on your TV through USB 2.0 ('videos' dependent on model - LG 42PT350 | Owner's Manual - Page 9
CD Manual (Refer to P.14) Power Cord (For 42/50PT200, 42/50PT330, 42/50PT350, 42/50PT350C, 42/50PT250U, 50PV400, (For 60PV400, 60PV430, 60PV450, 50PV430, 50PV450, 50PV450C, 50PV550U) 60PV450C, 60PV550U) Ferrite Core (Depending on model) x 4 x 3 M4x26 M5x14.5 Screws for stand assembly - LG 42PT350 | Owner's Manual - Page 10
PREPARATION FRONT PANEL INFORMATION s Image shown may differ from your TV. ENTER VOL CH Intelligent Sensor Adjusts picture according to the surrounding conditions. Power/Standby Indicator Illuminates red in standby mode. The LED is off while the TV remains on. Remote Control Sensor HOME - LG 42PT350 | Owner's Manual - Page 11
BACK PANEL INFORMATION I Image shown may differ from your TV. VIDEO L/MONO AUDIO R HDMI IN 3 SERVICE ONLY R HDMI IN 3 USB IN (For 42/50PT250U, 42/50PT350, 42/50PT350C, 50/60PV450, 50/60PV450C, 50/60PV550U) (For 42/50PT200, 42/50PT330, 50/60PV400, 50/60PV430) R 9 10 1 1 VIDEO L/MONO AUDIO - LG 42PT350 | Owner's Manual - Page 12
HD video and Digital audio. Doesn't support 480i. Accepts DVI video using an adapter or HDMI to DVI cable (not included) 2 OPTICAL DIGITAL AUDIO OUT Optical digital audio output for use with amps and home theater systems. Note: In standby mode, this port doesn't work. 3 RS-232C IN (CONTROL & SERVICE - LG 42PT350 | Owner's Manual - Page 13
protect the screen from damage. 2 Assemble the parts of the Stand Body with the Stand Base of the TV. Stand Body x 3 M5x24 (For 60PV400, 60PV430, 60PV450, 60PV450C, 60PV550U) 3 Assemble the TV as shown. x 3 M5x14.5 Stand Base (For 42/50PT200, 42/50PT330, 42/50PT350, 42/50PT350C, 42/50PT250U - LG 42PT350 | Owner's Manual - Page 14
3 Detach the stand from TV. 4 After removing the stand, install the included PROTECTION COVER over the hole for the stand. Attach the protection cover tape. When installing the wall mounting bracket, use the PROTECTION COVER. 14 Attach the protection cover tape. PROTECTION COVER Fix a Guide to the - LG 42PT350 | Owner's Manual - Page 15
Image shown may differ from your TV. 1 Install the power cord holder and power cord. It will help prevent the power cable from being removed by accident. 2 Gather and bind the cables with the cable holder. POWER CORD HOLDER CABLE HOLDER CAUTION G Do not move the TV by holding the cable holder and - LG 42PT350 | Owner's Manual - Page 16
wall. 4 inches 4 inches 4 inches 4 inches CAUTION G Ensure adequate ventilation by following the clearance recommendations. G Do not mount near or above any type of heat source. SWIVEL STAND s This feature is not available for all models. After installing the TV, you can adjust the TV manually - LG 42PT350 | Owner's Manual - Page 17
brand wall mount when mounting the TV to a wall. LG recommends that wall mounting be performed by a qualified professional installer. Model VESA (A * B) A Standard Screw Quantity B Wall Mounting bracket (sold separately) 42/50PT200, 42/50PT330, 42/50PT350, 42/50PT350C, 50PV400, 50PV430 - LG 42PT350 | Owner's Manual - Page 18
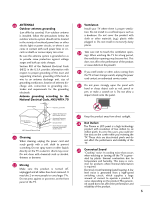
to tie the rope so it becomes horizontal between the wall and the product. ! NOTE G Use a platform or cabinet strong enough and large enough to support the size and weight of the TV. G To use the TV safely, make sure that the height of the bracket on the wall and the one on the TV are the same. 18 - LG 42PT350 | Owner's Manual - Page 19
() VARIABLE AUDIO OUT R I To prevent damage do not connect to the power outlet until all connections are made between the devices. ANTENNA OR CABLE CONNECTION R 1. Antenna (Analog or Digital) Wall Antenna Socket or Outdoor Antenna without a Cable Box Connection. For optimum picture quality - LG 42PT350 | Owner's Manual - Page 20
the audio output of the digital set-top box to the COMPONENT IN AUDIO 1 jacks on the TV. 2. How to use s Turn on the digital set-top box. (Refer to the owner's manual for the digital set-top box. operation) s Select the Component1 input source on the TV using the INPUT button on the remote control - LG 42PT350 | Owner's Manual - Page 21
HDMI supports both audio and video. 2. How to use I Turn on the digital set-top box. (Refer to the owner's manual for the digital set-top box.) I Select the HDMI1, 2, or 3 input source on the TV using the INPUT button on the remote control. HDMI-DTV OUTPUT 1 OPTICAL DIGITAL AUDIO OUT AUDIO (RGB - LG 42PT350 | Owner's Manual - Page 22
the audio output of the digital set-top box to the AUDIO IN (RGB/DVI) jack on the TV. 2. How to use I Turn on the digital set-top box. (Refer to the owner's manual for the digital set-top box.) I Select the HDMI1 or 2 input source on the TV using the INPUT button on the remote control. ! NOTE - LG 42PT350 | Owner's Manual - Page 23
TV using the INPUT button on the remote control. I If connected to COMPONENT IN 2 input, select the Component2 input source on the TV. I Refer to the DVD player's manual for operating instructions. DIO IN B/DVI) REMOTE CONTROL IN AV IN 1 VIDEO /MONO AUDIO 2 L R 1 VIDEO AUDIO A COMPONENT - LG 42PT350 | Owner's Manual - Page 24
No separate audio connection is necessary. HDMI supports both audio and video. 2. How to use I Select the HDMI1, 2, or 3 input source on the TV using the INPUT button on the remote control. I Refer to the DVD player's manual for operating instructions. HDMI-DVD OUTPUT 1 OPTICAL DIGITAL AUDIO OUT - LG 42PT350 | Owner's Manual - Page 25
the VCR. 2. How to use I Set VCR output switch to 3 or 4 and then tune TV to the same channel number. I Insert a video tape into the VCR and press PLAY on the VCR. (Refer to the VCR owner's manual.) ANT OUT S-VIDEO VIDEO L R ANT IN OUTPUT SWITCH 2 Wall Jack Antenna Composite (RCA) Connection - LG 42PT350 | Owner's Manual - Page 26
source on the TV. I Operate the corresponding external equipment. USB IN Camcorder Video Game Set VIDEO L R 1 EXTERNAL EQUIPMENT SETUP VIDEO L/MONO AUDIO R HDMI IN 3 AV IN 2 VIDEO L/MONO AUDIO R HDMI IN 3 USB IN USB CONNECTION - For 42/50PT350, 42/50PT350C, 50/60PV450, 50/60PV450C, 42 - LG 42PT350 | Owner's Manual - Page 27
the TV's audio to external audio equipment via the Audio Output port. 1. How to connect 1 Connect one end of the optical cable to the TV's OPTICAL port of DIGITAL AUDIO OUT. 2 Connect the other end of the optical cable to the digital audio input on the audio equipment. 3 Set the "TV Speaker - LG 42PT350 | Owner's Manual - Page 28
How to use I Turn on the PC and the TV. I Select the RGB-PC input source on the TV using the INPUT button on the remote control. OPTICAL DIGITAL AUDIO OUT AUDIO IN (RGB/DVI) REMOTE CONTROL IN VIDEO 2 2 1 VIDEO COMPONEN 1 RS-232C IN (CONTROL & SERVICE) RGB IN (PC) 2 1 AUDIO RGB OUTPUT DVI - LG 42PT350 | Owner's Manual - Page 29
Vertical frequencies is separate. G Depending on the graphics card, some resolution settings may not allow the image to be positioned on the screen properly. Supported Display Specifications (RGB-PC, HDMI-PC) Resolution Horizontal Vertical Frequency(KHz) Frequency(Hz) 640x350 31.468 70.09 - LG 42PT350 | Owner's Manual - Page 30
, Phase, and Size can also be adjusted. PICTURE Move E • Contrast 90 • Brightness 50 • H Sharpness 60 • V Sharpness 60 • Color 60 • Tint 0R • Expert Control • Reset Screen (RGB-PC) Enter G Screen Resolution G Auto config. Position Size Phase Reset Move Prev. 1024 x 768 1280 x 768 - LG 42PT350 | Owner's Manual - Page 31
correct, try using the manual settings or a different resolution or refresh rate on the PC. PICTURE Move E • Contrast 90 • Brightness 50 • H Sharpness 60 • V Sharpness 60 • Color 60 • Tint 0R • Expert Control • Reset Screen (RGB-PC) Enter G Screen Resolution Auto config. G Position - LG 42PT350 | Owner's Manual - Page 32
, adjust the picture phase manually. This feature operates only in RGB-PC mode. PICTURE Move E • Contrast 90 • Brightness 50 • H Sharpness 60 • V Sharpness 60 • Color 60 • Tint 0R • Expert Control • Reset Screen (RGB-PC) Enter G Screen Resolution Auto config. Move D Position - LG 42PT350 | Owner's Manual - Page 33
90 • Brightness 50 • H Sharpness 60 • V Sharpness 60 • Color 60 • Tint 0R • Expert Control • Reset Screen (RGB-PC) Enter G 1 Home 2 ENTER 3 ENTER 4 ENTER 5 ENTER Select PICTURE. Select Screen (RGB-PC). Select Reset. Select Y e s. Screen Move Prev. Resolution Auto config. Position - LG 42PT350 | Owner's Manual - Page 34
TV Select the remote operating mode: TV NUMBER button - (DASH) Used to enter a program number for multiple program channels such as 2-1, 2-2, etc. LIST Displays the channel list. FLASHBK Tunes to the last channel viewed. Color Access special functions in some menus. button USB, SIMPLINK Controls USB - LG 42PT350 | Owner's Manual - Page 35
apply the Picture Wizard setting. Use to mark or unmark a photo/music/movie. RATIO Changes the aspect ratio. MUTE Switches the sound on or off. G p.36 CHANNEL Changes the channel. UP/DOWN PAGE Moves from one full set of screen information to the next one. UP/DOWN INFO Displays channel information - LG 42PT350 | Owner's Manual - Page 36
the INPUT button on the remote control. 3 When finished using the TV, press the POWER button on the remote control. The TV reverts to standby mode. ! NOTE G If you intend to be away on vacation, disconnect the power plug from the wall power outlet. CHANNEL SELECTION 1 Press the CH ( or ) or NUMBER - LG 42PT350 | Owner's Manual - Page 37
the first time when purchasing the TV. It will be displayed on the screen when turning the TV on for the first time. It can also be activated from the user menus. I Default selection is "Home Use". We recommend setting the TV to "Home Use" mode for the best picture in your home environment. I "Store - LG 42PT350 | Owner's Manual - Page 38
WATCHING TV / CHANNEL CONTROL ON-SCREEN MENUS SELECTION Your TV's OSD (On Screen Display) may differ slightly from that shown in this manual. Except 42/50PT250U, 50/60PV550U CHANNEL Auto Tuning Manual Tuning Channel Edit Move Enter PICTURE Move Aspect Ratio : 16:9 Picture Wizard Energy - LG 42PT350 | Owner's Manual - Page 39
WATCHING TV / CHANNEL CONTROL QUICK MENU Your TV's OSD (On Screen Display) may differ slightly from what is shown in this manual. Q.Menu (Quick Menu) is a menu of features which users might use frequently. Q.Menu Aspect Ratio Picture Mode Sound Mode Caption Multi Audio Sleep Timer CH Del/Add/Fav - LG 42PT350 | Owner's Manual - Page 40
previous menu. EXIT Return to TV viewing. s The TV will ask for a password if parental control has been activated (LOCK Menu). Use the password you set up in the LOCK Menu to allow a channel search. s When setting the Auto tuning or Manual tuning, the number of maximum channel you can store is 900 - LG 42PT350 | Owner's Manual - Page 41
Return to TV viewing. CHANNEL Auto Tuning Manual Tuning Channel Edit Move Enter F DTV G Select channel type and RF-channel number. Channel 2 DTV 2-1 Bad Normal Good Add Close s The TV will ask for a password if parental control has been activated (LOCK Menu). Use the password you set up - LG 42PT350 | Owner's Manual - Page 42
be unable to select it using CH , button during TV viewing. If you wish to select the deleted channel, directly enter the channel number with the NUMBER buttons or select it in the Channel Edit menu. WATCHING TV / CHANNEL CONTROL CHANNEL Auto Tuning Manual Tuning Channel Edit Move Enter 1 Home - LG 42PT350 | Owner's Manual - Page 43
control. Channel List 2-1 3-1 4-1 WATCHING TV / CHANNEL CONTROL Exit Displaying Channel List 1 LIST Display the Channel List. Selecting a channel in the channel list 1 Select a channel. 2 ENTER Switch to the chosen channel number. Paging through a channel list 1 P CH A G E Turn - LG 42PT350 | Owner's Manual - Page 44
Your TV's OSD (On Screen Display) may differ slightly from what is shown in this manual. Favorite Channels are a convenient feature that lets you quickly select channels of your choice without waiting for the TV to select through all the in-between channels. Q.Menu Aspect Ratio Picture Mode Sound - LG 42PT350 | Owner's Manual - Page 45
WATCHING TV / CHANNEL CONTROL FAVORITE CHANNEL LIST Favorite List 2-1 3-1 4-1 Displaying the favorite channel list 1MARK FAV Display the Favorite channel list. Selecting a channel in the favorite channel list 1 Select a channel. 2 ENTER Switch to the chosen channel number. Exit Paging - LG 42PT350 | Owner's Manual - Page 46
screen. 2 EXIT Return to TV viewing WATCHING TV / CHANNEL CONTROL 7 DOLBY DIGITAL CNN 1 2 3 4 5 6 Brief Info Title Test.. Sat, Feb 21, 2009 10:10 AM Multilingual D CC Caption 11:40 AM 1080i TV-PG D L S V 10:40 AM Multilingual : The program contains two or more audio services. Use - LG 42PT350 | Owner's Manual - Page 47
INPUT LIST Only these input signals which are connected to a TV can be activated and selected. WATCHING TV / CHANNEL CONTROL 1 INPUT TV AV1 AV2 Component1 Component2 ENTER Select the desired input source. TV AV1 AV2 Component1 Component2 HDMI3 HDMI2 HDMI1 RGB-PC ie) Disconnected - LG 42PT350 | Owner's Manual - Page 48
WATCHING TV / CHANNEL CONTROL WATCHING TV / CHANNEL CONTROL INPUT LABEL This indicates which device is connected to which input port. OPTION Language Input Label SIMPLINK Key Lock Caption Demo Mode ISM Method Set ID Initial Setting Move Enter : On : Off : Off : Off : Normal : 1 : Home Use OPTION - LG 42PT350 | Owner's Manual - Page 49
preset Video and Audio settings. Off Game Cinema Sport WATCHING TV / CHANNEL CONTROL 1AV MODE Press the AV MODE button repeatedly to select the desired source. 2 ENTER s If you select "Cinema" in AV mode, Cinema will be selected both for "PICTURE menu - Picture Mode" and "AUDIO menu - Sound - LG 42PT350 | Owner's Manual - Page 50
the logo are fully supported. SIMPLINK can be turned on and off in the user menus. WATCHING TV / CHANNEL CONTROL OPTION Language Input Label SIMPLINK Key Lock Caption Demo Mode ISM Method Set ID Initial Setting Move Enter : On : Off : Off : Off : Normal : 1 : Home Use OPTION Language Input Label - LG 42PT350 | Owner's Manual - Page 51
of discs are conveniently displayed at the 2 bottom of the screen. 3 VCR playback: Control the connected 3 VCR. 4 HDD Recordings playback: Control 4 recordings stored in HDD. 5 Audio Out to Home Theater speak- 5 er/Audio Out to TV: Select Home Theater speaker or TV speaker for Audio Out. FG G When - LG 42PT350 | Owner's Manual - Page 52
42/50PT350, 42/50PT350C, 50/60PV450, 50/60PV450C, 42/50PT250U, 50/60PV550U ENTRY MODES When you connect a USB device, this screen is displayed automatically. In USB device, you can not add a new folder or delete the existing folder. 1 Connect the USB device to the USB IN jacks on the side of TV - LG 42PT350 | Owner's Manual - Page 53
LIST You can view (*.JPG) files from USB storage devices. The On Screen Display on your model may be slightly different. Supported photo file: *.JPG I You can play JPG files only. I Only baseline scan is supported among JPG. Screen Components 1 Home Select U S B. 2 ENTER ENTER Select Photo - LG 42PT350 | Owner's Manual - Page 54
USB Device Free Space 150MB Move PopUp Menu CH Move Page MARK Mark Exit When you select a file (not folder), this Popup menu is displayed. G View: Display the selected item. G Mark All: Mark all photo files on the screen . I Use the C H button to navigation in the photo page. I Use the MARK - LG 42PT350 | Owner's Manual - Page 55
menu. 4 Select V ie w. 5 ENTER The selected photo is displayed in full size. Slide show BGM 1/17 Delete Q.MENU Option Hide The aspect ratio of a photo may change the size of the photo displayed on the screen in full size. I Use the C H photo page. button to navigation in the 55 USB - LG 42PT350 | Owner's Manual - Page 56
the previous or next photo. I Use button to select and control the menu on the full-sized screen. USB G Slide show: Selected photos are displayed during the slide show. If no photo is selected, all photos in the current folder are displayed during slide show. I Set the time interval of the - LG 42PT350 | Owner's Manual - Page 57
Using the Photo List Option Slide show BGM 1/17 Q.MENU Option Delete Hide Choose option Set photo view. Set video. Set audio. Exit USB 1 Q.MENU Show the Popup menu. 2 ENTER Select Set Photo View, Set Video, or Set Audio. G When you select the Set Photo View. I You cannot change Music Folder - LG 42PT350 | Owner's Manual - Page 58
80 0 W C 0 W C Medium Prev. 1 ENTER 2 ENTER Show the Picture Mode. Make appropriate adjustments. G When you select the Set Audio. I APS mode is not supported in Set Video function. Set audio. Sound Mode Auto Volume Clear Voice ll Balance Cinema Off Off 0 L R Prev. 1 ENTER 2 ENTER - LG 42PT350 | Owner's Manual - Page 59
LIST You can use the Music List menu to play MP3 files from a USB storage device. This TV cannot play back copy-protected files. The On Screen Display on your model may be slightly different. Supported music file: *.MP3 Bit rate range 8Kbps - 320Kbps • Sampling rate (Sampling Frequency) MPEG1Layer - LG 42PT350 | Owner's Manual - Page 60
A 00:00 / 04:16 Up Folder USB Device Free Space 150MB Duration 3945 KB,128 Select the desired Popup menu. 5 EXIT Return to TV viewing. G Play (During stop): Play the selected : Close the popup menu. I Use the C H button to navigation in the music page. I Use MARK button to mark or unmark - LG 42PT350 | Owner's Manual - Page 61
displays 00:00 as the play time. G Music files with copy-protection will not play. G Press ENTER, A, H o m e, Q.MENU, B A C K, E X I T, or ENERGY SAVING button to stop the screen saver. G This TV can not play music files less than 16 Kbytes. G If you select "Off" for TV speaker, Set Audio features - LG 42PT350 | Owner's Manual - Page 62
activated once a USB drive is detected. It is used when playing movie files on the TV. Displays the video files in the USB folder that it recognizes as a video file. Editing such as delete and add is not allowed. Movie (*.AVI/ *.mp4/ *.DivX/ *.DAT/ *.MPG/ *.MPEG/ *.MPE/ *.VOB) supporting file Bit - LG 42PT350 | Owner's Manual - Page 63
1 Moves to upper level folder. 2 Preview: Display the title/folder name of the movie in the selected folder. 3 Current page/Total pages. 2 4 Total number of marked movie files. 5 Usable USB memory. 1 6 Corresponding buttons on the remote control. MOVIE LIST DriveA Butterfly 640x480, 707MB Up - LG 42PT350 | Owner's Manual - Page 64
640x480, 707MB B003 Up Folder B004 USB Device Free Space 150MB Duration 640x480, Return to TV viewing G P l a y: Play the selected movie. DivX Play is executed while screen changes. the pop-up menu. I Use the C H button to navigation in the movie page. I Use MARK button to mark or unmark - LG 42PT350 | Owner's Manual - Page 65
USB Using the remote control You can adjust various method screen is displayed. I When using the or buttons during playback a cursor indicating the position can be viewed on the screen. Press the P L A Y(G) button to return to normal playback. ! NOTE G Use the ( / ) bottons to move to a specific - LG 42PT350 | Owner's Manual - Page 66
Set video play. Set video. Set audio. Exit ! NOTE G If you select "Off" for TV speaker, Set Audio features in choose options will not work. 1 Q.MENU Show the Popup menu. 2 ENTER Select Set Video Play, Set Video, or Set Audio. USB G When you select the Set Video Play. Set video play. Picture - LG 42PT350 | Owner's Manual - Page 67
. Set video. Picture Mode Contrast Brightness Sharpness Color Tint Color Temperature Noise Reduction Reset Standard 100 50 70 80 0 W C 0 W C Low Prev. 1 ENTER 2 ENTER Show the Picture Mode. Make appropriate adjustments. USB G When you select the Set Audio. Set audio. Sound Mode Auto - LG 42PT350 | Owner's Manual - Page 68
to TV viewing. ! NOTE G When loading, some buttons may not work. G If you use the DivX registration code of another device, the rented or purchased DivX file cannot be played. Therefore always use the DivX registration code assigned to this product. G The video or audio of a file converted based on - LG 42PT350 | Owner's Manual - Page 69
List Music List Movie List DivX Reg. Code Deactivation Move Enter DivX(R) Video On Demand Do yoiu want to deactivate your device? Yes No USB 1 Home 2 ENTER Select U S B. Select Deactivation. 3 ENTER ENTER Select Y e s. 4 ENTER Display Deactivation. 5 BACK Return to the previous menu - LG 42PT350 | Owner's Manual - Page 70
ratio is displayed on your TV. s RGB-PC input only supports 4:3 and 16:9 aspect ratio. Q.Menu Aspect Ratio Picture Mode Sound Mode Caption Multi Audio Sleep Timer CH Del/Add/Fav F 16:9 G Vivid Standard Off English Off Add Eject USB Eject Close 16:9 Cinema Zoom Just Scan Zoom Set By Program - LG 42PT350 | Owner's Manual - Page 71
in DTV/CADTV/Component/HDMI-DTV/DVI-DTV (720p/1080i/1080p) input source. JUST SCAN Set By Program Selects the proper picture proportion to match the source's image. (4:3 4:3) AUTO (16:9 16:9) AUTO Zoom Choose Zoom when you want to view the picture without any alteration. However, the top and bottom - LG 42PT350 | Owner's Manual - Page 72
PICTURE CONTROL PICTURE WIZARD - Except 42/50PT250U, 50/60PV550U This feature lets you adjust the picture quality of the original image. Use this to calibrate the screen quality by adjusting the Black and White Level etc. You can calibrate the screen quality by easily following each step. When - LG 42PT350 | Owner's Manual - Page 73
Vertical Sharpness Set the screen above identical to the Recommended sample below. Low Recommended E • V Sharpness 50 E High Previous Next 9 ENTER Adjust V e r t i c a l S h a r p n e s s. PICTURE CONTROL i.e) Complete Select (an) input(s) to apply the settings. DTV TV AV1 AV2 Component1 - LG 42PT350 | Owner's Manual - Page 74
PICTURE CONTROL ENERGY SAVING It reduces the TV's power consumption. You can increase the brightness of your screen by adjusting the Energy Saving level or by setting the Picture Mode. This feature is disabled in "Picture Mode-Cinema". PICTURE Move Aspect Ratio : 16:9 Picture Wizard Energy - LG 42PT350 | Owner's Manual - Page 75
You can use a preset, change each setting manually. Q.Menu Aspect Ratio Picture Mode Sound Mode Caption Multi Audio Sleep Timer CH Del/Add/Fav 16:9 F Vivid G Standard Off English Off Add Eject USB Eject Close Vivid Expert2 Expert1 Standard Game Auto Power Save Cinema Sport PICTURE CONTROL - LG 42PT350 | Owner's Manual - Page 76
: Increase or decrease the gradient of the video signal. You may use Contrast when the bright part of picture is saturated. s Brightness: Adjusts the base level of the signal in the picture. You may use brightness when the dark part of the picture is saturated. s Sharpness: Adjusts the level of - LG 42PT350 | Owner's Manual - Page 77
making adjustments to each video mode, execute the "Reset" function for each Picture Mode. PICTURE Move E • Contrast 90 • Brightness 50 • Sharpness 60 • Color 60 • Tint 0R • Color Temperature 0 W • Advanced Control • Reset Screen(RGB-PC) Enter G C PICTURE Screen(RGB-PC) Move - LG 42PT350 | Owner's Manual - Page 78
may also be used be a professional to help optimize the TV performance in the environment the TV is in. PICTURE Move Enter Aspect Ratio : 16:9 Picture Wizard Energy Saving : Intelligent SenVsoivrid Picture Mode : Expert1 Standard • Contrast 80 • Brightness Auto Power Save 50 • H Sharpness - LG 42PT350 | Owner's Manual - Page 79
HDMI or Component. Otherwise, 'Black level' is set to 'Auto'. s Makes video clips recorded in film look more natural by eliminating judder effect. s DVD and Blu-ray movies are filmed at 24 frames per second. Standard: Displays standard color area. Wide: Mode to use and set the rich color area of the - LG 42PT350 | Owner's Manual - Page 80
Control • Reset Screen (RGB-PC) 1 Home 2 ENTER Select PICTURE. Select Reset. 3 ENTER Initialize the adjusted value. 4 EXIT Return to TV viewing. DEMO MODE Displays a slide show to explain the various features of this TV. This feature is disabled in "Initial Setting-Home Use". OPTION - LG 42PT350 | Owner's Manual - Page 81
A frozen still picture displayed on the screen for prolonged periods can result in a ghost image. You can use Orbiter to help prevent image sticking. The other two functions are for removing a ghost image. OPTION Language Input Label SIMPLINK Key Lock Caption Demo Mode ISM Method Set ID Initial - LG 42PT350 | Owner's Manual - Page 82
• Treble 50 • Bass 50 • Reset TV Speaker : On AUDIO Auto Volume Clear Voice II Balance Sound Mode TV Speaker Move Enter : Off Off : Off +3 On 0L R : Standard • Infinte Surround: Off • Treble 50 • Bass 50 • Reset : On 1 Home 2 ENTER Select AUDIO. Select Auto Volume. 3 ENTER - LG 42PT350 | Owner's Manual - Page 83
CONTROL E E CLEAR VOICE II By differentiating the human sound range from others, it improves the sound quality of voices. AUDIO Auto Volume Clear Voice II Balance Sound Mode TV Speaker Move Enter : Off : Off +3 0L R : Standard • Infinte Surround: Off • Treble 50 • Bass 50 • Reset - LG 42PT350 | Owner's Manual - Page 84
enjoy the best sound without any special adjustment as the TV sets the appropriate sound options based on the program content. Q.Menu Aspect Ratio Picture Mode Sound Mode Caption Multi Audio Sleep Timer CH Del/Add/Fav 16:9 Vivid F Standard G Off English Off Add Eject USB Eject Close Standard - LG 42PT350 | Owner's Manual - Page 85
E SOUND & LANGUAGE CONTROL E SOUND SETTING ADJUSTMENT - USER MODE Adjust the sound to suit your taste and room situations. AUDIO Auto Volume Clear Voice II Balance Sound Mode TV Speaker Move Enter : Off : Off +3 0L R : Standard • Infinte Surround: Off • Treble 50 • Bass 50 • Reset : - LG 42PT350 | Owner's Manual - Page 86
E SOUND & LANGUAGE CONTROL SOUND & LANGUAGE CONTROL INFINITE SURROUND Select this option to sound realistic. AUDIO Auto Volume Clear Voice II Balance Sound Mode TV Speaker Move Enter : Off : Off +3 0L R : Standard • Infinite Surround: Off • Treble 50 • Bass 50 • Reset : On AUDIO - LG 42PT350 | Owner's Manual - Page 87
CONTROL E BALANCE Adjust the left/right sound of speaker to suit your taste and room situations. AUDIO Auto Volume Clear Voice II Balance Sound Mode TV Speaker Move Enter : Off : Off +3 0L R : Standard • Infinte Surround: Off • Treble 50 • Bass 50 • Reset : On AUDIO Move Enter Auto - LG 42PT350 | Owner's Manual - Page 88
SOUND & LANGUAGE CONTROL TV SPEAKERS ON/OFF SETUP Turn the TV speakers off if using external audio equipment. AUDIO Move Enter Auto Volume : Off Clear Voice II : Off +3 Balance 0L R Sound Mode : Standard • Infinte Surround: Off • Treble 50 • Bass 50 • Reset TV Speaker : On AUDIO - LG 42PT350 | Owner's Manual - Page 89
AUDIO RESET Settings of the selected Sound Mode return to the default factory settings. AUDIO Auto Volume Clear Voice II Balance Sound Mode TV Speaker Move Enter : Off : Off +3 0L R : Standard • Infinte Surround: Off • Treble 50 • Bass 50 • Reset : On AUDIO Move Enter Auto Volume : - LG 42PT350 | Owner's Manual - Page 90
transmits an additional sound signal. Mono sound is automatically used if the broadcast is only in Mono. Q.Menu Aspect Ratio Picture Mode Sound Mode Caption Multi Audio Sleep Timer CH Del/Add/Fav 16:9 Vivid Standard Off F English G Off Add Eject USB Eject Close Analog TV 1 Q.MENU Select - LG 42PT350 | Owner's Manual - Page 91
Lock Caption Demo Mode ISM Method Set ID Initial Setting Move Enter Menu : On Audio : Off : Off : Off : Normal : 1 : Home Use English English Close E SOUND & LANGUAGE CONTROL E 1 Home 2 ENTER 3 ENTER Select OPTION. Select Language. Select Audio. 4 ENTER Select your desired language - LG 42PT350 | Owner's Manual - Page 92
Set ID Initial Setting Move Enter Menu : On Audio : Off : Off : Off : Normal : 1 : Home Use English English Close E E SOUND & LANGUAGE CONTROL 1 Home 2 ENTER Select OPTION. Select Language. 3 ENTER Select M e n u. 4 ENTER Select your desired language. From this point on, the on-screen - LG 42PT350 | Owner's Manual - Page 93
any position on the screen and is usually the program's dialog. Caption/Text, if provided by the broadcaster, would be available for both digital and analog channels on the Antenna/Cable. This TV is programmed to memorize the caption/text mode which was last set when you turned the power off. This - LG 42PT350 | Owner's Manual - Page 94
. Return to the previous menu. EXIT Return to TV viewing. OPTION Language Input Label SIMPLINK Key Lock Caption Demo Mode ISM Method Set ID Initial Setting Move Enter : On : Off : CC1 F : Off On G : Normal Mode Service 1 : 1 : Home Use Digital Option Close SOUND & LANGUAGE CONTROL 94 - LG 42PT350 | Owner's Manual - Page 95
Style, F on t, etc., to your preference. A preview icon is provided at the bottom of the screen, use it to see the caption language. Return to the previous menu. EXIT Return to TV viewing. s S i z e: Set the word size. s F o n t: Select a typeface for the text. s Text Color: Choose a color for the - LG 42PT350 | Owner's Manual - Page 96
TIME SETTING CLOCK SETTING Auto Clock Setup The time is set automatically from a digital channel signal. The digital channel signal includes information for the current time provided by the broadcasting station. Set the clock manually if the current time is set incorrectly by the auto clock - LG 42PT350 | Owner's Manual - Page 97
to TV viewing. TIME Clock Off Time : Off On Time : Off Sleep Timer : Off Move Enter F Year Month Date Hour Minute Manual G 2008 2 21 2 AM 10 Time Zone Daylight Saving Eastern Auto Close G If you unplug the TV once or turn the main power off, the clock function reset. TIME SETTING 97 - LG 42PT350 | Owner's Manual - Page 98
to the previous menu. EXIT Return to TV viewing. s To cancel On/Off Time function, select O f f. s Only for On Time function 1 ENTER Select Input. 2 Select the desired input source. 3 When Selecting T V: set the channel at turn-on. 4 Adjust to sound level at turn-on. TIME SETTING 98 - LG 42PT350 | Owner's Manual - Page 99
SLEEP TIMER SETTING The Sleep Time turns the TV off at the preset time. Note that this setting is cleared when the TV is turned off. Q.Menu Aspect Ratio Picture Mode Sound Mode Caption Multi Audio Sleep Timer CH Del/Add/Fav Eject USB 16:9 Vivid Standard Off English F Off G Add Eject Close 1 Q. - LG 42PT350 | Owner's Manual - Page 100
PARENTAL CONTROL / RATINGS Parental Control can be used to block specific channels, ratings and other viewing sources. The Parental Control Function (V-Chip) is used to block program viewing based on the ratings sent by the broadcasting station. The default setting is to allow all programs to be - LG 42PT350 | Owner's Manual - Page 101
you set up previously. LOCK Move Enter Lock System : Off Set Password Block Channel Movie Rating TV Rating-Children TV Rating EXIT Return to TV viewing. LOCK Move Enter Lock System Set Password : On Off On Block Channel Movie Rating TV Rating-Children TV Rating-General Downloadable - LG 42PT350 | Owner's Manual - Page 102
PARENTAL CONTROL / RATINGS Set Password Change the password by inputting a new password twice. LOCK Move Enter Lock System : Off Set Password Block Channel Movie Rating TV Rating-Children TV Rating-General Downloadable Rating Input Block LOCK Move Enter Lock System : Off Set - LG 42PT350 | Owner's Manual - Page 103
: Off Set Password Block Channel Movie Rating TV Rating-Children TV Rating-General Channel. 4 ENTER Select a channel to block or unblock. 5 Blue Block or unblock a channel. 6 BACK Return to the previous menu. EXIT Return to TV viewing. Previous Block/Unblock PARENTAL CONTROL - LG 42PT350 | Owner's Manual - Page 104
PG-13, R, NC-17, X, or Blocking Off. Return to the previous menu. EXIT Return to TV viewing. LOCK Move Lock System : Off Set Password Block Channel Movie Rating TV Rating-Children TV Rating-General Downloadable Rating Input Block Enter Blocking off : Permits all programs G PG PG-13 R NC - LG 42PT350 | Owner's Manual - Page 105
Move Enter Lock System : Off Set Password Block Channel Movie Rating TV Rating-Children TV Rating-General Downloadable Rating Input Block LOCK Move Enter Lock System : Off Set Password Block Channel Movie Rating TV Rating-Children TV Rating-General Downloadable Rating Input Block - LG 42PT350 | Owner's Manual - Page 106
PARENTAL CONTROL / RATINGS TV Rating General - Depending on model Based on the ratings, blocks certain TV programs that you and your family do not want to view. LOCK Move Enter Lock System : Off Set Password Block Channel Movie Rating TV Rating-Children TV Rating-General Downloadable - LG 42PT350 | Owner's Manual - Page 107
EXIT Return to TV viewing. LOCK Move Enter Lock System : Off Blocking off programs : Permits all Set Password E Block Channel C TV Rating-English C8+ TV Rating-French G 14 years and older) s 18+ (Adult programming) s Blocking Off (Permits all programs) PARENTAL CONTROL / RATING 107 - LG 42PT350 | Owner's Manual - Page 108
PARENTAL CONTROL / RATINGS TV Rating French - Depending on model Selecting the Canadian French rating system. LOCK Move Enter Lock System : Off Set Password Block Channel TV Rating-English TV Rating-French Downloadable Rating Input Block LOCK Move Enter Lock System : Off Set Password - LG 42PT350 | Owner's Manual - Page 109
Move Enter Lock System : Off Set Password Block Channel Movie Rating TV Rating-Children TV Rating-General Downloadable Rating Input Block Humor Sport Cruelty Language Sadness Genre Age E Close E s Based on rating table, your TV's OSD (On Screen Display) may differ slightly from what is - LG 42PT350 | Owner's Manual - Page 110
. LOCK Move Enter Lock System Set Password Block Channel Movie Rating : Off AV1 F Off G AV2 Off Component1 Off TV Rating-Children Component2 Off TV Rating-General RGB-PC Off Downloadable Rating HDMI1 Off Input Block HDMI2 Off HDMI3 Off Close PARENTAL CONTROL / RATING 110 - LG 42PT350 | Owner's Manual - Page 111
In Key Lock 'O n', if the TV is turned off, press the (power), INPUT, CH , button on the TV or POWER, INPUT, CH , or NUMBER buttons on the remote control. s With the Key Lock On, the display ' ! Key Lock' appears on the screen if any button (Except (power) button) on the front panel is pressed while - LG 42PT350 | Owner's Manual - Page 112
power control settings. Power interrupted. s TV will be automatically turned off, in case of no signal for 15 minutes. Video Problems No picture &No sound s Check whether the product is turned on. s Try another channel. The problem may be with the broadcast. s Is the power cord inserted into wall - LG 42PT350 | Owner's Manual - Page 113
Audio Problems Picture OK & No sound No output from one of the speakers Unusual sound from inside the product s Press the VOL or VOLUME button. s Sound muted? Press MUTE button. s Try another channel. The problem may be with the broadcast. s Are the audio cables installed properly? s Adjust Balance - LG 42PT350 | Owner's Manual - Page 114
your TV dormant for a long time (such as a vacation), it's a good idea to unplug the power cord to protect against possible damage from lightning or power surges. APPENDIX PRODUCT SPECIFICATIONS MODEL Dimensions (Width x Height x Depth) With stand Without stand Weight With stand Without stand - LG 42PT350 | Owner's Manual - Page 115
613.8 mm x 52.5 mm (39 inch x 24.1 inch x 2 inch) 21.5 kg (47.3 lb) 20 kg (44 lb) 50PT330 (50PT330-UB) 50PT350 (50PT350-UD) 50PT350C (50PT350C-UD) 1176.1 mm x 774.7 mm x 289.8 mm (46.3 inch x 30.5 inch x 11.4 inch) 1176.1 mm x 716.5 mm x 52.5 mm (46.3 inch x 28.2 inch x 2 inch) 29.6 kg (65.2 lb) 27 - LG 42PT350 | Owner's Manual - Page 116
(This feature is not available for all models.) 1. How to Connect I Connect your wired remote control to the Remote Control port on the TV. 2. Remote Control IR Codes I Output waveform Single pulse, modulated with 37.917KHz signal at 455KHz Tc Carrier frequency FCAR = 1/TC = fOSC/12 T1 Duty - LG 42PT350 | Owner's Manual - Page 117
8E FF GG Remote control Button Remote control Button 8F Rew FF Remote control Button 0F TV Remote control Button 5B EXIT Remote control Button B1 Stop A Remote control Button B0 Play G Remote control Button Note Discrete IR Code (TV Input Selection) Discrete IR Code (Only Power On - LG 42PT350 | Owner's Manual - Page 118
control device (such as a computer or an A/V control system) to control the TV's functions externally. I Note: RS-232C on this unit is intended to be used with third party RS-232C control hardware and software. The instructions code : ASCII code I Use a crossed (reverse) cable. 6 9 118 - LG 42PT350 | Owner's Manual - Page 119
SIMPLINK Key Lock Caption Demo Mode ISM Method Set ID Initial Setting Move Enter : On : Off : Off : Off : Normal : 1 : Home Use 1 HMoEmNeU Select OPTION. 2 ENTER Select Set ID. 3 ENTER 4 BACK Choose the desired TV ID number. The adjustment range of Set ID is 1~ 99. Return to the previous menu - LG 42PT350 | Owner's Manual - Page 120
'b'. [OK] : Use the large character. Error Acknowledgement [Command2][ ][Set ID][ ][NG][Data][x] The TV transmits ACK (acknowledgement) based on this format when receiving abnormal data from non-viable functions or communication errors. Data1: Illegal Code Data2: Not supported function Data3: Wait - LG 42PT350 | Owner's Manual - Page 121
In case of Video-Out mute on only, TV will display On Screen Display(OSD). But, In case of Screen Mute On, TV will not display OSD. 05. Volume Mute (Command: k e) To control volume mute on/off. You can also adjust mute using the MUTE button on remote control. Transmission [k][e][ ][Set ID][ ][Data - LG 42PT350 | Owner's Manual - Page 122
and front panel controls on the TV, use this mode. When main power is on/off, remote control lock is released. 14. Treble (Command: k r) To adjust treble. You can also adjust treble in the AUDIO menu. Transmission [k][r][ ][Set ID][ ][Data][Cr] Data Min: 00 ~ Max: 64 (*transmit by Hexadecimal code - LG 42PT350 | Owner's Manual - Page 123
Key (Command: m c) To send IR remote key code. Transmission [m][c][ ][Set ID][ ][Data][Cr] G p.117. Acknowledgement [c][ ][Set ID][ ][OK/NG][Data][x] * 4th bit: Set to 0. * 3-0 bits: Choose signal type. * Tune Command Examples: 1. Tune to the analog (NTSC) cable channel 35. Data 00 = Physical of - LG 42PT350 | Owner's Manual - Page 124
The model and serial number of the TV is located on the back and one side of the TV. Record it below should you ever need service. MODEL SERIAL
-
 1
1 -
 2
2 -
 3
3 -
 4
4 -
 5
5 -
 6
6 -
 7
7 -
8
-
9
-
10
-
11
-
12
-
13
-
14
-
15
-
16
-
17
-
18
-
19
-
20
-
21
-
22
-
23
-
24
-
25
-
26
-
27
-
28
-
29
-
30
-
31
-
32
-
33
-
34
-
35
-
36
-
37
-
38
-
39
-
40
-
41
-
42
-
43
-
44
-
45
-
46
-
47
-
48
-
49
-
50
-
51
-
52
-
53
-
54
-
55
-
56
-
57
-
58
-
59
-
60
-
61
-
62
-
63
-
64
-
65
-
66
-
67
-
68
-
69
-
70
-
71
-
72
-
73
-
74
-
75
-
76
-
77
-
78
-
79
-
80
-
81
-
82
-
83
-
84
-
85
-
86
-
87
-
88
-
89
-
90
-
91
-
92
-
93
-
94
-
95
-
96
-
97
-
98
-
99
-
100
-
101
-
102
-
103
-
104
-
105
-
106
-
107
-
108
-
109
-
110
-
111
-
112
-
113
-
114
-
115
-
116
-
117
-
118
-
119
-
120
-
121
-
122
-
123
-
124
 |
 |

OWNER’S MANUAL
PLASMA TV
Please read this manual carefully before operating
your set and retain it for future reference.
P/NO : SAC34173308 (1102-REV01)
www.lg.com
42PT200
50PT200
42PT330
50PT330
42PT350
50PT350
50PV400
60PV400
50PV430
60PV430
50PV450
60PV450
42PT250U
50PT250U
50PV550U
60PV550U
42PT350C
50PT350C
50PV450C
60PV450C