LG DLHC1455V Owners Manual
LG DLHC1455V Manual
 |
View all LG DLHC1455V manuals
Add to My Manuals
Save this manual to your list of manuals |
LG DLHC1455V manual content summary:
- LG DLHC1455V | Owners Manual - Page 1
OWNER'S MANUAL DRYER Read this owner's manual thoroughly before operating the appliance and keep it handy for reference at all times. ENGLISH DLHC1455* MFL71424358 Rev.07_030421 www.lg.com Copyright © 2020-2021 LG Electronics Inc. All Rights Reserved. - LG DLHC1455V | Owners Manual - Page 2
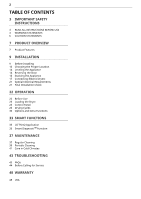
the Dryer 24 Control Panel 26 Drying Cycles 30 Options and Extra Functions 33 SMART FUNCTIONS 33 LG ThinQ Application 35 Smart DiagnosisTM Function 37 MAINTENANCE 37 Regular Cleaning 39 Periodic Cleaning 41 Care in Cold Climates 43 TROUBLESHOOTING 43 FAQs 44 Before Calling for Service 48 WARRANTY - LG DLHC1455V | Owners Manual - Page 3
in this manual. • Connect to a properly rated, protected, and sized power circuit to avoid electrical overload. • To reduce the risk of severe injury or death, follow all installation instructions. • The appliance must be installed and electrically grounded by qualified service personnel in - LG DLHC1455V | Owners Manual - Page 4
INSTRUCTIONS servicing. Service personnel contact an LG Electronics customer LG Electronics customer information center for instructions instruction dry articles that have been previously cleaned in, washed in, soaked in, soiled with or spotted with gasoline, dry use heat to dry articles containing foam - LG DLHC1455V | Owners Manual - Page 5
hand get pinched when opening or closing the dryer door. Maintenance • Do not repair or replace any part of the appliance. All repairs and servicing must be performed by qualified service personnel unless specifically recommended in this Owner's Manual. Use only authorized factory parts • Do not - LG DLHC1455V | Owners Manual - Page 6
6 IMPORTANT SAFETY INSTRUCTIONS CAUTION STATEMENTS CAUTION • To reduce the risk of minor or moderate injury to persons, malfunction, or damage to the product or property of the fabric softener or product. • If the drain hose is frozen in winter, thaw it out before use. SAVE THESE INSTRUCTIONS - LG DLHC1455V | Owners Manual - Page 7
PRODUCT OVERVIEW PRODUCT OVERVIEW 7 Product Features The images in this guide may be different from the actual components and accessories, which are subject to change by the manufacturer without prior notice for product improvement purposes. Front - LG DLHC1455V | Owners Manual - Page 8
listed in this manual may vary due to constant product improvements. Electrical requirements: Please refer to the rating label for detailed information. Model Description Dimensions (Width × Depth × Height) Net Weight Drying Capacity Normal Cycle DLHC1455* Heat Pump Electric Dryer 24'' x 26 - LG DLHC1455V | Owners Manual - Page 9
Installation Overview Please read the following installation instructions first after purchasing this dryer or transporting it to another location. ENGLISH a Choose the proper location. b Level the appliance. c Connect the heat pump electric dryer. d Plug in the power cord. e Final Installation - LG DLHC1455V | Owners Manual - Page 10
review this entire manual before installing and using the appliance. Detailed instructions limit, or do not permit, installation of the dryer in garages, mobile homes or sleeping quarters. Contact NOTE • A sturdy floor is needed to support the total appliance weight when loaded. The drying times. - LG DLHC1455V | Owners Manual - Page 11
recommended for the appliance. • Additional clearances should be considered for ease of installation and servicing. • Additional clearances should be considered on all sides of the dryer to reduce noise transfer. Installation spacing for Recessed Area or Closet Installation ENGLISH - Description - LG DLHC1455V | Owners Manual - Page 12
to form openings. Louvered doors with equivalent ventilation openings are also acceptable. NOTE • There should be at least a little space around the dryer (or any other appliance) to eliminate the transfer of vibration from one appliance to another. If there is enough vibration, it could cause - LG DLHC1455V | Owners Manual - Page 13
Installation Spacing for Cabinet INSTALLATION 13 ENGLISH For cabinet installation with a door, minimum ventilation openings in the top of the cabinet are required. - Description A Depth of Ventilation Opening B Back Clearance C Depth D Front Clearance E Side Clearance F Width G - LG DLHC1455V | Owners Manual - Page 14
to vibrate. • To ensure that the appliance provides optimal drying performance, it must be level. To minimize vibration, noise, instructions carefully. WARNING • Do not reverse the door while the appliance is stacked on a washing machine. • Before removing the hinge screws, have an assistant support - LG DLHC1455V | Owners Manual - Page 15
on the door hinge a. Remove the door from the cabinet b and place it inside facing up on a non-scratching surface. WARNING • Be sure to support the weight of the door before removing the hinge screws. 4 Swap the position of the hinge assembly c and the door latch assembly d and reassemble. Refer - LG DLHC1455V | Owners Manual - Page 16
Appliance Stacking Kit Overview In order to stack the appliance, an LG stacking kit is required. Stacking Kit Installation WARNING • The weight stable, level floor capable of supporting the weight of both appliances. • Do not stack the washer on top of the dryer. • If appliances are already - LG DLHC1455V | Owners Manual - Page 17
collected until manually emptied. It dryer. • This dryer must be connected to a grounded metal, permanent wiring system SERVICE FOR THE DRYER SHOULD BE OF THE MAXIMUM RATE VOLTAGE LISTED instructions on the following pages. • Do not modify the plug and internal wire provided with the dryer. • The dryer - LG DLHC1455V | Owners Manual - Page 18
. • Use UL-listed 4-wire #10 AWG minimum copper conductor cable. Allow at least 5 ft. (1.5 m) of wire to allow for removal and reinstallation of the dryer. 1 Remove 5 inches (12.7 cm) of the outer covering from the wire and remove 5 inches of insulation from the ground wire. Cut off approximately - LG DLHC1455V | Owners Manual - Page 19
4 Thread the 4-wire #10 AWG minimum copper power cable prepared in step 1 through the strain relief. a Terminal Block b UL-Listed Strain Relief c UL-Listed 4-Wire Power Cord 5 Transfer the appliance's ground wire from behind the green ground screw to the center of the terminal block. 6 Attach the - LG DLHC1455V | Owners Manual - Page 20
required. • Use UL-listed 3-wire, #10 AWG minimum copper conductor cable. Allow at least 5 ft. (1.5 m) length to allow for removal and installation of dryer. 1 Remove 3.5 inches (8.9 cm) of the outer covering from the wire. Strip 1 inch (2.5 cm) insulation from each wire. Bend the ends of the three - LG DLHC1455V | Owners Manual - Page 21
proposed installation will comply with these standards, please contact a service and installation professional for assistance. • A 4-wire connection Please be aware that venting materials are not supplied with the dryer. You must obtain the venting materials necessary for proper installation. Final - LG DLHC1455V | Owners Manual - Page 22
read the IMPORTANT SAFETY INSTRUCTIONS before operating this appliance. dryer door slightly open to help air out the drum after use. WARNING • For safety, do not allow children or animals to climb inside the appliance. They could be injured or damage the appliance. NOTE • The final part of the dry - LG DLHC1455V | Owners Manual - Page 23
Permanent Press and Synthetics • Do not overload your dryer. Take out permanent press items as soon as the dryer stops to reduce wrinkles. Baby Clothes and Nightgowns • Always check the manufacturer's instructions. Rubber and Plastics • Do not dry any items made from or containing rubber or plastics - LG DLHC1455V | Owners Manual - Page 24
selected, the standard presets will be shown in the display. On Manual Dry cycles, these settings can be adjusted using the cycle modifier buttons Not all options are available for each cycle. • Remote Start - With the LG ThinQ app, you can use a smartphone to control your appliance remotely. • Wi - LG DLHC1455V | Owners Manual - Page 25
is not inserted, the icon will light up and the appliance will not operate. c Cycle Status Indicators • @ lights up when the appliance is in the drying stage. • = lights up when the appliance is in the cool down stage. After = lights up, the appliance can operate for up to 20 minutes. d Estimated - LG DLHC1455V | Owners Manual - Page 26
the knob or press the button to select the desired cycle. When you select a drying cycle the light for the corresponding drying cycle will turn on. Sensor Dry Cycles Sensor dry cycles utilize LG's unique dual sensor system to detect and compare the moisture level in clothes and in the air and adjust - LG DLHC1455V | Owners Manual - Page 27
-free clothes. Default: Normal Available: All Default: Normal Available: Normal Default: Off Manual Dry Cycles Use Manual Dry cycles to select a specific amount of drying time and a drying temperature. When a Manual Dry cycle is selected, the actual time remaining in your cycle appears on the - LG DLHC1455V | Owners Manual - Page 28
cycle allows you to download a new and specialized drying cycle to your appliance with a smartphone. • Refer to the LG ThinQ smartphone application to see the cycles available for download. Selectable Drying Options Cycle Cycle Dry Level Off Normal Very Normal Damp Heavy Duty - Bulky - LG DLHC1455V | Owners Manual - Page 29
- Perm. Press Very Normal Damp Rack Dry - Heated Dry - Air Dry - Dry Mode Wrinkle Care Off Energy Saver† Normal # # # # # # # # # # # # # # # # # # # # # † This option helps to reduce the energy used when drying clothes by circulating the refrigerant at a lower - LG DLHC1455V | Owners Manual - Page 30
when you are unable to remove items from the dryer immediately. Press the Wrinkle Care button before you start a drying cycle. NOTE • When the option is set, or decrease drying time in 1 minute increments when you use manual drying cycles such as Rack Dry, Heated Dry and Air Dry. Custom PGM - LG DLHC1455V | Owners Manual - Page 31
the turning drum. Be sure to remove the rack after use. • Some models do not include the drying rack. To purchase a drying rack, contact an LG Electronics Customer Information Center or visit the website at http://www.lg.com. 1 With the door open, slide the rack into the drum and insert the hook on - LG DLHC1455V | Owners Manual - Page 32
32 OPERATION NOTE • Turning off the power will not reset this function. You must deactivate this function before you can access any other options and functions. Locking/Unlocking the Control Panel 1 Turn on the power. 2 Press and hold the Wrinkle Care and Condenser Care buttons at the same time for - LG DLHC1455V | Owners Manual - Page 33
how the dryer's power consumption is affected by selected drying cycles the appliance has problems, you will receive Before Using LG ThinQ Application supports 2.4 GHz Wi-Fi networks only. To check your network frequency, contact your Internet service provider or refer to your wireless router manual - LG DLHC1455V | Owners Manual - Page 34
LG ThinQ is not responsible for any network connection problems or any faults, malfunctions, or errors caused by network connection. • The surrounding wireless environment can make the wireless network service run slowly. • If the appliance is having trouble system close the dryer door. 2 Manually - LG DLHC1455V | Owners Manual - Page 35
you experience a problem with your Wi-Fi equipped appliance, it can transmit troubleshooting data to a smartphone using the LG ThinQ application. • Launch the LG ThinQ application and select the Smart Diagnosis feature in the menu. Follow the instructions provided in the LG ThinQ application. Using - LG DLHC1455V | Owners Manual - Page 36
36 SMART FUNCTIONS the instructions for audible diagnosis provided in the LG ThinQ application. 1 Press the Power button to turn on the appliance. • Do not press any other buttons. 2 Hold the mouthpiece of your phone in front - LG DLHC1455V | Owners Manual - Page 37
Regular Cleaning Cleaning the Lint Filter CAUTION • Refer to the following instructions for proper cleaning of the lint filter. Failure to do so a vacuum cleaner or rinse under running water. • The filter must be completely dry before using or it could cause an unpleasant odor. CAUTION • Do not tap - LG DLHC1455V | Owners Manual - Page 38
1 Remove the dust or lint around the filter inlet. CAUTION a • If the lint drops into the filter inlet, it may cause degradation of drying performance and increase in drying time. NOTE • Ensure the side of the filter is closed properly. If you fail to do so, any lint accumulated on the filter - LG DLHC1455V | Owners Manual - Page 39
drink the condensed water or reuse it. Doing so could lead to health problems for people and animals. • The water container is heavy when full. Hold • Do not wipe the moisture sensor with abrasive materials. Use a dry acrylic sponge to clean the sensor. 3 Refit the water container into the appliance - LG DLHC1455V | Owners Manual - Page 40
If the plug is not securely inserted into the drain tube, water will leak out and could cause damage. Draining the Remaining Condensed Water After drying clothes, a small quantity of condensed water may sit in the base of the appliance and cause odors. Drain the remaining water regularly to reduce - LG DLHC1455V | Owners Manual - Page 41
the condenser using water condensed from the drying process. If needed, the condenser can also be cleaned manually. CAUTION • Remove all of the to empty the water container. 7 Open the dryer door and leave it open to allow air to circulate and thoroughly dry the drum. WARNING • For safety reasons, - LG DLHC1455V | Owners Manual - Page 42
on the installation environment such as installation location and ambient temperature of the appliance. 3 When thawing is complete, dry clothes as usual. Thawing out the Appliance Manually 1 Open the dryer door and pull out both the inner and outer filters. 2 Carefully pour 34 oz. (1 liter) of hot - LG DLHC1455V | Owners Manual - Page 43
. Q: Why does my dryer take so long to dry clothes? A: Proper airflow is critical to the efficient operation of clothes dryers. A lint filter which is LG website. 1 On the lg.com/us home page, click on the Support menu tab to bring up the menu selections. Select Video Tutorials. 2 Type Dryer - LG DLHC1455V | Owners Manual - Page 44
TROUBLESHOOTING Before Calling for Service The dryer is equipped with an automatic error-monitoring system to detect and diagnose problems at an early stage. If the dryer does not function properly or does not function at all, check the following before you call for service. Error Messages Problem - LG DLHC1455V | Owners Manual - Page 45
. Greasy or dirty spots Fabric softener used incorrectly. on clothes. • Confirm and follow the instructions provided with your fabric softener. Clean and dirty clothes are being dried together. • Use your dryer to dry only clean items. Soil from dirty clothes can transfer to the clean clothes in - LG DLHC1455V | Owners Manual - Page 46
46 TROUBLESHOOTING Problem Clothes are shrinking. Lint on clothes. Excess static in clothes after drying. Clothes have damp spots after a Sensor Dry cycle. Possible Cause & Solution Garment care instructions are not being followed. • To avoid shrinking your clothes, always consult and follow - LG DLHC1455V | Owners Manual - Page 47
can cause odors. After cleaning the lint filter, allow it to dry completely before using it. • Periodically run the Drum Care and Condenser Care cycles following the instructions in the MAINTENANCE section. Wi-Fi Problem Trouble connecting appliance and smartphone to Wi-Fi network. Possible Cause - LG DLHC1455V | Owners Manual - Page 48
of Parts and Labor original retail purchase LG will provide parts and labor to repair or replace defective parts. Three (3) years from date of original retail purchase Dryer drum Parts only. Customer will be responsible for any labor or in-home service to replace defective parts. Ten (10) years - LG DLHC1455V | Owners Manual - Page 49
an inaccessible location or is not installed in accordance with the Product owner's manual. • Damage or failure of the Product resulting from misuse, abuse, improper installation/repair/ maintenance or service not approved by LG. • Conversion of product from natural gas or LP gas. The cost of repair - LG DLHC1455V | Owners Manual - Page 50
a copy of this provision, to the AAA in the manner described in the AAA Rules. You must also send a copy of your written demand to LG at LG Electronics, USA, Inc. Attn: Legal Department-Arbitration 111 Sylvan Avenue, Englewood Cliffs, NJ 07632. If there is a conflict between the AAA Rules and the - LG DLHC1455V | Owners Manual - Page 51
number; and (d) the serial number (the serial number can be found (i) on the product; or (ii) online by accessing https:// www.lg.com/us/support/repair-service/schedule-repair-continued and clicking on "Find My Model & Serial Number"). You may only opt out of the dispute resolution procedure in the - LG DLHC1455V | Owners Manual - Page 52
52 Memo - LG DLHC1455V | Owners Manual - Page 53
Memo 53 - LG DLHC1455V | Owners Manual - Page 54
54 Memo - LG DLHC1455V | Owners Manual - Page 55
Memo 55 - LG DLHC1455V | Owners Manual - Page 56
LG Customer Information Center For inquiries or comments, visit www.lg.com or call: 1-800-243-0000 U.S.A. 1-888-542-2623 CANADA Register your product Online! www.lg.com
-
 1
1 -
 2
2 -
 3
3 -
 4
4 -
 5
5 -
 6
6 -
 7
7 -
8
-
9
-
10
-
11
-
12
-
13
-
14
-
15
-
16
-
17
-
18
-
19
-
20
-
21
-
22
-
23
-
24
-
25
-
26
-
27
-
28
-
29
-
30
-
31
-
32
-
33
-
34
-
35
-
36
-
37
-
38
-
39
-
40
-
41
-
42
-
43
-
44
-
45
-
46
-
47
-
48
-
49
-
50
-
51
-
52
-
53
-
54
-
55
-
56
 |
 |
OWNER'S MANUAL
DRYER
Read this owner's manual thoroughly before operating the
appliance and keep it handy for reference at all times.
ENGLISH
DLHC1455*
MFL71424358
Rev.07_030421
www.lg.com
Copyright © 2020-2021 LG Electronics Inc. All Rights Reserved.