LG HECTO Additional Link - Installation Manual - Page 7
plate, make sure to use screws that came with the product. - laser display
 |
View all LG HECTO manuals
Add to My Manuals
Save this manual to your list of manuals |
Page 7 highlights
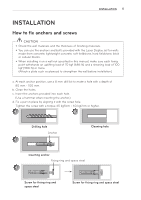
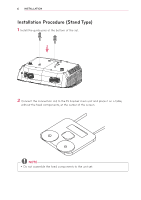
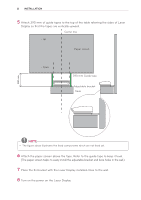
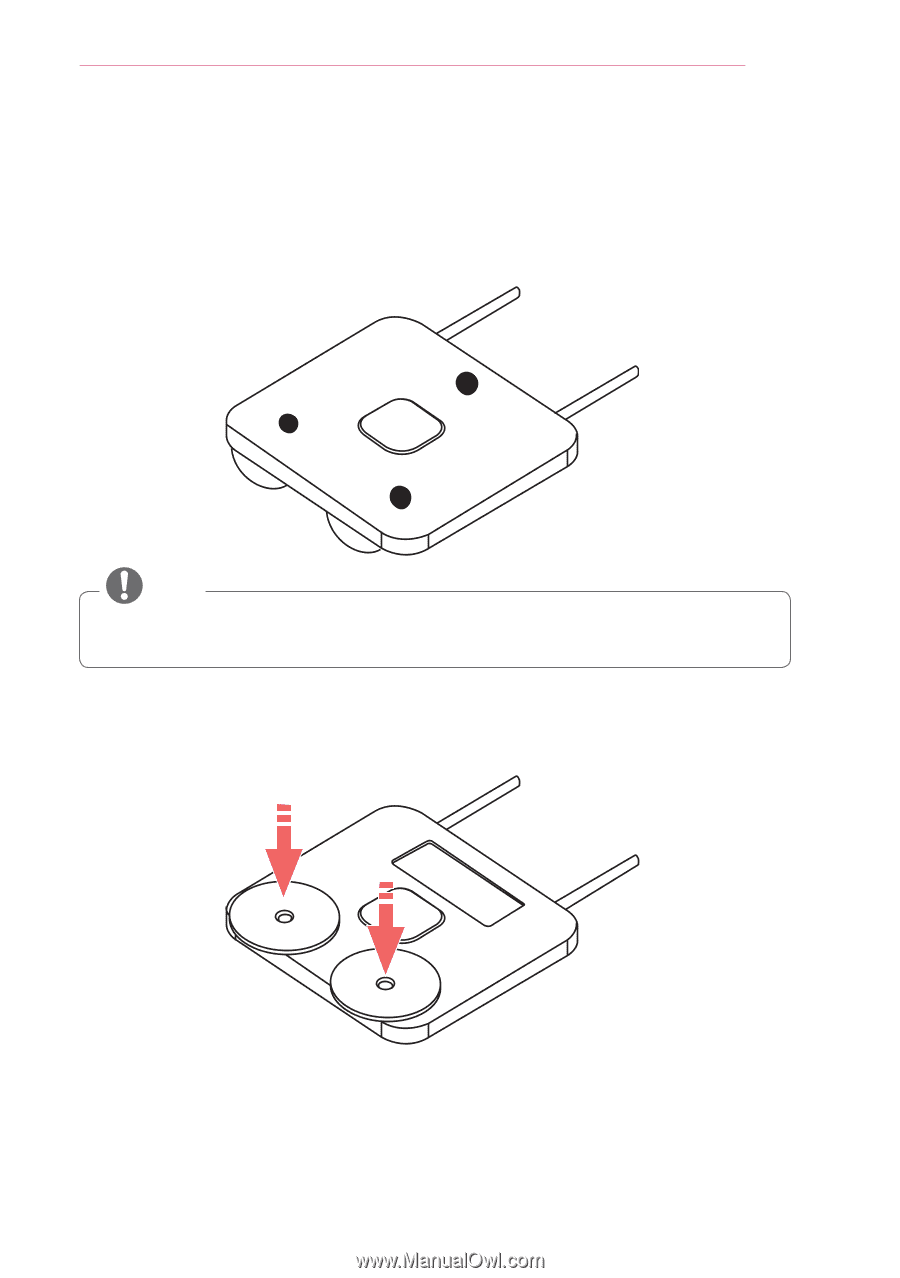
INSTALLATION 7 3 If the Ez bracket does not stay level, attach a rubber to the bottom of the bracket to make it level. (If you cannot make it level using a rubber, remove or add a plate. To add a plate, make sure to use screws that came with the product.) NOTE yyIf you cannot make it level by attaching a rubber, remove or add a plate. (To add a plate, make sure to use screws that came with the product.) 4 Place the Laser Display onto the Ez bracket by aligning the guide pins and the holes on the adjustable bracket.
-
 1
1 -
 2
2 -
 3
3 -
 4
4 -
 5
5 -
 6
6 -
 7
7 -
 8
8 -
 9
9 -
 10
10 -
 11
11 -
 12
12 -
13
-
14
-
15
-
16
-
17
-
18
-
19
-
20
-
21
-
22
-
23
-
24
 |
 |
7
INSTALLATION
3
If the Ez bracket does not stay level, attach a rubber to the bottom of the bracket to
make it level.
(If you cannot make it level using a rubber, remove or add a plate. To add a plate,
make sure to use screws that came with the product.)
NOTE
y
If you cannot make it level by attaching a rubber, remove or add a plate. (To add a
plate, make sure to use screws that came with the product.)
4
Place the Laser Display onto the Ez bracket by aligning the guide pins and the holes
on the adjustable bracket.