LG L1404R Owners Manual - Page 13
Hardware Installation
 |
View all LG L1404R manuals
Add to My Manuals
Save this manual to your list of manuals |
Page 13 highlights
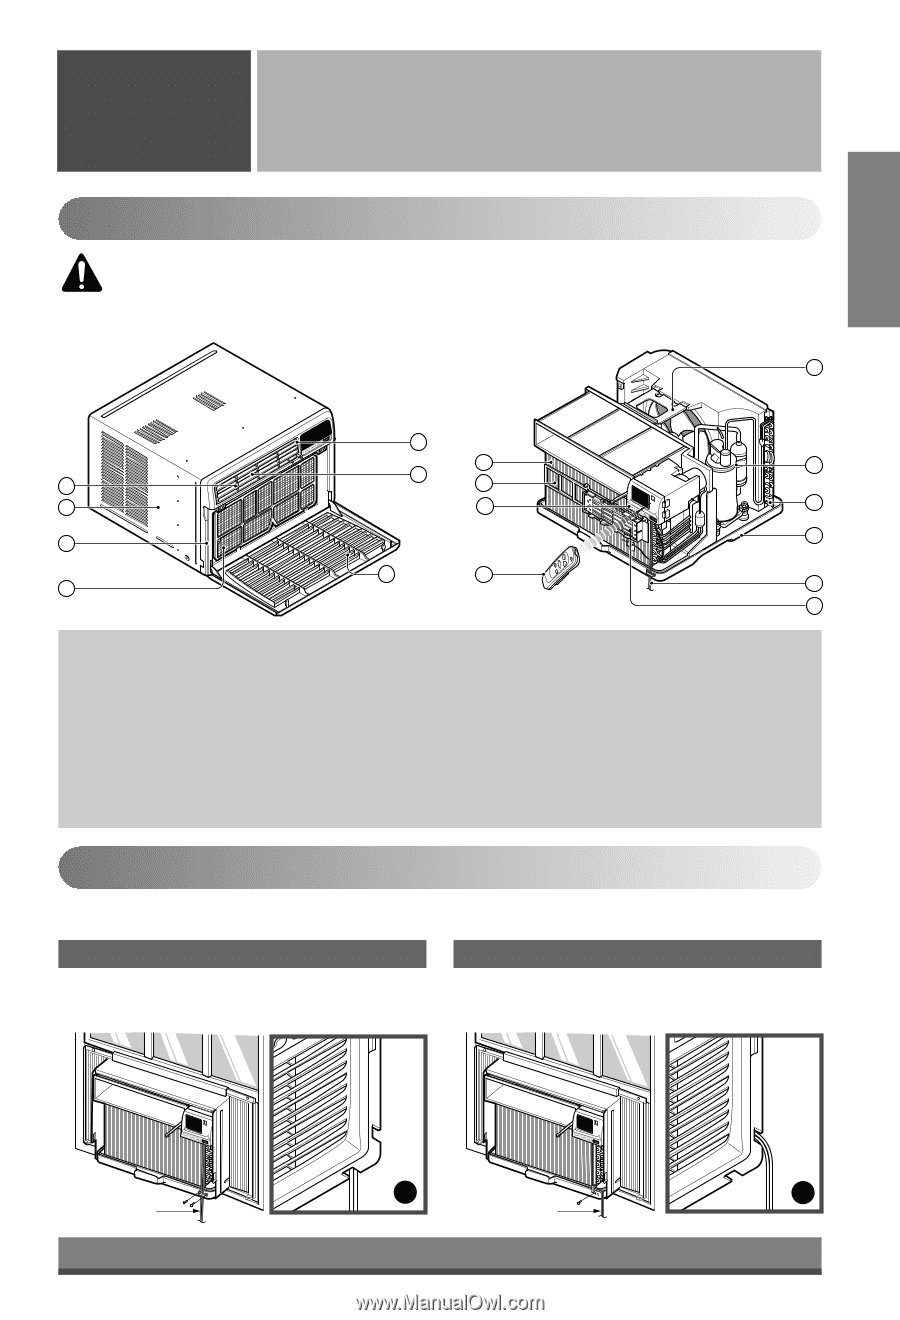
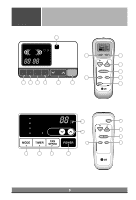
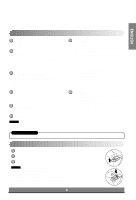
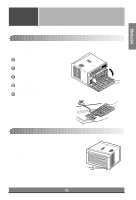
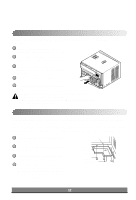
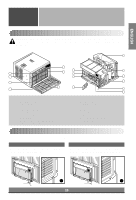
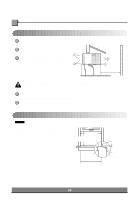
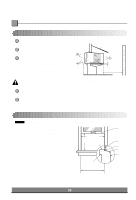
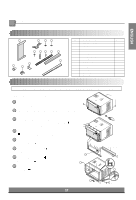
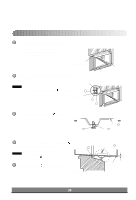
ENGLISH Hardware Installation Hardware Installation Product Features CAUTION: This appliance should be installed in accordance with national wiring regulations. The following information serves acts as a guide to help to explain product features. 13 6 5 8 1 2 4 3 1. CABINET 2. FRONT GRILLE 3. AIR FILTER 4. AIR INTAKE (INLET GRILLE) 5. AIR DISCHARGE 6. VERTICAL AIR DEFLECTOR (HORIZONTAL LOUVER) 7. EVAPORATOR 8. HORIZONTAL AIR DEFLECTOR (VERTICAL LOUVER) 7 11 17 9 14 12 15 10 16 9. CONTROL PANEL 10. POWER CORD 11. COMPRESSOR 12. BASE PAN 13. BRACE 14. CONDENSER 15. REMOTE CONTROLLER 16. AIR PURIFYING FILTER (Optional) 17. CASE, FILTER (Optional) Installing the Power cord You can choose between two methods below according to your window stool shape and preference. Using slit "A" • Fasten the stopper using 2 screw holes, and lead out the power cord through slit "A". Using slit "B" • Fasten the stopper using left screw hole, and rotate properly to lead the power cord out through slit "B". A B Power cord Power cord 13
-
 1
1 -
2
-
3
-
4
-
5
-
6
-
7
-
 8
8 -
 9
9 -
 10
10 -
 11
11 -
 12
12 -
 13
13 -
 14
14 -
 15
15 -
 16
16 -
 17
17 -
 18
18 -
19
-
20
-
21
-
22
-
23
-
24
-
25
-
26
-
27
-
28
 |
 |