LG L1404R Owners Manual - Page 18
Cabinet Installation
 |
View all LG L1404R manuals
Add to My Manuals
Save this manual to your list of manuals |
Page 18 highlights
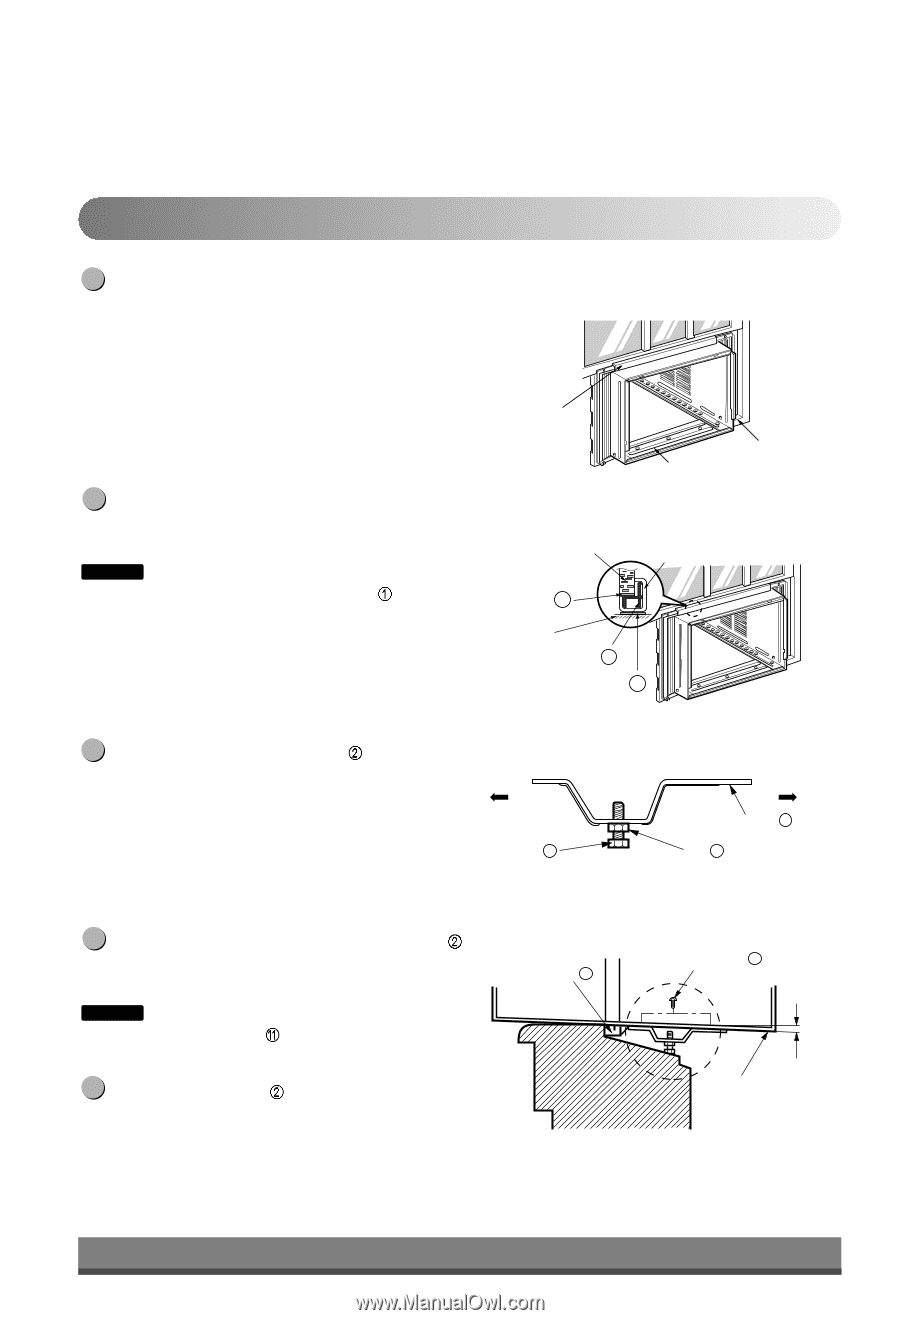
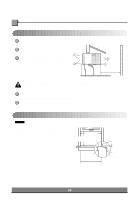
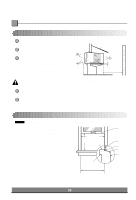
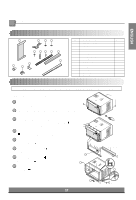
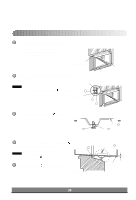
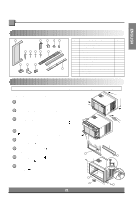
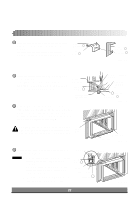
Cabinet Installation 1 Open the window. Mark a line on center of the window stool. Carefully place the cabinet on the window stool and align the center mark on the bottom front with the center line marked in the window stool. Upper Guide 2 Pull the bottom window sash down behind the Upper Guide until it meets. Window Sash NOTICE : Do not pull the window sash down tightly that the movement of Frame Curtain is restricted. Foam-pe 13 Window stool Front Angle Fig. 1 Upper guide Cabinet Frame Curtain 1 Foam-pe 10 Fig. 2 3 Loosely assemble the Sill Support using the parts in Fig. 3. INDOOR OUTDOOR Bolt 3 Sill Support 2 Nut 4 Fig. 3 4 Select the position that will place the Sill Support near the outer most point on sill (See Fig. 4) NOTICE : Be careful when you install the cabinet (Frame Guides are broken easily). Frame Guide 11 5 Attach the Sill Support to the cabinet track hole in relation to the selected position using 2 Type A screws in each support (See Fig. 4). INDOOR Screw(Type A) 5 Cabinet OUTDOOR Fig. 4 About 1/2" 18
-
 1
1 -
2
-
3
-
4
-
5
-
6
-
7
-
8
-
9
-
10
-
11
-
12
-
 13
13 -
 14
14 -
 15
15 -
 16
16 -
 17
17 -
 18
18 -
 19
19 -
 20
20 -
 21
21 -
 22
22 -
 23
23 -
24
-
25
-
26
-
27
-
28
 |
 |