LG LMHM2017ST Installation Instructions - Page 11
facetowards - installation guide
 |
View all LG LMHM2017ST manuals
Add to My Manuals
Save this manual to your list of manuals |
Page 11 highlights
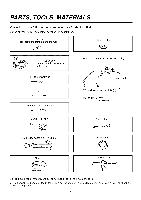
4.Reassembthleblowewr ireS. eeFigur1e5. 5.Rotatteheunist othatheexhausptortsfacethereaor fthecabineSt.eeFigur1e7.Whenyouinserbt loweurnit, blowewr iremusbt elikefigure16. 6.P17la.cebloweurnibt ackintocabineCt.hectkhattheexhausptortsfacetowardtsherearofthecabineSt.eeFigure 7.ReattacthebloweprlatetocabinestotheexhausptortsandbloweprlateopeninagrealignedA.ttacwh ithone bloweurnitmountinsgcrewandthenonebloweprlatemountinsgcrewS. eeFigure18. blower unit Figure 15 Roof-Vented Installation: exhaust ports Figure 16 exhaust ports Figure 17 blower plate ___ m£unting screw (option) 1. Remove one blower unit mounting screw and one or two blower plate screw(s). Remove the blower plate from cabinet. See Figure 19. 2. Use side cutter or thin snips to cut and remove knockouts "A" from Blower plate. Discard knockouts. Be careful not to distort the plate. See Figure 20. 3. Carefully lift the blower unit out of the microwave oven. 4. Rotate blower unit 90 ° so the exhaust ports face the top of the cabinet. See Figure 21. 5. Reassemble the blower wire. 6. Place blower unit back into microwave oven. blower unit blower plate 31ate blower unit exhauspt orts _ blower unit mountinsgcrew(option) Figure 18 blower unit t blower plate i ...... imounting screw(option) plate )late 7. Reattach blower plate to microwave oven. Attach with the one blower unit mounting screw and then the one or two blower plate mounting screw(s). See Figure 22. 8. Attach the exhaust adapter to the blower plate by sliding it into the Guide. See Figure 23. parts "B" Figure 19 blower unit mounting screw (option) Knockouts "A" unit Figure 21 blower plate Figure 20 blower unit _'__ _j o '?-. ...... "-..L_;X __ blower plate mounting screw (option) I i _'__. _-----, __adapter Exhaust i i Back __ _/" of oven blower plate _ Figure 22 "'_'-- blower unit mounting screw (option) Figure 23 -11 -
-
 1
1 -
2
-
3
-
4
-
5
-
 6
6 -
 7
7 -
 8
8 -
 9
9 -
 10
10 -
 11
11 -
 12
12 -
 13
13 -
 14
14 -
 15
15 -
 16
16 -
17
-
18
-
19
-
20
 |
 |
