LG MA8000ST Service Manual
LG MA8000ST Manual
 |
View all LG MA8000ST manuals
Add to My Manuals
Save this manual to your list of manuals |
LG MA8000ST manual content summary:
- LG MA8000ST | Service Manual - Page 1
GoldStar Website: http://us.lgservice.com MICROWAVE OVEN SERVICE MANUAL MODEL: MA8000ST CAUTION BEFORE SERVICING THE UNIT READ THE SAFETY PRECAUTIONS IN THIS MANUAL. P!NO : 3828W5S3961 August, 2004 Printed in Korea - LG MA8000ST | Service Manual - Page 2
This device is to be serviced only by properly qualified service personnel. nsult tl-nzr e manual for pfepeFserviee-pFeeeekifes-tu assureFeentinued safety power for any service test orinsmattrinaziraralmmicrowave-generating mpartments7check the magnetron, wave guide or transmission4ine.-and-cavity - LG MA8000ST | Service Manual - Page 3
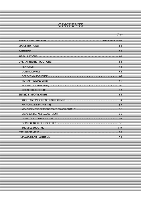
CONTROL PANEL OPERATING SEQUENCE SCHEMATIC DIAGRAM (I) SCHEMATIC DIAGRAM (II) CIRCUIT DESCRIPTION SERVICE INFORMATION TOOLS AND MEACI1RINC INSTRUMENTS MICROWAVE LEAKAGE TEST MEASUREMENT OF MICROWAVE POWER OUTPUT TROUBLE SHOOTING EXPLODED VIEW REPLACEMENT PARTS LIST Pane Inside front cover - LG MA8000ST | Service Manual - Page 4
Net Weight Shipping weight Control Complement Nameplate Location DESCRIPTION MA8000ST 120 Volts AC 60 Hz (10.5A) 1200 approx. 60% ---approx. 40% approx. 20% I= Back Side Accessories Owner's manual Glass turntable Roller Rest This microwave oven is designed for household use only. It is - LG MA8000ST | Service Manual - Page 5
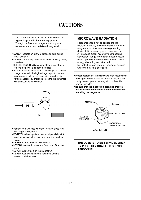
anything into the latch hole and the interlock switches area. ANTENNA Gasket o. FILAMENT TERMINALS ----- COOLING FIN MAGNETRON CHASSIS GROUND MAGNETRON THE OVEN IS TO BE SERVICED ONLY BY PROPERLY QUALIFIED - LG MA8000ST | Service Manual - Page 6
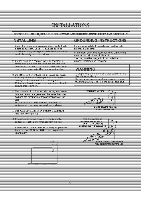
INSTALLATIONS • Empty the microwave and clean inside it with personal safdly, thus app u y a-soft,-damp.cloth-eheck=for damage such=as=grounded=at=all times. misaligned door, damage around the door or dents inside the cavity or on the exterior. In the event of an electrical short circuit, - LG MA8000ST | Service Manual - Page 7
OPERATING INSTRUCTIONS FEATURES Oven Frot Plate Window Door Screen Door Seal Control Panel CONTROL PANEL 2 - One Touch Control Z2i 2 lea PC00 9 6 Ez On 11 3 - l_Gotord Meat 2.Poulny - LG MA8000ST | Service Manual - Page 8
The-fallowing .a a d to foe r onent functions during oven operation. 1. SETTING THE CLOCK STOP/CLEAR CLOCK NUMBER ► CLOCK ex.) To set 4:30, touch number key [4 ], [3 ], and [0 ]. NOTE: 1) This is a 12 hour clock. 2) Clock will oporato as long as powor is appliod to the oven. 2. CANCEL FUNCTION - LG MA8000ST | Service Manual - Page 9
- LG MA8000ST | Service Manual - Page 10
SCHEMATIC DIAGRAM (II) *Check the Rating Model No. (ADD Noise filter) NOTE: 1. DOOR IS OPEN. 2. RS: SENSING ELEMENT RC: COMPENSATING ELEMENT 3. WIRE COLOR. SYMBOL COLOR WH WHITE BK BLACK BL BLUE YL YELLOW PI< PINK RD RED GN GREEN BN BROWN WH MGT/OVEN THERMOSTAT GN WH AC 120V/60HZ SINGLE PHASE - LG MA8000ST | Service Manual - Page 11
• The low voltage transformer supplies the necessary vo lage to the rnicorn conlr er when power cord is plugged in. • When t le door is closed, the primary switch is ON, he secondary switch is ON, and the monitor switch opens (contact COM anc NO). WHEN SELECTING COOKING POWER LEVEL AND TIME • The - LG MA8000ST | Service Manual - Page 12
-lowing-the-manufactures-recommendeel test proceaure to assure correct result. • When measuring the leakage, always use the 2- inch excessive leakage. The service personnel should instruct the owner not to use the unit until the oven has een orougnt into compliance. • If the oven operates with the - LG MA8000ST | Service Manual - Page 13
the measured values for future reference Also enter the information on the service invoice. • The microwave-energy leakage should not be more than , functioning property and genuine replacement parts which are listed in this manual-have bPen_used_ • At least ance a year, have the electromagnetic - LG MA8000ST | Service Manual - Page 14
(RY2) of the PCB SUB ASS'Y. 4) Lift up and pull out control panel assemb y careful y from the cavity. CAUTION: DISCHARGE THE HIGH VOLTAGE CAPACITOR BEFORE SERVICING (refer to page 2-1) 5-3 Lift up and pull out control panel oe - LG MA8000ST | Service Manual - Page 15
1) Discharge the high voltage capacitor. 2) Disconnect the leadwire from fan motor, and high voltage capacitor. 3) Remove the two screws holding the the suction guide ASS'Y to the oven cavity and remove the high voltage diode earth screw. 4) Remove the two screws holding the fan motor ASS'Y to the - LG MA8000ST | Service Manual - Page 16
H. AIR DUCT ASSEMBLY REMOVAL 1) Disconnect the leadwire from lamp. 2) Remove the mounting screw to latch board. I. MAGNETRON REMOVAL 1) Disconnect the leadwire from the high voltage transformer. 2) Carefully remove the mounting screws holding the magnetron to the waveguide. 3) Remove the magnetron - LG MA8000ST | Service Manual - Page 17
K. PCB ASSEMBLY REMOVAL liftemoysalhaconlioLpanef assembly from Lhe cavity. panel assembly removal on previous page.) 2) Remove screws which hold the I5C1I-SUWASSR1c the control-per .el. 3) Disconnect the flat cable from the PCB SUB ASS'Y and take off the PCB SUB ASS'Y_ ontrot Pa le Key - LG MA8000ST | Service Manual - Page 18
WARNING • FOR CONTINUED PROTECTION AGAINST EXCESSIVE RADIATION EMISSION, REPLACE ONLY WITH IDENTICAL REPLACEMENT PARTS TYPE NO. SZM-V 1G-FA-63 OR VP-533A-Or FOR PRIMARY SWITCH TYPF NO S7M V 16 FA 62 OR VP 532A OF FOR MONITOR SWITCH TYPE NO. SZM-V 16-FA-63 OR VP-533A-OF FOR SECONDARY SWITCH When the - LG MA8000ST | Service Manual - Page 19
-CAUTIONS 1 DISCONNECT THE POWER SUPPLY CORD FROM THE OUTLET WHENEVER REMOVING THE OUTER GAS O UNIT OC WITH THE TESTONI Y AFTER I'IISCHARGING THE HIGH VOLTAGE CAPACITOR AND REMOVING THE WIRELEADS-F-ROM-T-I4E-PRIMARY-WINDING-OF-TH-E- E 22 Al L OPERATIONAL CHFCKS WITH MICROWAVE ENERGY MUST BE - LG MA8000ST | Service Manual - Page 20
COMPONENTS TEST PROCEDURE Antenna Gasket 0 Chassis RESULTS HIGH VOLTAGE CAPACITOR Filament NOTE: When testing the magnetron, be sure to install the magnetron gasket in the correct position and be sure that the gasket is in good condition. Measure the resistance. (Ohm-meter scale: Rx1000) • - LG MA8000ST | Service Manual - Page 21
COMPONENTS RELAY 2 TEST PROCEDUR check for continuity of relay 2 with an ohm-meter. (Remove wire leads from relay 2 and operate the unit.) Rela I-AN MOTOR (Wire leads removed y -Measure the resistance. (Ohm-meter scale: R x 100) ACRD) El4 LEVEL 4 sec 18 sec 2 6 16 sec sec 5 12 sec 10 sec - LG MA8000ST | Service Manual - Page 22
INSTRUCT THE CUSTOMER IN THE PROPER USE OF THE MICROWAVF OVFN THIS CAN FLIMINATF AN UNNFCESSARY SFRVICF CAI L 1 Check grounding-laefore-checking_for trouble not use metallic ware f co ,except whons-notecl- in the cooking guide. Do not use any type of cookware with medallic trimming. 1. Use plastic - LG MA8000ST | Service Manual - Page 23
tiglitly. Replace key membrane asternbly_and ck operation. Fverything works Defective key as specified. -111P membrane -assambly. =`•.- Still have trouble. Defective PCB assembly. Replace key membrane assembly. RP e PCB asserrgly. A._Random programming when touching other pads. b. Display - LG MA8000ST | Service Manual - Page 24
and no input is accepted. 1. Fuse blows. Check continuity of monitor switch (with Replace fuse la" Continuity. No continuity Malfunction ofthe monitor switch. REMEDY Replace fuse, primary, monitor secondary witches, and RIN=A-Y(RY2) of Check continuit of primary switch (wit d . No continuity. - LG MA8000ST | Service Manual - Page 25
do Check fan motor. Abnormal Defective fan motor. elective oven amp. REMEDY p ace PCB mbl . tightly. Replace fan motor. ep ace oven amp. (TROUBLE 4) Oven seems tQbe opera CONDITION Output is low. CHECK Check the power source voltage. RESULT CAUSE Lower than 90% of rating voltage. Decrease - LG MA8000ST | Service Manual - Page 26
(Display operates properly) CONDITION wave CHECK Disconnect-the wire leads from relay 2 and check continuity of rela 2 Operate the unit) RESULT rsio-continuit Continui Checkh h vol tape transf Abnormal Normal tage caPacit0r- Check high vnltage diode. Abnormal Normal Abnormal CAUSE assembly. - LG MA8000ST | Service Manual - Page 27
- LG MA8000ST | Service Manual - Page 28
DOOR PARTS 581 z C' 331* 1$552A 13213A Of C14206 14970A 13551A 6-2 - LG MA8000ST | Service Manual - Page 29
- LG MA8000ST | Service Manual - Page 30
C31.1 I. wl17 ■• IIIII. .1401M111h. 7.W41, [s -`r-1•7 v l7111•171;171 I Mrs. Jr1 Al MAI a i MP" 211B I MI Ir=t ` `14/ MI IN` • I l!r° •Ir ,A- MPIPP1h1 P) /4•11 IN JIN IN MilPINkr..M. I IMil r.`41•1 Ino•MIIPM% 67WAMP.M 167IIMIii i." iiM •- I. 1.144.71I1,01 'MIMIlaw • II I. II= - LG MA8000ST | Service Manual - Page 31
LATCH BOARD PARTS 49028 262)3, ,t7 Z50 43500 O 0 SZ085 ( 4.. 600') T 466003 O 466001 6-5 TTO-4 - LG MA8000ST | Service Manual - Page 32
#EV# INTERIOR PARTS (I) Model: MA8000ST Check the rating label of Model and order SVC parts according to the Model No. * Check the * Check the Rating Model No. Rating Model No. - LG MA8000ST | Service Manual - Page 33
#EV# INTERIOR PARTS (II) Model: MA8000ST / 01 * Check the Rating Model No. 568771 Check the rating label of Model and order SVC parts according to the Model No. * Check the Rating - LG MA8000ST | Service Manual - Page 34
BASE PLATE PARTS 63303 56170D 63302 I 40. WIT021 €0061)3 A q115-20.0 - LG MA8000ST | Service Manual - Page 35
-
 1
1 -
 2
2 -
 3
3 -
 4
4 -
 5
5 -
 6
6 -
 7
7 -
8
-
9
-
10
-
11
-
12
-
13
-
14
-
15
-
16
-
17
-
18
-
19
-
20
-
21
-
22
-
23
-
24
-
25
-
26
-
27
-
28
-
29
-
30
-
31
-
32
-
33
-
34
-
35
 |
 |
GoldStar
Website:
MICROWAVE
OVEN
SERVICE
MANUAL
MODEL:
MA8000ST
CAUTION
BEFORE
SERVICING
THE
UNIT
READ
THE
SAFETY
PRECAUTIONS
IN
THIS
MANUAL.
P!NO
:
3828W5S3961
August,
2004
Printed
in
Korea