Lenovo H520 User Guide - Page 42
Removing the front bezel
 |
View all Lenovo H520 manuals
Add to My Manuals
Save this manual to your list of manuals |
Page 42 highlights
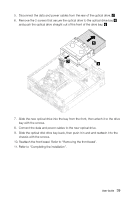
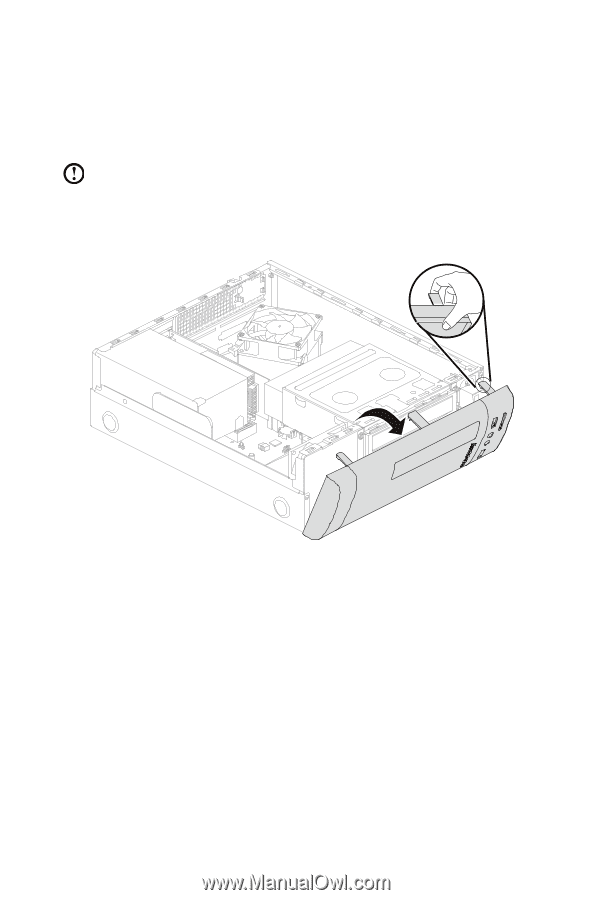
Removing the front bezel To remove the front bezel: 1. Remove the computer cover. Refer to "Removing the computer cover". Note: For this procedure, it helps to lay the computer on a flat, stable surface. 2. Remove the front bezel by releasing the three plastic tabs inside the chassis and pushing the bezel outward as shown. 3. To reattach the bezel, align the plastic tabs on the bottom of the bezel with the corresponding holes in the chassis, and then snap it into position at the bottom and top of the chassis. 4. Refer to "Completing the installation". User Guide 37
-
 1
1 -
2
-
3
-
4
-
5
-
6
-
7
-
8
-
9
-
10
-
11
-
12
-
13
-
14
-
15
-
16
-
17
-
18
-
19
-
20
-
21
-
22
-
23
-
24
-
25
-
26
-
27
-
28
-
29
-
30
-
31
-
32
-
33
-
34
-
35
-
36
-
 37
37 -
 38
38 -
 39
39 -
 40
40 -
 41
41 -
 42
42 -
 43
43 -
 44
44 -
 45
45 -
 46
46 -
 47
47 -
48
-
49
-
50
-
51
-
52
-
53
 |
 |
37
User Guide
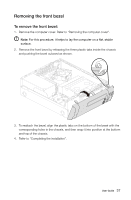
Removing the front bezel
To remove the front bezel:
1.
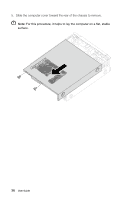
Remove the computer cover. Refer to “Removing the computer cover”.
Note:
For this procedure, it helps to lay the computer on a flat, stable
surface.
2.
Remove the front bezel by releasing the three plastic tabs inside the chassis
and pushing the bezel outward as shown.
3.
To reattach the bezel, align the plastic tabs on the bottom of the bezel with the
corresponding holes in the chassis, and then snap it into position at the bottom
and top of the chassis.
4. Refer to “Completing the installation”.